Christmas Popcorn Balls are more than just a delightful holiday treat; they are a truly magical, bite-sized package of pure festive joy and cherished memories that perfectly encapsulate the spirit of the season. I find these glistening, sticky-sweet confections absolutely irresistible, and for generations, they have graced holiday tables and festive gatherings, often evoking a wonderful sense of nostalgic warmth from simpler times. Their history is deeply intertwined with holiday traditions, evolving from a clever way to utilize popcorn into a beloved staple, especially around Christmas. People adore this dish for countless reasons: the unparalleled delight of sinking your teeth into the perfect balance of light, crispy popcorn coated in a wonderfully sweet, sticky glaze creates an utterly satisfying texture and taste. They offer a unique chewiness and a burst of flavor that truly sets them apart from other festive sweets. Furthermore, making your own Christmas Popcorn Balls is a fantastic, fun-filled activity for families, creating new memories while sharing these homemade wonders with loved ones. Each vibrant, edible creation is a testament to homemade goodness, serving as a fantastic gift or a stunning centerpiece for any holiday dessert spread.

Ingredients:
- 16 cups popped popcorn: This is a key ingredient, of course! For the best results with your Christmas Popcorn Balls, I always recommend using freshly popped popcorn. It should be light, airy, and free of any unpopped kernels. Typically, this equates to about 1/2 to 3/4 cup of unpopped kernels, depending on how diligently you pop them. Make sure to choose a good quality popping corn.
- 1 cup granulated sugar: The foundation of our sweet syrup. Granulated sugar provides the primary sweetness and contributes to the crisp texture once cooled.
- 1/2 cup light corn syrup: This is crucial for achieving that wonderfully chewy, yet pliable texture in your Christmas Popcorn Balls. Light corn syrup prevents the sugar from crystallizing, ensuring a smooth, glossy, and manageable syrup. Don’t substitute with dark corn syrup unless you want a different flavor profile.
- 1/2 cup (1 stick) unsalted butter: Butter adds a rich, creamy flavor and helps to prevent the mixture from sticking too much, both in the pot and when you’re forming the balls. Unsalted butter allows us to control the salt content precisely. Make sure it’s fresh for the best taste.
- 1/2 teaspoon salt: A touch of salt is absolutely essential to balance the sweetness and enhance all the flavors in our Christmas Popcorn Balls. It truly makes a difference, preventing the balls from tasting overly sugary.
- 1 teaspoon vanilla extract: Pure vanilla extract adds a beautiful aromatic depth and warmth to the syrup, complementing the other sweet and buttery notes perfectly. I always opt for good quality pure vanilla for the best flavor.
- Red and green gel food coloring (optional, but highly recommended for Christmas Popcorn Balls!): This is where the “Christmas” in Christmas Popcorn Balls truly shines! Gel food coloring provides vibrant, concentrated color without adding excess liquid, which is perfect for candy making. You’ll want to have both red and green on hand to create a festive look.
- Christmas-themed sprinkles (optional): For an extra touch of holiday magic and sparkle! Star-shaped sprinkles, tiny candy canes, or classic red and green nonpareils or jimmies will make your Christmas Popcorn Balls even more appealing.
- Non-stick cooking spray or extra butter for greasing hands: You’ll need this when it’s time to form the popcorn balls. It’s a sticky business, and a little grease goes a long way to prevent frustration!
Preparation Phase: Popping the Perfect Popcorn
- Gather Your Popping Corn and Equipment: The first and most critical step for amazing Christmas Popcorn Balls is to have truly perfect popcorn. I find that about 1/2 to 3/4 cup of unpopped kernels will yield the 16 cups of popped popcorn we need. Choose a high-quality yellow or white popping corn. Ensure you have a very large mixing bowl ready – one that can comfortably hold 16 cups of popcorn with room to spare for mixing. You’ll also need a large spoon or spatula.
- Popping the Popcorn – Method One: Stovetop (My Preferred Method for Flavor)
- Prepare Your Pot: Select a large, heavy-bottomed pot (at least 5-quart capacity) with a tight-fitting lid. Heat 2-3 tablespoons of a high-smoke point oil, such as canola, vegetable, or coconut oil, over medium-high heat. I personally love using coconut oil for a subtly sweet and fragrant popcorn that enhances the flavor of the Christmas Popcorn Balls.
- Test the Temperature: Add 2-3 popcorn kernels to the hot oil. Cover the pot and wait for these test kernels to pop. This indicates your oil is at the perfect temperature, typically around 375°F (190°C).
- Add Remaining Kernels: Once the test kernels pop, remove the pot from the heat. Add the remaining 1/2 to 3/4 cup of kernels to the pot, ensuring they form a single layer. Give the pot a gentle shake to coat all kernels in oil. This brief resting period helps ensure more kernels pop at once, reducing the number of unpopped “old maids.”
- Pop Away!: Return the pot to medium-high heat. Keep the lid on, slightly ajar if you want to let some steam escape for crispier popcorn. As the kernels begin to pop vigorously, gently shake the pot back and forth continuously over the burner. This motion prevents burning and ensures even popping. When the popping slows to several seconds between pops, remove the pot from the heat immediately.
- Transfer and Inspect: Carefully pour the freshly popped popcorn into your very large mixing bowl. Take a moment to inspect the popcorn for any unpopped kernels. While a few are inevitable, try to remove as many as possible – biting into a hard kernel is never a pleasant surprise in a soft Christmas Popcorn Ball! This step is crucial for an enjoyable eating experience.
- Popping the Popcorn – Method Two: Air Popper (For a Lighter Option)
- Measure and Load: Measure 1/2 to 3/4 cup of unpopped kernels into your air popper, following the manufacturer’s instructions.
- Pop and Collect: Turn on the air popper and let it do its magic. Make sure you have a large bowl positioned to catch all the fluffy popcorn as it comes out.
- Inspect for Unpopped Kernels: Just as with the stovetop method, once all the popcorn has popped, transfer it to your large mixing bowl. Carefully pick out any stray unpopped kernels. Air-popped popcorn is naturally lighter and less oily, which can be great if you’re looking for a slightly less indulgent Christmas Popcorn Ball, but you might find the syrup coats it a little differently.
- Keep it Warm and Ready: Once your popcorn is popped and in the bowl, set it aside. I often place the bowl near the stove, not directly on it, just to keep the popcorn slightly warm, which helps it absorb the syrup better when we combine them.
Crafting the Festive Syrup for Your Christmas Popcorn Balls
- Combine Syrup Ingredients: In a medium-sized, heavy-bottomed saucepan (at least a 2-quart capacity is ideal to prevent boil-overs), combine the granulated sugar, light corn syrup, unsalted butter, and salt. I find a heavy-bottomed pan distributes heat more evenly, reducing the risk of scorching.
- Begin Heating and Stirring: Place the saucepan over medium heat. Stir the mixture constantly with a heatproof spatula or wooden spoon. Your goal here is to dissolve the sugar completely and melt the butter. Do not stop stirring until the butter is fully melted and the sugar crystals are no longer visible, which usually takes about 3-5 minutes. This ensures a smooth syrup and prevents crystallization later.
- Bring to a Boil: Once the sugar is dissolved and the butter is melted, stop stirring. Allow the mixture to come to a rolling boil. At this point, I like to attach a candy thermometer to the side of the saucepan, ensuring the bulb is submerged in the syrup but not touching the bottom of the pan.
- Cook to the Soft Ball Stage: Continue boiling the syrup without stirring. Watch the candy thermometer carefully. We are aiming for the “soft ball” stage, which is 250°F (121°C). This temperature is absolutely critical for the texture of your Christmas Popcorn Balls.
- If the syrup doesn’t reach 250°F, your popcorn balls will be too soft and sticky, possibly even falling apart.
- If it goes much higher, say 260°F or more, your popcorn balls will be hard and brittle, like a caramel apple coating, and much more difficult to chew.
Be patient; it can take 5-10 minutes to reach this temperature, depending on your stove and pan.
- Remove from Heat and Flavor: As soon as the thermometer hits 250°F (121°C), immediately remove the saucepan from the heat. Carefully remove the candy thermometer. Now, quickly stir in the vanilla extract. Be careful, as the vanilla can cause the hot syrup to bubble up initially. The aroma at this point is just heavenly!
- Add Your Festive Christmas Colors (Optional but Highly Recommended!): This is the moment to transform your popcorn balls into true Christmas Popcorn Balls! If you’re making a batch of both red and green, you can either divide the syrup in half into two separate heatproof bowls at this point, or you can do what I often do: make a whole batch red, then make another batch green.
- Add a few drops of red gel food coloring to the syrup (or green, if that’s the color you’re starting with). Start with 2-3 drops, stir well, and add more if you desire a deeper, more vibrant hue. Remember, gel colors are highly concentrated, so a little goes a long way! Stir quickly but thoroughly until the color is evenly distributed throughout the hot syrup. The color will intensify slightly as it cools.
Combining and Cooling: Forming Your Christmas Popcorn Balls
- Pour Syrup Over Popcorn: Immediately and carefully pour the hot, colored syrup evenly over the 16 cups of popped popcorn in your large mixing bowl. Work quickly, as the syrup will start to thicken as it cools.
- Gentle Mixing: Using a large, heatproof spoon or spatula (I find two spatulas work best for this), gently fold and stir the popcorn until it is thoroughly coated with the festive syrup. The goal is to get every piece of popcorn glistening with that sweet, colorful coating. This takes a few minutes, so be patient and continue to fold the popcorn from the bottom of the bowl upwards, ensuring no dry spots remain.
- Cooling Time: Let the mixture cool for about 5-10 minutes in the bowl. It will still be quite warm, but it needs to be cool enough to handle without burning yourself. If you try to form the balls when it’s too hot, it will be messy and painful! If it cools too much, it will become too stiff to form properly. This window is crucial!
- Prepare for Forming: While the popcorn mixture is cooling slightly, prepare your work surface. Line a baking sheet or a large piece of parchment paper with wax paper or parchment paper. Have your Christmas sprinkles ready in a shallow dish, if using. Now, and this is important, spray your hands generously with non-stick cooking spray, or lightly butter them. You will need to re-grease your hands several times during the forming process.
- Forming Your Christmas Popcorn Balls:
- Scoop and Compress: Using your greased hands, scoop out about 1/2 to 3/4 cup of the warm popcorn mixture. This will make a medium-sized popcorn ball, perfect for snacking.
- Shape and Squeeze: Gently but firmly press and roll the mixture between your palms to form a compact, round ball. Don’t press too hard, or you’ll crush the popcorn, but you need enough pressure for the ball to hold its shape. You’ll feel the stickiness, even through the grease on your hands, but that’s what makes them hold together!
- Add Festive Sprinkles: If you’re adding sprinkles, immediately after forming each ball, roll it gently in the dish of Christmas sprinkles. The warmth and stickiness of the ball will ensure the sprinkles adhere beautifully. This adds that extra festive touch that makes these truly Christmas Popcorn Balls!
- Repeat and Re-grease: Place the finished Christmas Popcorn Ball onto the prepared wax paper. Repeat the process, continually re-greasing your hands as needed. The mixture will get sticker and cooler as you go, so working efficiently is key. If the mixture becomes too stiff to form, you can microwave it for 10-15 seconds to soften it slightly, but be careful not to overheat it.
- Final Cooling: Allow the Christmas Popcorn Balls to cool completely on the wax paper-lined surface, undisturbed, for at least 30 minutes to an hour. They will firm up as they cool, becoming perfectly set and ready to enjoy.
Storage and Presentation: Keeping Your Christmas Popcorn Balls Fresh
- Proper Storage: Once completely cool and firm, store your beautiful Christmas Popcorn Balls individually wrapped in plastic wrap. This is essential to prevent them from drying out and becoming stale, or from absorbing moisture and becoming sticky. They can be stored at room temperature in an airtight container for up to 3-5 days. I usually keep them in a cool, dry place away from direct sunlight.
- Gifting and Presentation: These Christmas Popcorn Balls make wonderful edible gifts! After wrapping them individually, you can place them in clear cellophane bags tied with festive ribbons, or arrange them on a decorative platter for a holiday gathering. They look absolutely stunning when presented this way, especially with their vibrant red and green colors and shimmering sprinkles. Your friends and family will surely appreciate this homemade holiday treat!
- Enjoying Your Creation: Now for the best part – enjoy the fruits of your labor! These homemade Christmas Popcorn Balls are a delightful treat, perfect for holiday parties, cozy evenings by the fire, or as a fun activity for kids to help make (the forming part, once the mixture is cool enough!). The balance of sweet, salty, and vanilla, combined with the satisfying chewiness, makes them truly irresistible.
Conclusion:
And there you have it, dear friends! We’ve journeyed through the delightful process of creating a truly special treat, and I sincerely hope you’re as excited as I am about the results. This isn’t just another recipe; it’s an invitation to bring a little extra sparkle and joy into your home, especially during the festive season. I truly believe that these fantastic concoctions are a must-try for anyone looking to capture the essence of holiday cheer in a bite-sized, incredibly satisfying form. They’re wonderfully straightforward to make, requiring minimal fuss but delivering maximum impact, making them perfect for even the busiest of holiday schedules. The combination of light, airy popcorn with that sweet, gooey binding creates a textural paradise that’s utterly irresistible. Forget complicated baking; this recipe offers a simple path to a genuinely impressive and crowd-pleasing dessert that everyone from tiny tots to seasoned foodies will adore.
What makes this recipe truly stand out? Beyond its undeniable deliciousness, it’s the inherent customizability and the sheer joy it brings. It’s a recipe that encourages creativity and interaction, transforming a simple kitchen activity into a memorable family event. Imagine the laughter and sticky fingers as you and your loved ones shape these delightful treats together. It’s a fantastic way to create new traditions or revive cherished old ones, making memories that will last long after the last crumb is gone. The simplicity of the ingredients lies in the incredible festive magic they collectively create, proving that sometimes, the most delightful things in life are also the easiest to achieve. They embody that perfect balance of comfort and celebration, a sweet reminder of all the good things the holiday season has to offer.
Serving Your Sweet Masterpieces
Once your creations are perfectly set, the fun doesn’t stop there! How you present and enjoy them can add another layer of charm to their already irresistible appeal. For individual servings, I love wrapping each one in a small square of clear cellophane, tying it with a festive ribbon – perhaps a vibrant red, a glistening gold, or a deep forest green. This not only keeps them fresh but also transforms each one into a beautiful, ready-to-grab treat. They look absolutely stunning arranged on a large platter, perhaps interspersed with a scattering of fresh cranberries, sprigs of rosemary, or even some complementary holiday cookies. Think of them as edible ornaments, brightening up any dessert table or holiday buffet. For a cozy evening, consider serving them alongside mugs of steaming hot cocoa topped with whipped cream, a rich eggnog, or even a spiced cider. The contrast of the sweet, chewy treat with a warm beverage is simply divine.
They also make truly thoughtful and personal gifts! Gather a collection of these delightful treats into a decorative tin or a cellophane gift bag, and you’ve got a homemade present that speaks volumes. It’s a wonderful way to show appreciation to neighbors, teachers, or colleagues, offering a taste of homemade warmth during the chilly season. Imagine the delight on their faces when they receive a batch of these charming, homemade goodies. They can also serve as unique party favors for your holiday gatherings; guests will love taking a little piece of the festive fun home with them. No matter the occasion, these treats are guaranteed to be a hit, eliciting smiles and satisfied sighs with every bite.
Endless Creative Variations to Explore
But wait, there’s more! While the base recipe is absolutely perfect on its own, I encourage you to see it as a canvas for your own culinary creativity. This is where you can truly make the recipe your own and experiment with different flavors and textures. Want to add a zesty twist? Incorporate a teaspoon of orange or lemon zest into the melted marshmallow mixture for a bright, aromatic lift. For a more intense flavor profile, a few drops of almond extract or peppermint extract can transform the entire experience – imagine minty wonders, perfect for a white Christmas theme! A dash of ground cinnamon, nutmeg, or even a pinch of allspice can infuse them with classic holiday warmth. And don’t even get me started on mix-ins! Stir in dried cranberries or chopped apricots for a chewy, fruity element. Toasted pecans, walnuts, or almonds add a delightful crunch. Mini chocolate chips, white chocolate chunks, or even colorful holiday sprinkles can be folded in at the very end, adding both flavor and visual appeal. For an extra decadent touch, consider dipping half of each finished ball into melted dark chocolate, milk chocolate, or white chocolate, then sprinkle with more festive decorations before the chocolate sets. You can even add a tiny bit of red or green food coloring to the marshmallow mixture itself to make vibrant, themed Christmas Popcorn Balls that are even more eye-catching. The possibilities are truly boundless, limited only by your imagination.
Your Turn! Let’s Get Popping!
Now, it’s your turn! I genuinely hope this recipe has inspired you to roll up your sleeves and create your very own batch of these incredible treats. Don’t be shy; dive into the kitchen and experience the sheer delight of making something so simple, yet so utterly rewarding. I promise you, the process is as much fun as the eating! Gather your loved ones, put on some festive music, and let the magic unfold. I can’t wait to hear about your experiences. Please, when you’ve made them, come back and share your stories! Did you try a unique variation? Did your kids have a blast helping? What creative serving ideas did you come up with? Your insights and photos inspire me and our entire community. Don’t hesitate to drop a comment below or share your masterpieces on social media. Let’s spread the joy and make this holiday season the sweetest one yet, one delicious, homemade treat at a time. Happy holidays and happy cooking!
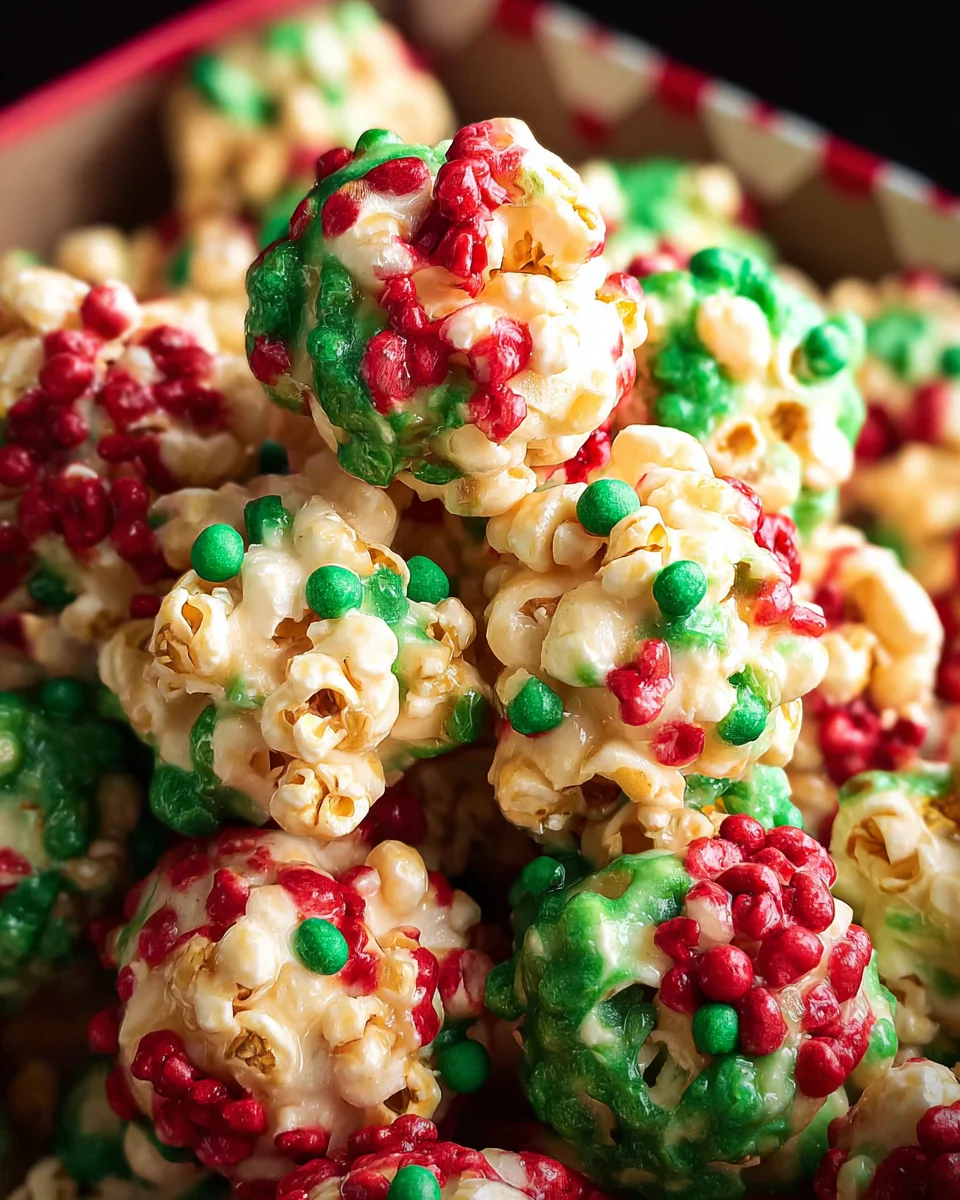
Christmas Popcorn Balls
Christmas Popcorn Balls are a magical, bite-sized package of pure festive joy, perfect for holiday tables. Their unique chewy texture and sweet, sticky glaze make them irresistible. Making them is a fun family activity, creating homemade wonders and cherished memories for loved ones.
Ingredients
Instructions
Important Information
Nutrition Facts (Per Serving)
It is important to consider this information as approximate and not to use it as definitive health advice.
Allergy Information
Please check ingredients for potential allergens and consult a health professional if in doubt.