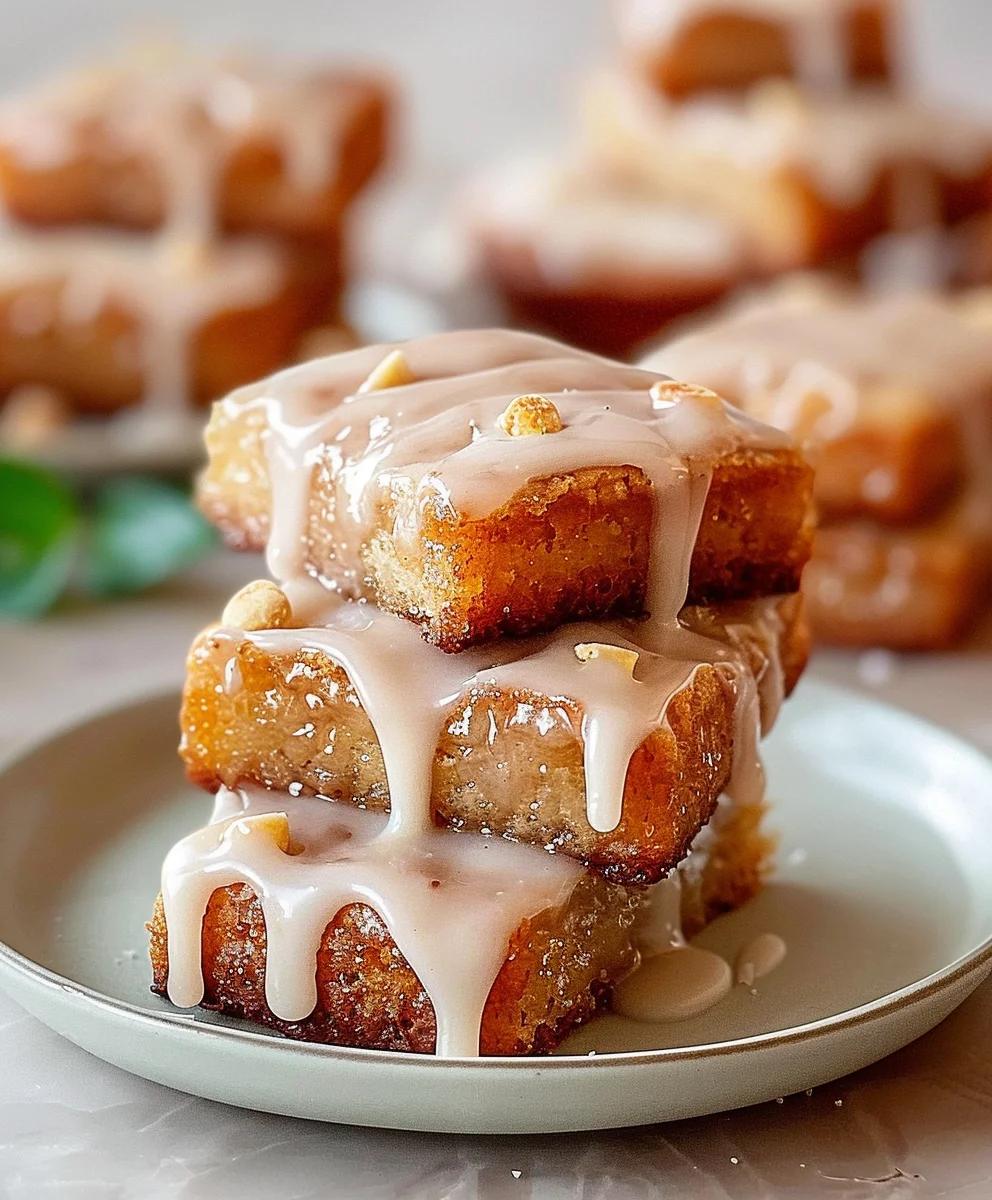
Maple Donut Bars The Ultimate Guide To Baking Delicious Treats begins right here, inviting you into a world where the comforting nostalgia of a classic donut meets the delightful convenience of a bakeable bar. Have you ever wished you could savor that perfectly sweet, fluffy donut experience without the hassle of deep-frying? Well, prepare to have your culinary dreams come true! I’m thrilled to share with you a recipe that captures the essence of those beloved maple-glazed treats, transforming them into an easy-to-manage, utterly irresistible slice of heaven.
The rich, amber sweetness of maple syrup holds a special place in North American history and culture, a cherished flavor that evokes crisp autumn mornings and cozy gatherings. When combined with the tender crumb of a cake-like donut, it creates an unparalleled taste sensation. People utterly adore these Maple Donut Bars for their incredibly moist, tender texture, the rich, authentic maple flavor that permeates every bite, and that decadent, crackly maple glaze. It’s the perfect blend of comfort food and achievable baking, making them an ideal choice for a special breakfast, a delightful dessert, or a comforting treat anytime. This guide is truly Maple Donut Bars The Ultimate Guide To Baking Delicious Treats, promising to equip you with all the knowledge to create these show-stopping delights with confidence and joy in your own kitchen.

Ingredients:
Creating these delightful Maple Donut Bars starts with gathering the right ingredients. Quality makes all the difference, especially when it comes to that rich maple flavor!
-
For the Maple Donut Bars:
- 2 ½ cups (300g) all-purpose flour, spooned and leveled. I always measure my flour accurately; too much can lead to dry bars!
- 2 teaspoons baking powder.
- ½ teaspoon baking soda.
- ½ teaspoon salt.
- 1 teaspoon ground cinnamon.
- ¼ teaspoon ground nutmeg.
- ½ cup (113g) unsalted butter, softened to room temperature. This is absolutely crucial for a smooth batter.
- 1 cup (200g) granulated sugar.
- ½ cup (100g) packed light brown sugar.
- 2 large eggs, at room temperature. Again, room temperature eggs emulsify better!
- 1 teaspoon pure vanilla extract.
- 1 cup (240ml) buttermilk, at room temperature. If you don’t have buttermilk, you can make your own by adding 1 tablespoon of lemon juice or white vinegar to regular milk and letting it sit for 5-10 minutes.
-
For the Irresistible Maple Glaze:
- 2 cups (240g) powdered sugar, sifted. Sifting prevents lumps, trust me on this!
- ¼ cup (60ml) pure maple syrup, preferably Grade A Dark, Robust Taste for the best flavor. Don’t skimp on the quality of your maple syrup here; it’s the star!
- 3-4 tablespoons milk or heavy cream, adjust as needed for consistency.
- ½ teaspoon pure vanilla extract.
- Pinch of salt.
-
Optional Toppings (for extra flair!):
- Chopped toasted pecans or walnuts.
- Sprinkles (rainbow or fall-themed).
- A light dusting of cinnamon.
Preparing the Maple Donut Bars: The Ultimate Guide To Baking Delicious Treats
Get ready to transform simple ingredients into a truly delightful dessert. This process is all about precision and a little bit of love!
Mise en Place and Oven Preparation:
- Preheat Your Oven: I always start by preheating my oven to 350°F (175°C). This ensures a consistent temperature from the moment your batter goes in, which is key for even baking.
- Prepare Your Baking Pan: I grab a 9×13 inch baking pan. To prevent sticking and ensure a beautiful release, I generously grease the pan with butter or baking spray, then dust it lightly with flour. Tapping out any excess flour creates a perfect non-stick surface. Sometimes, I even line it with parchment paper, leaving an overhang on the sides, for super easy lifting later.
- Gather and Temper Your Ingredients: Take a moment to gather all your ingredients. For the butter and eggs, make sure they are truly at room temperature. I can’t stress this enough! Room temperature butter creams with sugar to create tiny air pockets, resulting in a lighter, fluffier texture. Cold butter won’t emulsify properly and can lead to a dense, tough bar. Likewise, room temperature eggs integrate smoothly into the mixture, preventing curdling and ensuring a uniform batter.
Mixing the Dry Ingredients:
- Combine Dry Goodness: In a medium bowl, I whisk together my 2 ½ cups all-purpose flour, 2 teaspoons baking powder, ½ teaspoon baking soda, ½ teaspoon salt, 1 teaspoon ground cinnamon, and ¼ teaspoon ground nutmeg. Sifting these ingredients together isn’t just for lump prevention; it also helps aerate the flour and ensures that the leavening agents and spices are evenly distributed throughout the dry mixture. This simple step contributes significantly to the bars’ light texture and consistent flavor. Set this aside for a moment.
Creaming the Wet Ingredients:
- Cream Butter and Sugars: In a large mixing bowl, using an electric mixer (either a stand mixer with the paddle attachment or a hand mixer), I beat the ½ cup softened unsalted butter with the 1 cup granulated sugar and ½ cup packed light brown sugar. I let this go for about 3-5 minutes on medium-high speed. The goal here is to achieve a mixture that is light in color, incredibly fluffy, and airy. It should look like whipped clouds! This creaming process incorporates air, which is vital for the final texture of our donut bars. Remember to scrape down the sides of the bowl occasionally to ensure everything is evenly combined.
- Add Eggs One at a Time: With the mixer still running on medium speed, I crack in one large egg and beat until it’s fully incorporated into the butter mixture. Then, I add the second egg, beating until it, too, is completely blended. It’s important to add them one at a time to allow each egg ample time to emulsify with the fat, creating a stable, smooth batter. After adding the eggs, I mix in the 1 teaspoon pure vanilla extract. Give the bowl another good scrape to catch any bits clinging to the bottom or sides.
Combining Wet and Dry:
-
Alternate Dry and Buttermilk: Now comes the gentle art of combining. With the mixer on low speed, I begin to add the dry ingredients and the buttermilk alternately to the wet mixture. I typically start by adding about one-third of the dry ingredients, mixing just until almost combined. Then, I pour in half of the 1 cup buttermilk, mixing until just barely incorporated. I repeat this process with another third of the dry ingredients, followed by the remaining buttermilk, and finally, the last third of the dry ingredients.
The Golden Rule: Don’t Overmix! As soon as the last of the dry ingredients are added, I stop the mixer. Overmixing at this stage develops the gluten in the flour, which will lead to tough, dense bars – definitely not what we want for a light and tender “donut” bar! A few streaks of flour are perfectly fine; a quick final fold with a spatula will take care of them.
Baking the Bars:
- Into the Pan and Oven: I gently pour the batter into my prepared 9×13 inch baking pan. Using an offset spatula or the back of a spoon, I carefully spread the batter evenly to all corners of the pan. This ensures a uniform thickness and even baking.
- Bake to Perfection: I place the pan in the preheated 350°F (175°C) oven. The baking time will typically be between 28-35 minutes. Keep an eye on them! To check for doneness, I insert a wooden skewer or toothpick into the center of the bars. If it comes out clean or with a few moist crumbs attached (but no wet batter), they are ready. It’s always better to slightly underbake than overbake for a tender texture.
- Cooling Down: Once baked, I remove the pan from the oven and let the bars cool in the pan on a wire rack for about 15-20 minutes. This allows them to set up properly before I attempt to remove them. After this initial cooling, I carefully invert the bars onto the wire rack to cool completely. If you used parchment paper with an overhang, this step is even easier – just lift them out! Allowing the bars to cool completely before glazing is critical. If they’re even slightly warm, the glaze will melt and run off, creating a messy situation instead of a beautiful, set glaze.
Crafting the Irresistible Maple Glaze:
This glaze is what truly elevates these bars into their “donut” status. It’s simple yet utterly delicious.
Gathering Glaze Ingredients:
- Glaze Prep: I make sure I have my 2 cups powdered sugar, ¼ cup pure maple syrup, 3-4 tablespoons milk/cream, ½ teaspoon pure vanilla extract, and a pinch of salt ready to go. Sifting the powdered sugar beforehand is a non-negotiable step for me; it ensures a silky smooth, lump-free glaze.
Mixing the Glaze:
- Whisk it Up: In a medium bowl, I combine the sifted powdered sugar, pure maple syrup, 3 tablespoons of milk (or cream for a richer glaze), vanilla extract, and the pinch of salt. I whisk vigorously with a fork or a small whisk until the mixture is completely smooth and free of any lumps.
- Achieving the Perfect Consistency: This is where you become the chef! The glaze should be thick enough to coat the back of a spoon and appear opaque, but still thin enough to drizzle smoothly. If it’s too thick, I add more milk or cream, a teaspoon at a time, until the desired consistency is reached. If it’s too thin, I whisk in a little more sifted powdered sugar. You want it to be spreadable but not watery. I find that the ideal consistency holds its shape on the bar but isn’t so thick that it becomes clumpy.
Assembling Your Maple Donut Bar Masterpiece:
The moment of truth! This is where your baked bars get their crowning glory.
Glazing the Cooled Bars:
- Ensure Complete Cooling: Before applying the glaze, I absolutely double-check that the Maple Donut Bars are completely cool. I can’t emphasize this enough! If there’s any residual warmth, the glaze will simply melt into the bars rather than setting beautifully on top. Patience here is key for that perfect, shiny finish.
- Apply the Glaze Generously: Once the bars are fully cooled and still on the wire rack (with parchment or wax paper underneath to catch drips for easy cleanup!), I pour the freshly made maple glaze evenly over the top. I use an offset spatula or the back of a spoon to gently spread the glaze all the way to the edges, ensuring every inch of the bar is covered in that delicious, sweet maple goodness.
- Allow the Glaze to Set: I let the glazed bars sit at room temperature for at least 30-60 minutes, or until the glaze is fully set and firm to the touch. This waiting period is crucial for the glaze to form that slightly crisp, sweet shell that makes donut bars so irresistible.
Optional Toppings:
- Embellish (if desired!): If I’m adding any optional toppings like chopped toasted pecans, sprinkles, or a dusting of cinnamon, I do this immediately after applying the glaze, while it’s still wet. This allows the toppings to adhere beautifully and become part of the finished bar. Toasted nuts add a wonderful crunch and a deeper, nutty flavor that complements the maple perfectly.
Slicing and Serving:
- Slice with Care: Once the glaze is completely set, I carefully transfer the entire bar (or lift it by the parchment paper) to a cutting board. For clean, neat slices, I like to use a large, sharp knife. Sometimes, I even warm the knife under hot water and wipe it dry between cuts to prevent the glaze from sticking. I typically cut them into 12-16 bars, depending on how generous I’m feeling!
- Serve and Enjoy: These Maple Donut Bars are best enjoyed the day they are made, when the cake is moist and the glaze is fresh. They make a fantastic treat for breakfast, brunch, or a delightful afternoon snack with a cup of coffee.
Expert Tips for Maple Donut Bar Perfection:
Baking is an art and a science, and a few insider tricks can take your Maple Donut Bars from good to absolutely glorious. I’ve picked up these tips over years of baking, and they’ll ensure your treats are nothing short of spectacular.
Ingredient Quality Matters:
Don’t Compromise on Maple Syrup: For these “Maple Donut Bars The Ultimate Guide To Baking Delicious Treats”, the maple syrup is truly the star. I always recommend using pure maple syrup, preferably a Grade A Dark, Robust Taste (formerly known as Grade B). This variety has a much deeper, more concentrated maple flavor compared to lighter grades, and it will shine through beautifully in both the bars and the glaze. Avoid pancake syrup, which is often corn syrup-based and lacks the complex, natural flavor we’re aiming for.
Fresh Leavening Agents: Baking powder and baking soda lose their potency over time. If yours have been sitting in the pantry for ages, it might be time for fresh ones. To test baking powder, add a teaspoon to half a cup of hot water; it should fizz immediately. For baking soda, add a quarter teaspoon to a small amount of vinegar; it should also fizz vigorously. If they don’t, your bars might not rise properly.
Room Temperature Magic:
The Importance of Softened Butter and Eggs: I really can’t stress this enough! When butter and eggs are at room temperature, they emulsify much more effectively with the sugar and other wet ingredients. This creates a smooth, homogenous batter that traps more air during the creaming process, resulting in a lighter, more tender crumb. Cold ingredients can lead to a lumpy batter, a denser texture, and even cause the mixture to curdle. So, plan ahead and take them out of the fridge at least an hour before you start baking.
Don’t Overmix!
The Enemy of Tenderness: Once you add the flour to the wet ingredients, mix only until just combined. Overmixing develops gluten, which is what gives bread its chewiness. While great for bread, it’s the enemy of tender cakes and bars. You’ll end up with tough, dense bars if you keep mixing once the flour is incorporated. A few streaks of flour are acceptable; a final gentle fold with a spatula will incorporate them without overworking the batter.
Baking Pan Choices:
Light vs. Dark Pans: The type of baking pan you use can affect your baking time and the color of your bars. Lighter-colored metal pans typically lead to more even baking and lighter crusts because they reflect heat. Darker metal pans absorb more heat, which can result in darker, crispier edges and potentially faster baking times. If using a dark pan, you might need to reduce your oven temperature by 25°F (15°C) or shorten the baking time slightly to prevent over-browning.
Cooling Patience:
Completely Cool Bars for Glazing: This is a non-negotiable step for a flawless glaze. If your bars are even slightly warm when you apply the maple glaze, it will melt, become thin, and simply run off the sides, leaving you with bare spots and a sticky mess. Allowing the bars to cool completely on a wire rack ensures the glaze sets beautifully, creating that signature sweet, slightly firm shell. This can take anywhere from 1 to 2 hours, depending on your kitchen’s temperature.
Storing Your Treats:
Keeping Them Fresh: These Maple Donut Bars are best enjoyed on the day they are made. However, if you have leftovers, store them in an airtight container at room temperature for up to 2-3 days. If your kitchen is particularly warm or humid, or if you prefer a firmer glaze, you can store them in the refrigerator, but bring them back to room temperature before serving for the best flavor and texture. For longer storage, you can freeze unglazed bars for up to 3 months; thaw and glaze just before serving.
Flavor Variations:
Get Creative: While these maple donut bars are fantastic as is, don’t hesitate to experiment!
- Citrus Zest: A teaspoon of orange or lemon zest added to the batter or glaze can brighten the flavors beautifully.
- Spice it Up: A pinch of cardamom or a tiny dash of allspice can add another layer of warmth to the existing cinnamon and nutmeg.
- Maple Bacon: For a truly decadent and popular combination, sprinkle finely chopped, crisp-cooked bacon bits over the wet glaze. The salty-sweet contrast is incredible!
- Nutty Crunch: In addition to pecans or walnuts on top, you can fold ½ cup of finely chopped nuts into the batter for an added texture inside the bars.
- Chocolate Chips: A ½ cup of mini chocolate chips folded into the batter can make these an even more universally appealing treat.
Achieving the Perfect Glaze Consistency:
The Art of the Drizzle: The glaze consistency is crucial for both appearance and taste. You want it thick enough to coat the bars opaquely but thin enough to spread smoothly and drip attractively down the sides. Always add your liquid (milk/cream) a tablespoon at a time to the powdered sugar and maple syrup, whisking thoroughly after each addition. It’s much easier to thin a glaze than to thicken it! If you accidentally make it too thin, simply whisk in a little more sifted powdered sugar until it reaches the desired consistency. A perfect glaze should be able to create a visible trail when drizzled from a spoon into the bowl, slowly disappearing into the rest of the glaze.
Conclusion:
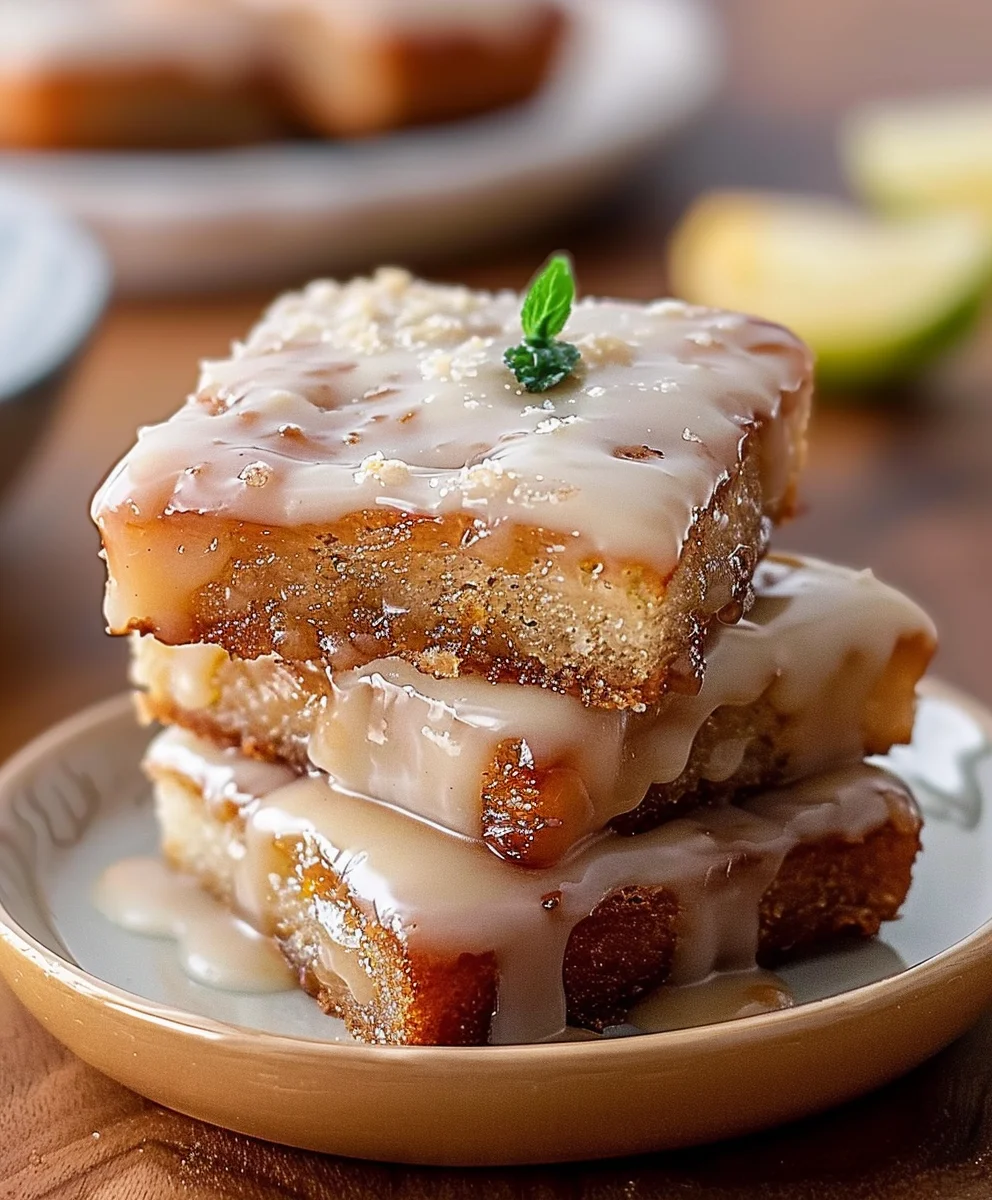
So, we’ve journeyed together through the delightful process of creating something truly special, something that stands head and shoulders above your average baked good. When you pull these golden-brown beauties from your oven, filling your kitchen with an intoxicating aroma of sweet maple and vanilla, you’ll immediately understand why this recipe isn’t just another item on your baking list; it’s a profound experience. These Maple Donut Bars are, without a doubt, a must-try for any baking enthusiast or anyone simply looking to bring a little extra joy into their home. They offer that quintessential donut taste and texture – light, airy, and incredibly tender – but with the added convenience and less mess of baking rather than deep-frying. Imagine biting into that soft, cake-like base, perfectly complemented by the rich, glossy maple glaze that sets just right, creating a delightful crackle as you break through it. It’s a symphony of textures and flavors that will undoubtedly leave you craving more, long after the last crumb is gone.
I truly believe that what makes these bars so exceptional is their ability to deliver on both simplicity and sophistication. You don’t need a pastry chef’s training to achieve bakery-quality results here. The steps are straightforward, making this a perfect project for bakers of all skill levels, from novices to seasoned pros. Yet, the outcome is consistently impressive, making them ideal for impressing guests, delighting your family, or simply treating yourself to something wonderfully homemade. This isn’t just a recipe; it’s an invitation to create edible happiness, a way to transform simple ingredients into a memorable moment. And when you consider the sheer delight they bring, you’ll realize that the minimal effort invested yields an exponential return in pure, unadulterated pleasure.
But the fun doesn’t stop once they’re baked and glazed! Oh no, the versatility of these Maple Donut Bars is part of their charm. While they are absolutely divine enjoyed simply on their own, perhaps with a steaming mug of coffee or a comforting cup of tea, there are so many ways to elevate your serving experience. Picture them as the star of your next brunch spread, beautifully arranged on a platter, ready to be devoured. Or, for an unexpected dessert, try warming them slightly and serving them alongside a scoop of premium vanilla bean ice cream or a generous dollop of freshly whipped cream. The warm maple notes will sing against the cool, creamy backdrop, creating an indulgent finish to any meal.
And let’s talk about variations – because part of the joy of baking is making a recipe truly your own! While the classic maple glaze is heavenly, don’t hesitate to experiment. A simple vanilla bean glaze could be lovely, or for a chocolate lover’s twist, a rich chocolate ganache drizzle would be phenomenal. Think about toppings too: a sprinkle of crunchy toasted pecans or walnuts adds a fantastic textural contrast, while a dusting of cinnamon sugar can enhance the warm spice notes. For a truly unique sweet-and-savory experience, crumbled crispy bacon bits over the top are surprisingly addictive! You could even incorporate miniature chocolate chips or dried cranberries into the batter before baking for an extra burst of flavor and texture. The possibilities are truly endless, allowing you to tailor these bars to any occasion or preference.
Ultimately, if you’re searching for an absolute showstopper that epitomizes delicious homemade baking, our recipe for Maple Donut Bars The Ultimate Guide To Baking Delicious Treats truly delivers on every front. It’s a recipe that promises not just a fantastic result, but a truly enjoyable journey from start to finish. I genuinely hope you feel inspired to roll up your sleeves and give these irresistible bars a try. There’s an immense satisfaction that comes from creating something so delicious from scratch, and I promise you, the smiles these will bring to your family and friends will be priceless. Don’t just read about it; experience the magic for yourself!
Once you’ve baked your batch, I would absolutely love to hear about your experience! Did you stick to the classic maple, or did you venture into exciting variations? What was your favorite part of the process, or the most cherished reaction from someone you shared them with? Baking is a shared passion, and I thrive on hearing your stories and seeing your creations. Please do share your thoughts and photos – let’s celebrate the joy of homemade goodness together! Happy baking, my friends!
Maple Donut Bars
Discover the ultimate guide to baking delicious Maple Donut Bars. Enjoy the comforting nostalgia of a classic donut in a convenient, bakeable bar form, featuring a moist, tender cake and a decadent, crackly maple glaze. Perfect for breakfast, dessert, or any treat.
Ingredients
-
3 cups all-purpose flour
-
2 teaspoons baking powder
-
1 teaspoon baking soda
-
1/2 teaspoon salt
-
1/2 teaspoon ground nutmeg
-
1 cup granulated sugar
-
1/2 cup (1 stick) unsalted butter, melted and slightly cooled
-
2 large eggs
-
1 cup buttermilk
-
1 teaspoon vanilla extract
-
4 cups powdered sugar
-
1/2 cup pure maple syrup
-
1/4 cup milk (or more, as needed)
-
2 tablespoons unsalted butter, melted
-
1 teaspoon vanilla extract
Instructions
-
Step 1
Preheat oven to 350°F (175°C). Grease and flour a 9×13 inch baking pan, or line with parchment paper for easy removal. -
Step 2
In a medium bowl, whisk together 3 cups all-purpose flour, 2 tsp baking powder, 1 tsp baking soda, 1/2 tsp salt, and 1/2 tsp ground nutmeg. -
Step 3
In a large bowl, whisk together 1 cup granulated sugar, 1/2 cup melted unsalted butter (cooled), 2 large eggs, 1 cup buttermilk, and 1 tsp vanilla extract until well combined and smooth. -
Step 4
Gradually add the dry ingredient mixture to the wet mixture, mixing on low speed or by hand just until combined. Do not overmix. -
Step 5
Pour the batter evenly into the prepared 9×13 inch baking pan. Bake for 28-35 minutes, or until a wooden skewer or toothpick inserted into the center of the bars comes out clean. -
Step 6
Remove the pan from the oven and let the bars cool in the pan on a wire rack for 15-20 minutes. Then, carefully invert or lift the bars onto the wire rack to cool completely. Ensure they are fully cooled before glazing. -
Step 7
In a medium bowl, whisk together 4 cups sifted powdered sugar, 1/2 cup pure maple syrup, 1/4 cup milk, 2 tbsp melted unsalted butter, and 1 tsp vanilla extract until completely smooth. Adjust milk as needed, adding a teaspoon at a time, to achieve a thick, pourable consistency that coats the back of a spoon. -
Step 8
Once the bars are completely cool, pour the freshly made maple glaze evenly over the top, spreading to the edges with an offset spatula. Let the glazed bars sit at room temperature for 30-60 minutes, or until the glaze is fully set and firm to the touch. -
Step 9
Once the glaze is completely set, carefully transfer the bar to a cutting board and slice into 12-16 bars using a sharp knife. Serve and enjoy!
Important Information
Nutrition Facts (Per Serving)
It is important to consider this information as approximate and not to use it as definitive health advice.
Allergy Information
Please check ingredients for potential allergens and consult a health professional if in doubt.