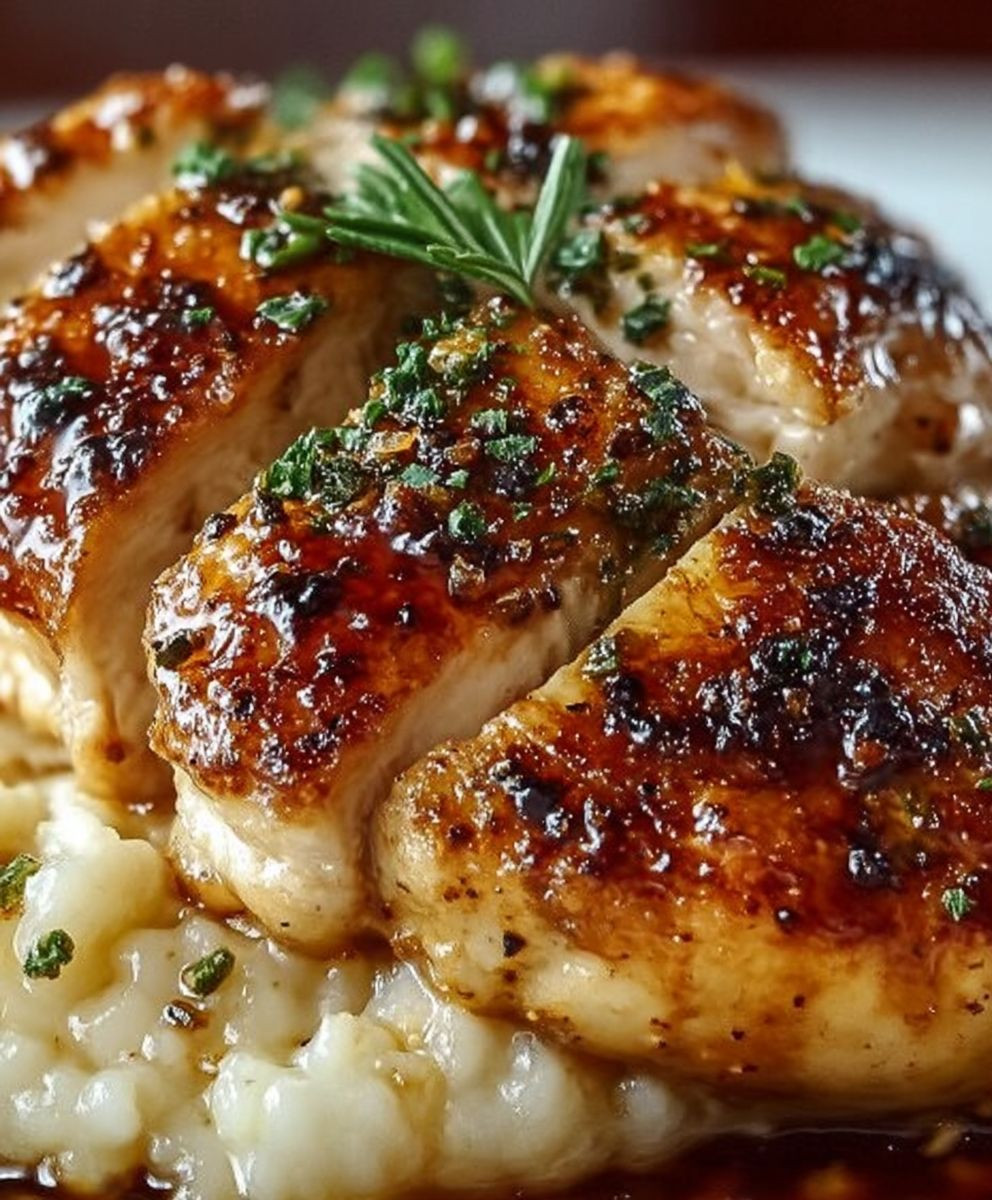
Melt in Mouth Chicken, that’s right, I said it! Imagine sinking your teeth into a piece of chicken so tender, so juicy, it practically dissolves on your tongue. Forget everything you thought you knew about dry, bland chicken – this recipe is a game-changer. This isn’t just dinner; it’s an experience.
While the exact origins of this particular method are a bit shrouded in mystery, the concept of tenderizing chicken through marination and slow cooking has roots in various culinary traditions around the world. From Asian braising techniques to Mediterranean stews, cultures have long sought ways to coax maximum flavor and tenderness from poultry. This recipe builds upon that rich history, offering a modern twist on a classic goal.
So, why do people rave about Melt in Mouth Chicken? It’s simple: the taste is incredible, the texture is divine, and the preparation is surprisingly easy. The secret lies in a carefully balanced marinade that not only infuses the chicken with flavor but also works to break down the muscle fibers, resulting in unparalleled tenderness. Plus, it’s incredibly versatile! Serve it with rice, noodles, roasted vegetables, or even in tacos – the possibilities are endless. Get ready to experience chicken like never before!

Ingredients:
- For the Chicken:
- 2 lbs boneless, skinless chicken breasts, cut into 1-inch cubes
- 1/2 cup cornstarch
- 1/4 cup all-purpose flour
- 1 teaspoon baking powder
- 1/2 teaspoon salt
- 1/4 teaspoon black pepper
- 1 large egg, lightly beaten
- 2 tablespoons vegetable oil
- For the Sauce:
- 1/2 cup soy sauce
- 1/4 cup rice vinegar
- 1/4 cup granulated sugar
- 2 tablespoons honey
- 1 tablespoon cornstarch
- 1 tablespoon water
- 1 teaspoon sesame oil
- 2 cloves garlic, minced
- 1 teaspoon ginger, grated
- 1/4 teaspoon red pepper flakes (optional, for heat)
- For Garnish:
- Sesame seeds
- Chopped green onions
- For Cooking:
- Vegetable oil, for frying
Preparing the Chicken:
Okay, let’s get started with the chicken! This is the foundation of our melt-in-your-mouth masterpiece. We want to make sure each piece is perfectly coated and ready to become incredibly tender.
-
Cut the Chicken: First, take your chicken breasts and cut them into bite-sized, 1-inch cubes. Try to keep them relatively uniform in size so they cook evenly. Nobody wants some pieces overcooked and others undercooked!
-
Combine Dry Ingredients: In a large bowl, whisk together the cornstarch, all-purpose flour, baking powder, salt, and pepper. The baking powder is key here – it helps create that light and airy texture we’re aiming for.
-
Coat the Chicken: Add the chicken cubes to the bowl with the dry ingredients. Toss them around until each piece is completely coated. Make sure there are no bare spots! This coating is what will give us that lovely crispy exterior.
-
Add Egg and Oil: Pour the lightly beaten egg and vegetable oil over the coated chicken. Mix well, ensuring that every piece is evenly coated with the egg mixture. The egg helps the coating adhere and adds richness.
-
Rest (Optional, but Recommended): Ideally, let the chicken sit for about 15-20 minutes after coating. This allows the coating to really adhere to the chicken and helps create a more tender result. You can skip this step if you’re short on time, but trust me, it makes a difference!
Making the Sauce:
While the chicken is resting (or while you’re prepping if you skipped the rest), let’s whip up the incredible sauce that will make this dish truly unforgettable. This sauce is a perfect balance of sweet, savory, and tangy, with a hint of warmth from the ginger and garlic.
-
Combine Sauce Ingredients: In a medium saucepan, whisk together the soy sauce, rice vinegar, sugar, honey, cornstarch, and water. Make sure the cornstarch is fully dissolved to prevent any lumps in your sauce.
-
Add Aromatics: Stir in the sesame oil, minced garlic, grated ginger, and red pepper flakes (if using). The sesame oil adds a wonderful nutty aroma, and the garlic and ginger provide a delicious depth of flavor. The red pepper flakes are optional, but they add a nice little kick!
-
Simmer the Sauce: Place the saucepan over medium heat and bring the sauce to a simmer, stirring constantly. Once it starts to simmer, reduce the heat to low and continue to simmer for about 5-7 minutes, or until the sauce has thickened to your desired consistency. It should be thick enough to coat the back of a spoon.
-
Taste and Adjust: Taste the sauce and adjust the seasonings as needed. If you prefer a sweeter sauce, add a little more honey or sugar. If you want it more tangy, add a splash more rice vinegar. If you like it spicier, add more red pepper flakes. This is your chance to customize the sauce to your liking!
-
Keep Warm: Once the sauce is ready, remove it from the heat and keep it warm until the chicken is cooked.
Cooking the Chicken:
Now for the fun part – frying the chicken! This is where the magic happens, and we transform those coated chicken cubes into crispy, golden-brown morsels of deliciousness. Be careful when working with hot oil!
-
Heat the Oil: Pour enough vegetable oil into a large skillet or wok to reach a depth of about 1 inch. Heat the oil over medium-high heat until it reaches a temperature of 350-375°F (175-190°C). You can use a deep-fry thermometer to check the temperature, or you can test it by dropping a small piece of chicken into the oil. If it sizzles immediately and turns golden brown in a few minutes, the oil is ready.
-
Fry in Batches: Carefully add the chicken cubes to the hot oil in batches, making sure not to overcrowd the skillet. Overcrowding will lower the oil temperature and result in soggy chicken. Fry the chicken for about 3-4 minutes per batch, or until it is golden brown and cooked through. Turn the chicken occasionally to ensure even cooking.
-
Remove and Drain: Use a slotted spoon or spider to remove the fried chicken from the oil and place it on a wire rack lined with paper towels to drain off any excess oil. This will help keep the chicken crispy.
-
Repeat: Repeat the frying process with the remaining chicken, making sure to maintain the oil temperature.
Combining and Serving:
Almost there! Now it’s time to bring everything together and create the ultimate melt-in-your-mouth chicken experience. This is where the magic truly happens!
-
Combine Chicken and Sauce: In a large bowl, combine the fried chicken and the warm sauce. Toss gently to coat the chicken evenly with the sauce. Make sure every piece is glistening with that delicious sauce!
-
Garnish: Sprinkle the sesame seeds and chopped green onions over the chicken. These add a touch of visual appeal and a burst of fresh flavor.
-
Serve Immediately: Serve the melt-in-your-mouth chicken immediately over rice or noodles. It’s best enjoyed while it’s hot and crispy!
Tips for Success:
- Don’t Overcrowd the Pan: Frying in batches is crucial for achieving crispy chicken. Overcrowding lowers the oil temperature, leading to soggy results.
- Maintain Oil Temperature: Keep the oil temperature consistent for even cooking. Use a thermometer for accuracy.
- Adjust the Sauce to Your Taste: Feel free to customize the sauce to your liking. Add more or less sugar, vinegar, or red pepper flakes to achieve your desired flavor profile.
- Serve Immediately: This dish is best enjoyed fresh and hot. The chicken will lose its crispiness over time.
Variations:
- Spicy Chicken: Add more red pepper flakes to the sauce or use a spicy chili oil for frying.
- Lemon Chicken: Add a tablespoon of lemon juice to the sauce for a tangy twist.
- Orange Chicken: Substitute orange juice for some of the water in the sauce and add a teaspoon of orange zest.
- Sesame Chicken: Double the amount of sesame seeds used for garnish and add a tablespoon of sesame seeds to the sauce.
Conclusion:
So there you have it! This Melt in Mouth Chicken recipe is truly a game-changer, and I genuinely believe it deserves a spot in your regular dinner rotation. Why? Because it delivers incredible flavor and tenderness with minimal effort. We’re talking about chicken so succulent, it practically melts in your mouth – hence the name! It’s the kind of dish that will impress your family and friends without you having to spend hours slaving away in the kitchen. Plus, it’s incredibly versatile, making it perfect for weeknight dinners or weekend gatherings.
But the best part? It’s not just about convenience; it’s about the taste. The combination of the marinade ingredients creates a symphony of flavors that will tantalize your taste buds. The chicken absorbs all those delicious notes, resulting in a dish that’s both savory and satisfying. Trust me, once you try this recipe, you’ll understand why I’m so enthusiastic about it.
Now, let’s talk serving suggestions. This Melt in Mouth Chicken is fantastic served with a variety of sides. For a classic pairing, try it with fluffy rice and steamed vegetables like broccoli or green beans. The rice will soak up all the flavorful juices from the chicken, creating a truly satisfying meal. If you’re looking for something a bit more adventurous, consider serving it with quinoa or couscous. These grains add a nutty flavor and a pleasant texture that complements the chicken perfectly.
And don’t forget about the vegetables! Roasted root vegetables like carrots, potatoes, and sweet potatoes are a great option, especially during the colder months. Their sweetness balances out the savory flavors of the chicken. A simple salad with a light vinaigrette is also a refreshing choice, especially during the warmer months.
But wait, there’s more! This recipe is also incredibly adaptable. Feel free to experiment with different variations to suit your taste preferences. For example, if you like a bit of heat, add a pinch of red pepper flakes to the marinade. Or, if you prefer a sweeter flavor, add a tablespoon of honey or maple syrup. You can also try using different herbs and spices to create your own unique flavor profile.
Another variation is to use different cuts of chicken. While I personally love using boneless, skinless chicken breasts for this recipe, you can also use chicken thighs or drumsticks. Just be sure to adjust the cooking time accordingly. Chicken thighs tend to be more forgiving and stay moist even if slightly overcooked, while drumsticks add a rustic touch to the dish.
You can even turn this into a complete one-pan meal by adding vegetables directly to the baking dish along with the chicken. This is a great way to save time and effort, and it also allows the vegetables to absorb all the delicious flavors from the chicken.
Ultimately, the possibilities are endless! The key is to have fun and experiment until you find the perfect combination that suits your taste.
So, what are you waiting for? I highly encourage you to give this Melt in Mouth Chicken recipe a try. I’m confident that you’ll love it as much as I do. And when you do, please share your experience with me! I’d love to hear your feedback, see your photos, and learn about any variations you’ve tried. You can leave a comment below or tag me on social media. Let’s spread the word about this amazing recipe and help everyone enjoy delicious, melt-in-your-mouth chicken! Happy cooking!
Melt in Mouth Chicken: The Ultimate Recipe Guide
Crispy, bite-sized chicken in a sweet, savory, and tangy sauce. This melt-in-your-mouth chicken is perfect over rice or noodles for a quick and delicious meal.
Ingredients
Instructions
Recipe Notes
- For best results, don’t overcrowd the pan when frying the chicken. Fry in batches to maintain oil temperature and ensure crispiness.
- Adjust the sauce to your taste by adding more or less sugar, vinegar, or red pepper flakes.
- Serve immediately for the best flavor and texture. The chicken will lose its crispiness over time.