Old Fashioned Buttermilk Donut Bars are more than just a sweet treat; they are a delightful journey back to the comforting flavors of yesteryear, reimagined for modern convenience. Have you ever wished you could enjoy the irresistible taste and texture of a classic buttermilk donut without the fuss of individual shaping and frying? Well, prepare to be absolutely thrilled, because this recipe delivers all that beloved goodness in a wonderfully shareable and surprisingly simple format!
I often find myself craving that distinctive tangy sweetness and incredibly tender crumb that only a true buttermilk donut can deliver. These incredible bars capture every cherished aspect of that beloved fried dough, transforming it into a surprisingly easy-to-make dessert. The buttermilk works its magic, ensuring each bite is moist, light, and bursting with a subtle, zesty undertone that perfectly balances the sweet glaze. Historically, buttermilk donuts have been a staple in American bakeries and home kitchens, celebrated for their unique flavor profile and satisfying density, and these bars pay perfect homage to that rich legacy without requiring a deep fryer.
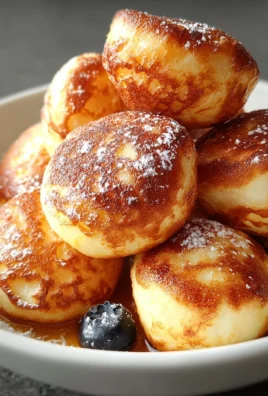
What truly makes people utterly adore this dish? It’s the harmonious blend of crispy edges and a pillowy soft interior, often enhanced with a hint of warm nutmeg, all culminating in a simple, yet utterly decadent glaze that melts in your mouth. Our recipe for these delectable Old Fashioned Buttermilk Donut Bars promises to deliver that nostalgic warmth and homemade goodness straight to your kitchen, proving that some classics are truly timeless, especially when they come in a more convenient, sliceable form. I am so excited for you to experience this deliciousness!

Ingredients:
For the Old Fashioned Buttermilk Donut Bars:
- ½ cup (113g) unsalted butter, softened to room temperature
- 1 ¼ cups (250g) granulated sugar
- 2 large eggs, at room temperature
- 1 teaspoon pure vanilla extract
- 4 ½ cups (540g) all-purpose flour, plus more for dusting your work surface
- 1 ½ teaspoons baking powder
- 1 teaspoon baking soda
- ¾ teaspoon salt
- ½ teaspoon freshly grated nutmeg – this is key for that classic old-fashioned flavor!
- 1 ½ cups (360ml) buttermilk, at room temperature
- Vegetable oil or canola oil, for deep frying (approximately 8-10 cups, depending on your pot size)
For the Classic Vanilla Glaze:
- 4 cups (480g) confectioners’ sugar (powdered sugar), sifted
- ½ cup (120ml) whole milk or heavy cream, plus more if needed
- 1 ½ teaspoons pure vanilla extract
- ¼ teaspoon salt (optional, but it really brightens the flavor!)
Preparing the Donut Dough:
- Start by Combining Dry Ingredients: In a large mixing bowl, I like to whisk together my all-purpose flour, baking powder, baking soda, salt, and that wonderful freshly grated nutmeg. Sifting the flour isn’t strictly necessary, but it does help ensure a lighter texture for your final donut bars, so if you have the time, go for it! Make sure all the dry ingredients are really well combined and set this bowl aside for a moment.
- Creaming Butter and Sugar: In the bowl of a stand mixer fitted with the paddle attachment, or using a large bowl and a handheld electric mixer, cream together the softened unsalted butter and granulated sugar. You’ll want to beat this on medium speed for about 3-5 minutes until the mixture is truly light, fluffy, and pale in color. This step is crucial for incorporating air into your dough, which contributes to a tender, cake-like texture in the finished donut bars. Don’t rush it!
- Incorporating Eggs and Vanilla: Next, I add the two large eggs, one at a time, beating well after each addition. Scrape down the sides of the bowl as needed to ensure everything is fully incorporated. After the eggs, stir in the pure vanilla extract. The vanilla not only adds a lovely aroma but also complements the nutmeg beautifully.
- Alternating Wet and Dry Ingredients: Now it’s time to bring everything together. With the mixer on low speed, I gradually add the dry ingredient mixture to the wet mixture, alternating with the room temperature buttermilk. Begin by adding about one-third of the dry ingredients, mixing just until combined. Then, pour in half of the buttermilk, mixing until just incorporated. Repeat this process, finishing with the remaining dry ingredients. Be careful not to overmix the dough! Overmixing can develop the gluten too much, leading to tough donut bars, and we definitely want ours to be tender and delicious. Stop mixing as soon as the flour streaks disappear. The dough will be quite soft and slightly sticky, which is exactly what we’re looking for.
- Chilling the Dough: Once your dough is mixed, gently turn it out onto a lightly floured surface. Form it into a thick disc or rectangle. Wrap the dough tightly in plastic wrap and refrigerate it for at least 2 hours, or preferably overnight. This chilling step is absolutely essential for several reasons: it makes the dough much easier to handle, prevents it from becoming too sticky during rolling and cutting, and allows the gluten to relax, which further contributes to that wonderfully tender crumb we’re aiming for. A well-chilled dough is key to successful frying, ensuring your donut bars hold their shape.
Shaping and Cutting the Donut Bars:
- Preparing Your Work Surface: When you’re ready to fry, retrieve the chilled dough from the refrigerator. Lightly flour a clean work surface, your rolling pin, and even your hands. This dough can still be a bit sticky, even after chilling, so don’t be shy with the flour, but don’t overdo it either – we don’t want to incorporate too much extra flour into the dough.
- Rolling the Dough: Gently roll out the dough into a large rectangle, aiming for a thickness of about ½ inch (just over 1 cm). Try to maintain an even thickness across the entire surface; this will ensure that your donut bars cook evenly in the hot oil. If the dough starts to stick, lift it gently and add a little more flour underneath. If it becomes too soft or difficult to handle, don’t hesitate to pop it back into the fridge for 10-15 minutes to firm up again.
- Cutting the Donut Bars: Using a sharp knife, a pizza cutter, or a pastry wheel, carefully cut the rolled-out dough into individual rectangular bars. I usually aim for pieces that are about 1 inch wide and 3-4 inches long, but you can adjust the size to your preference. Remember, these are “bars,” so think oblong, not round. You can re-roll the scraps once or twice, but be aware that subsequent batches may be slightly tougher due to the additional handling. Place the cut donut bars onto baking sheets that are lightly dusted with flour or lined with parchment paper. This prevents them from sticking while they wait to be fried.
Frying the Buttermilk Donut Bars:
- Setting Up Your Frying Station: Now for the exciting part! In a large, heavy-bottomed pot, Dutch oven, or deep fryer, pour enough vegetable or canola oil to reach a depth of about 3-4 inches. Attach a deep-fry thermometer to the side of the pot. Heat the oil over medium-high heat until it reaches a consistent temperature of 350°F (175°C). Maintaining the correct oil temperature is paramount for perfect donuts. If the oil is too cool, the donuts will absorb too much oil and become greasy. If it’s too hot, they’ll brown too quickly on the outside, leaving the inside raw.
- Frying the Donut Bars: Once the oil is at temperature, carefully lower 3-4 donut bars into the hot oil using a slotted spoon or spider. Do not overcrowd the pot, as this will lower the oil temperature and lead to uneven cooking. Fry for about 1-2 minutes per side, or until the donut bars are beautifully golden brown and puffed up. You’ll notice they develop that characteristic craggy, old-fashioned appearance as they fry, which is just wonderful!
- Draining the Fried Donut Bars: Using your slotted spoon or spider, carefully remove the cooked donut bars from the oil. Hold them over the pot for a moment to allow any excess oil to drip off. Transfer the fried donut bars to a wire rack set over a baking sheet lined with paper towels. This setup allows air to circulate around them, preventing sogginess, and the paper towels will absorb any remaining oil. Let them cool slightly on the rack while you continue frying the remaining batches. It’s important to glaze them while they are still warm, but not piping hot.
Crafting the Classic Vanilla Glaze:
- Preparing the Glaze Ingredients: While your donut bars are cooling slightly, let’s whip up that irresistible vanilla glaze. In a medium bowl, I combine the sifted confectioners’ sugar, whole milk or heavy cream, pure vanilla extract, and that optional but highly recommended pinch of salt. Sifting the confectioners’ sugar is a step I never skip, as it ensures a super smooth, lump-free glaze.
- Whisking to Perfection: Whisk all the glaze ingredients together until you achieve a completely smooth and pourable consistency. If the glaze seems too thick, add a tiny bit more milk, about ½ teaspoon at a time, until it reaches your desired consistency. It should be thick enough to cling to the donut bars but thin enough to drip off slightly. Conversely, if it’s too thin, add a tablespoon or two more sifted confectioners’ sugar.
Glazing and Finishing Your Donut Bars:
- Dipping the Warm Donut Bars: This is where the magic happens! Once the donut bars are warm enough to handle comfortably (but not hot, as that would make the glaze run right off), one by one, dip each donut bar into the vanilla glaze. You can dip just one side or fully submerge them for an all-over coating. I usually like to dip one side, letting the glaze pool a little, giving that classic old-fashioned look.
- Allowing Excess Glaze to Drip: Lift the glazed donut bar from the bowl, allowing any excess glaze to drip back into the bowl for a few seconds. This prevents a thick, clumpy layer of glaze and helps it set beautifully.
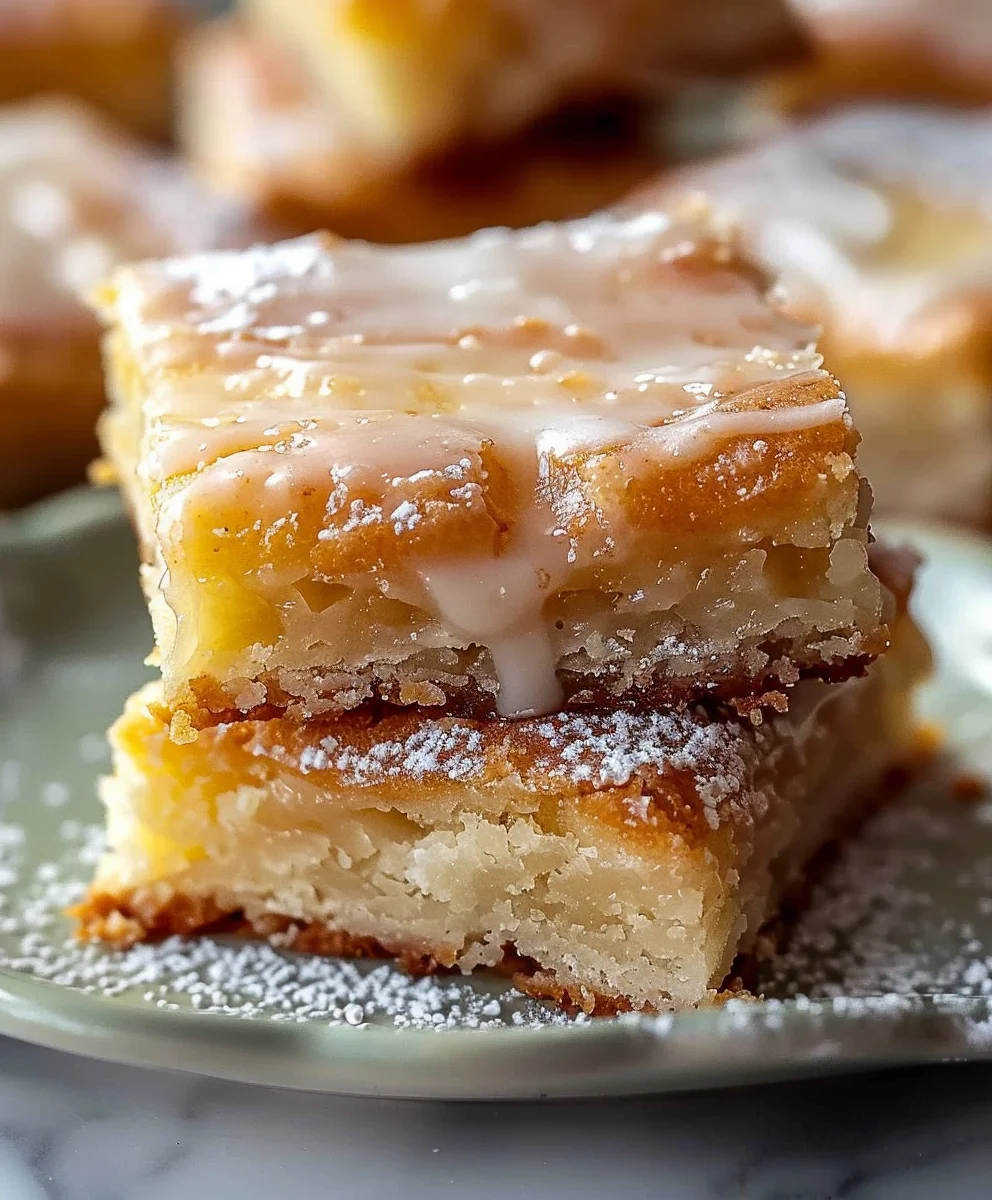
- Setting the Glaze: Place the glazed donut bars back onto the wire rack set over the baking sheet. This allows the glaze to set properly without sticking to your counter. The glaze will firm up within 15-30 minutes, creating a slightly crisp, sweet shell that perfectly complements the tender, rich donut inside.
Tips for Perfection and Storage:
- Enjoy Immediately: These Old Fashioned Buttermilk Donut Bars are, without a doubt, at their absolute best when enjoyed fresh, shortly after they’ve been glazed and the glaze has set. The aroma alone is enough to make your mouth water!
- Storage: If by some miracle you have any leftovers, you can store them in an airtight container at room temperature for up to 2 days. While they won’t have the exact same fresh-from-the-fryer crispness, they’ll still be wonderfully soft and delicious. I find that gently reheating them for a few seconds in the microwave can sometimes bring back a bit of their tenderness, but they are generally best consumed fresh.
- Don’t Waste the Oil: After frying, allow your oil to cool completely. You can then strain it through a fine-mesh sieve lined with cheesecloth to remove any food particles. Store the strained oil in a clean, airtight container in a cool, dark place, and you can reuse it for frying several more times. This is a great way to be economical and reduce waste.
- Experiment with Flavor: While the classic vanilla glaze is my favorite, feel free to experiment! You could add a pinch of cinnamon to the glaze for a cinnamon sugar donut bar twist, or even a hint of lemon zest for a bright, citrusy note. Some people even like a simple dusting of powdered sugar rather than a full glaze. Make them your own!
- Temperature Control is Key: I cannot stress enough the importance of an accurate thermometer for your frying oil. Fluctuations in temperature are the biggest enemy of a perfectly fried donut. Keep an eye on that thermometer and adjust your burner as needed to maintain that sweet spot of 350-375°F (175-190°C). A stable temperature ensures even cooking and that beautiful golden-brown exterior.
- A Note on Buttermilk: Buttermilk is truly what gives these “old fashioned” donut bars their signature tangy flavor and incredibly tender crumb. If you don’t have fresh buttermilk on hand, you can make a quick substitute: add 1 ½ tablespoons of fresh lemon juice or white vinegar to a liquid measuring cup, then fill the rest of the way with whole milk to the 1 ½ cup line. Stir gently and let it sit for 5-10 minutes until it slightly curdles. While it works in a pinch, I always recommend using real buttermilk for the best results!
- Patience is a Virtue: From chilling the dough to letting the oil reach the right temperature, and finally allowing the glaze to set, patience is your best friend when making these donut bars. Each step contributes to the final, mouth-watering outcome. Take your time, enjoy the process, and you’ll be rewarded with a truly special treat!
Conclusion:
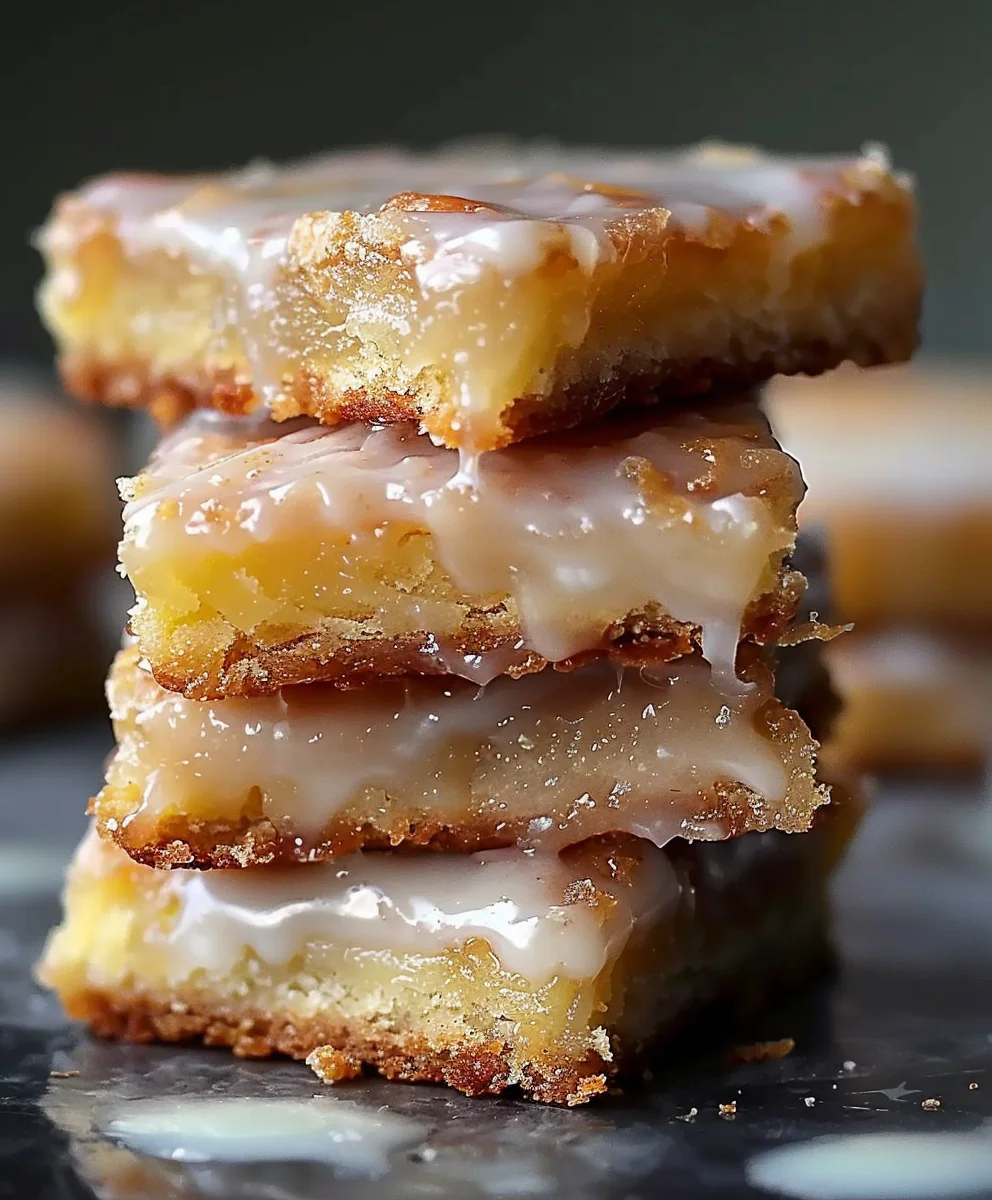
So, there you have it, my friends! We’ve journeyed through the simple yet magical process of creating something truly special in your own kitchen. I genuinely believe that this recipe isn’t just about baking; it’s about crafting memories, filling your home with an irresistible aroma, and indulging in a treat that speaks to the soul. These aren’t just any dessert bars; they are an invitation to experience comfort, nostalgia, and pure deliciousness. The unique tang of buttermilk combined with that perfectly crisp-on-the-outside, tender-on-the-inside texture, all crowned with a sweet, simple glaze, makes for an unparalleled experience. It’s that delightful contrast of textures and flavors that elevates them from a mere snack to a truly memorable occasion. Imagine the smiles when you present a tray of these golden beauties – a testament to a little time and a lot of love poured into the preparation. This recipe truly delivers on its promise of a homemade delight that surpasses anything you might find pre-packaged, offering a warmth and authenticity that only scratch-baking can provide.
Why are these a must-try, you ask? Because they offer that coveted “just like grandma used to make” feeling, even if your grandma never actually made them. The beauty of the Old Fashioned Buttermilk Donut Bars lies in their unassuming elegance. They don’t require fancy equipment or obscure ingredients, yet the result is nothing short of spectacular. Every bite transports you to a simpler time, a moment of pure, unadulterated joy. It’s the kind of treat that makes a regular morning feel like a holiday and turns an ordinary gathering into a festive occasion. Trust me when I say, once you taste that perfect balance of slightly tangy, profoundly sweet, and wonderfully tender, you’ll understand why I’m so passionate about sharing this with you. They represent a return to classic, wholesome baking, proving that sometimes, the most basic ingredients can create the most extraordinary flavors. These bars are a celebration of straightforward, honest baking that yields incredibly comforting and satisfying results every single time.
Serving Suggestions & Creative Variations:
Now, let’s talk about making these beauties even more uniquely yours! While they are absolutely divine served simply warm, perhaps with a steaming cup of coffee or a tall glass of milk, the possibilities for customization are endless. For a delightful breakfast or brunch spread, arrange them alongside fresh berries and perhaps a dollop of whipped cream. They also make an incredible dessert, especially if you get creative with your glazes and toppings. Think about pairing them with a scoop of vanilla bean ice cream for a warm, sweet, and cool contrast that’s simply heavenly.
Glaze It Your Way:
- For a classic twist, consider a rich chocolate glaze made with cocoa powder and powdered sugar, thinned with a little milk or cream. This adds a decadent layer that chocolate lovers will adore.
- A maple glaze, using pure maple syrup, brings a wonderful depth of flavor, especially fitting for autumn or a cozy weekend morning. Its earthy sweetness perfectly complements the buttermilk.
- Feeling zesty? A lemon glaze, made with fresh lemon juice, adds a bright, invigorating tang that beautifully complements the richness of the donut bar, offering a delightful contrast.
- Or, infuse your classic vanilla glaze with a pinch of cinnamon or nutmeg for a subtle spice kick that enhances that “old fashioned” feel, making them even more reminiscent of traditional donuts.
- For something truly indulgent, a brown butter glaze can add a nutty, caramelized undertone that is simply irresistible.
Top It Off:
- Sprinkles are always a hit, especially with kids (and adults who are kids at heart!). Rainbow sprinkles or chocolate sprinkles can add a festive touch and a bit of whimsy.
- For a nutty crunch, finely chop some toasted pecans, walnuts, or almonds and scatter them over the wet glaze. The warmth from toasting brings out their full flavor.
- Toasted coconut flakes offer a tropical, chewy dimension that pairs wonderfully with the sweet glaze.
- A sprinkle of mini chocolate chips or even a few M&M’s can add a fun pop of color and flavor, especially if you’re serving them to a younger crowd.
- Don’t shy away from a sweet and savory combo! Crispy, crumbled bacon bits are surprisingly delicious when paired with a maple glaze, creating an adventurous flavor profile.
- And for the ultimate simplicity, a dusting of powdered sugar after they’ve cooled completely creates an elegant, understated finish that allows the bar’s natural flavor to shine.
- Consider a drizzle of caramel or white chocolate over the finished glaze for an extra touch of gourmet appeal.
You could even experiment with adding a touch of citrus zest (orange or lemon) directly into the dough for a fragrant note, or a pinch of cardamom for an exotic warmth that beautifully elevates the humble donut bar. The base recipe is so wonderfully versatile, acting as a perfect canvas for your culinary imagination. Don’t be afraid to play around with these ideas and discover your new favorite combination – the kitchen is a place for creativity, after all!
Now, It’s Your Turn!
I truly hope this recipe inspires you to preheat your oven and get baking. There’s an unparalleled satisfaction that comes from creating something so utterly delicious from scratch, something that brings smiles to the faces of your loved ones. Don’t just take my word for it – give these incredible Old Fashioned Buttermilk Donut Bars a try this week! I promise you won’t regret the effort; in fact, you’ll probably find yourself making them again and again. They are perfect for sharing at a potluck, gifting to a neighbor, or simply enjoying with your family on a lazy Sunday morning, transforming an ordinary day into something a little more extraordinary. The joy of baking and sharing homemade treats is one of life’s simplest yet most profound pleasures, and these donut bars are perfectly suited for that purpose.
When you do bake them, I would absolutely love to hear about your experience! What variations did you try? Who did you share them with? Did they evoke any special memories for you? Please feel free to leave a comment below and share your photos or thoughts. Your feedback and creativity are what make this community so vibrant and inspiring. Let’s spread the joy of homemade baking, one delicious Old Fashioned Buttermilk Donut Bar at a time! Happy baking, everyone!
Old Fashioned Buttermilk Donut Bars
These Old Fashioned Buttermilk Donut Bars capture the irresistible taste and texture of classic buttermilk donuts without the fuss of individual shaping and frying. Enjoy a delightful journey back to comforting flavors in a wonderfully shareable and surprisingly simple bar format, complete with a tender crumb and zesty undertone, all balanced by a sweet vanilla glaze.
Ingredients
-
½ cup (113g) unsalted butter
-
1 ¼ cups (250g) granulated sugar
-
2 large eggs
-
1 tsp pure vanilla extract
-
4 ½ cups (540g) all-purpose flour
-
1 ½ tsp baking powder
-
1 tsp baking soda
-
¾ tsp salt
-
½ tsp freshly grated nutmeg
-
1 ½ cups (360ml) buttermilk
-
Vegetable oil or canola oil, for deep frying
-
4 cups (480g) confectioners’ sugar, sifted
-
½ cup (120ml) whole milk or heavy cream
-
1 ½ tsp pure vanilla extract
-
¼ tsp salt
Instructions
-
Step 1
In a large bowl, whisk together the all-purpose flour, baking powder, baking soda, salt, and freshly grated nutmeg. Set aside. -
Step 2
In a stand mixer, cream softened butter and granulated sugar on medium speed for 3-5 minutes until light, fluffy, and pale. -
Step 3
Add eggs one at a time, beating well after each. Scrape down bowl sides. Stir in vanilla extract. -
Step 4
On low speed, alternately add dry ingredient mixture and buttermilk to the wet mixture, beginning and ending with dry ingredients. Mix just until flour streaks disappear; do not overmix. Dough will be soft and sticky. -
Step 5
Turn dough onto a lightly floured surface, form into a disc/rectangle. Wrap tightly in plastic wrap and refrigerate for at least 2 hours, or preferably overnight. This is essential for handling and tender results. -
Step 6
Lightly flour your work surface, rolling pin, and hands. Roll the chilled dough into a large rectangle, about ½ inch (1 cm) thick, ensuring even thickness. -
Step 7
Using a sharp knife or pizza cutter, cut the dough into rectangular bars, approximately 1 inch wide and 3-4 inches long. Place cut bars on lightly floured or parchment-lined baking sheets. -
Step 8
In a large, heavy-bottomed pot, pour enough vegetable/canola oil to reach 3-4 inches deep. Attach a deep-fry thermometer. Heat oil over medium-high heat to 350°F (175°C). Maintaining temperature is crucial. -
Step 9
Carefully lower 3-4 donut bars into the hot oil using a slotted spoon. Do not overcrowd. Fry for 1-2 minutes per side, until golden brown and puffed up. -
Step 10
Remove cooked donut bars with a slotted spoon, letting excess oil drip off. Transfer to a wire rack set over a paper towel-lined baking sheet to drain and cool slightly. Glaze while still warm (not piping hot). -
Step 11
In a medium bowl, whisk together sifted confectioners’ sugar, whole milk/heavy cream, pure vanilla extract, and salt until smooth and pourable. Adjust consistency with more milk (½ tsp at a time) or sugar (1-2 tbsp). -
Step 12
Dip each warm donut bar into the vanilla glaze, coating one side or fully submerging. Lift and allow excess glaze to drip off. Place glazed bars back on the wire rack to set for 15-30 minutes.
Important Information
Nutrition Facts (Per Serving)
It is important to consider this information as approximate and not to use it as definitive health advice.
Allergy Information
Please check ingredients for potential allergens and consult a health professional if in doubt.