Oreo Cheesecake Cookie Cups – just hearing those words conjures images of pure dessert bliss, doesn’t it? As an avid baker and dessert enthusiast, I can confidently say that these delightful mini treats are much more than just a sweet indulgence; they represent the perfect fusion of beloved classics in one convenient, bite-sized package. While they might not have centuries of history, their innovation lies in bringing together the universally adored Oreo cookie, the rich creaminess of cheesecake, and the delightful structure of a cookie cup. It’s a testament to modern dessert artistry, crafting individual portions that eliminate the mess and fuss of serving traditional cheesecakes.
What makes these particular treats so incredibly popular? It’s the irresistible interplay of textures and flavors. Imagine a perfectly baked, slightly chewy cookie base forming a sturdy cup, cradling a velvety smooth, tangy cheesecake filling, all crowned with the iconic crunch of crushed Oreo cookies. This symphony of sweet, creamy, and chocolatey notes, combined with their charming individual presentation, makes “Oreo Cheesecake Cookie Cups” an absolute showstopper at any gathering, from casual get-togethers to elegant parties. They offer all the decadence of a full cheesecake with the added joy of an easy-to-handle, perfectly portioned delight, ensuring every bite is a moment of pure culinary happiness.

Ingredients:
-
For the Oreo Cookie Crust:
- 24 full-sized Oreo cookies (about 2 cups of crumbs), crushed
- 6 tablespoons (85g) unsalted butter, melted
-
For the Creamy Cheesecake Filling:
- 16 ounces (450g) full-fat cream cheese, softened to room temperature (two 8-ounce blocks)
- ½ cup (100g) granulated sugar
- 1 large egg, at room temperature
- 1 teaspoon pure vanilla extract
- ¼ cup (60ml) sour cream or heavy cream, at room temperature
- 6 full-sized Oreo cookies, roughly chopped or broken into small pieces
-
For the Optional Garnish:
- Whipped cream or cool whip
- Additional crushed Oreo cookies or mini Oreos
Instructions:
Get ready to create some absolutely delightful Oreo Cheesecake Cookie Cups! These little treats are packed with flavor and texture, and I promise, they’re worth every moment in the kitchen. Let’s dive in!
Phase 1: Preparing Your Muffin Pan and Oreo Cookie Crust
- Preheat your oven and prep your pan: First things first, let’s get that oven ready. Preheat it to 350°F (175°C). While that’s heating up, grab a 12-cup standard muffin pan. To ensure your beautiful Oreo Cheesecake Cookie Cups come out easily, you’ll want to line each cup with paper liners. This step is crucial for preventing sticking and making the cleanup a breeze later on. Trust me, you’ll thank yourself for this small effort.
- Crush those Oreos for the crust: Now for the fun part – preparing the iconic Oreo crust! Take your 24 full-sized Oreo cookies. You have a couple of options here for crushing them. My preferred method is to place them in a food processor and pulse until they become fine, even crumbs. We’re looking for a texture similar to coarse sand. If you don’t have a food processor, no worries! You can place the Oreos in a large, heavy-duty zip-top bag, seal it, and then use a rolling pin or the bottom of a heavy glass to crush them until you achieve those fine crumbs. Make sure there are no large chunks left, as this will affect the integrity of your crust.
- Combine crumbs with melted butter: Once your Oreo crumbs are perfectly fine, transfer them to a medium-sized mixing bowl. Now, gently pour in your 6 tablespoons of melted unsalted butter. Using a fork or a spoon, mix the butter into the crumbs thoroughly. You want every single crumb to be coated in that glorious butter. The mixture should resemble wet sand – when you press a small amount between your fingers, it should hold together. This is the foundation for your irresistible Oreo Cheesecake Cookie Cups, so take your time and mix it well!
- Form the crust in the muffin cups: It’s time to create the base of our cookie cups. Divide the buttery Oreo mixture evenly among the 12 lined muffin cups. I like to use a tablespoon measure to ensure consistency. Once the crumbs are in, use the back of a spoon, a small measuring cup, or even your fingers to firmly press the mixture into the bottom of each liner. You want a compact, even layer. This firm pressing is key to a sturdy crust that won’t crumble when you bite into your finished Oreo Cheesecake Cookie Cups.
- Pre-bake the crust: Pop the muffin pan into your preheated oven and bake the crusts for just 5 minutes. This brief pre-bake helps to set the crust, making it even more stable and deliciously crisp. While it’s baking, you’ll start to smell that wonderful Oreo aroma filling your kitchen – a little preview of the deliciousness to come!
- Cool the pre-baked crusts: Once the 5 minutes are up, carefully remove the muffin pan from the oven. Set it aside on a wire rack to cool slightly while you prepare the creamy cheesecake filling. We want these crusts to be cool enough that they don’t melt our cheesecake batter when we add it.
Phase 2: Crafting the Creamy Cheesecake Filling
- Prepare the cream cheese: In a large mixing bowl, using an electric mixer (either a stand mixer with the paddle attachment or a handheld mixer), beat your 16 ounces of softened full-fat cream cheese on medium speed. It’s absolutely essential that your cream cheese is at room temperature. If it’s cold, you’ll end up with lumps, and we want a silky-smooth cheesecake filling for our Oreo Cheesecake Cookie Cups. Beat it for about 2-3 minutes, scraping down the sides of the bowl occasionally, until it’s light, fluffy, and completely smooth.
- Add the sugar: Gradually add the ½ cup of granulated sugar to the cream cheese, beating on low speed until just combined. Then, increase the speed to medium and beat for another 1-2 minutes until the sugar is fully incorporated and the mixture is even smoother and a bit glossy. Be careful not to overbeat at this stage, as we don’t want to incorporate too much air.
- Incorporate the egg: Now, add the single large egg. Again, ensure your egg is at room temperature; this helps it emulsify better with the cream cheese mixture. Beat on low speed just until the egg is fully incorporated. Do not overmix once the egg is added, as overmixing can lead to cracks in your cheesecake, and while these are small cups, we still want them perfect! Scrape down the sides of the bowl one last time to ensure everything is mixed evenly.
- Stir in the vanilla and sour cream/heavy cream: Next, add the 1 teaspoon of pure vanilla extract and the ¼ cup of sour cream or heavy cream. The sour cream (or heavy cream) adds a wonderful tang and extra creaminess to the filling, making these Oreo Cheesecake Cookie Cups incredibly rich and luxurious. Beat on low speed until just combined and smooth. Give it a final scrape with a spatula to ensure there are no unmixed pockets at the bottom of the bowl.
- Fold in the chopped Oreos: Finally, gently fold in your 6 roughly chopped Oreo cookies using a rubber spatula. We’re not looking for fine crumbs here; delightful little chunks of Oreo will provide an extra burst of texture and flavor within the creamy cheesecake. Distribute them evenly throughout the batter. This step truly elevates the “Oreo” in our Oreo Cheesecake Cookie Cups!
Phase 3: Assembling and Baking Your Oreo Cheesecake Cookie Cups
- Fill the cookie cups: Take your cooled muffin pan with the pre-baked Oreo crusts. Carefully spoon the creamy cheesecake filling over each crust, dividing it as evenly as possible among the 12 cups. I usually fill them nearly to the top of the paper liner, leaving just a tiny bit of room for expansion. Gently tap the muffin pan on your counter a few times to release any air bubbles and help the filling settle evenly. This ensures a nice, flat top for your Oreo Cheesecake Cookie Cups.
- Bake the cheesecake cups: Place the muffin pan into your preheated 350°F (175°C) oven. Bake for approximately 18-22 minutes. Baking times can vary depending on your oven, so keep an eye on them. You’ll know they’re done when the edges appear set and slightly puffed, but the centers still have a slight jiggle to them when you gently shake the pan. They will continue to set as they cool, so resist the urge to overbake! Overbaking can result in a dry or cracked cheesecake.
- Cool completely: Once baked, carefully remove the muffin pan from the oven and place it on a wire rack to cool completely at room temperature. This will take at least 30-60 minutes. Do not attempt to move them from the pan or refrigerate them while they are still warm. This gradual cooling process is essential for the structure and texture of your Oreo Cheesecake Cookie Cups.
Phase 4: Chilling, Garnishing, and Enjoying!
- Chill the cookie cups: Once your Oreo Cheesecake Cookie Cups have cooled completely to room temperature, it’s time for the most important (and perhaps the hardest!) step: chilling. Transfer the muffin pan to the refrigerator and chill for a minimum of 3-4 hours, or ideally, overnight. This chilling period is absolutely crucial. It allows the cheesecake to fully set, firm up, and develop its full creamy texture and rich flavor. Rushing this step will result in a softer, less stable cookie cup. Patience is a virtue here, my friend!
- Garnish and serve: Once thoroughly chilled, carefully remove the Oreo Cheesecake Cookie Cups from the muffin pan. You can gently lift them out by the paper liners. Now for the final flourish! If you’re feeling extra indulgent, top each cookie cup with a dollop of fresh whipped cream or a swirl of cool whip. For that extra “Oreo” appeal, sprinkle some additional crushed Oreo cookies over the whipped cream, or place a mini Oreo cookie on top. These garnishes not only make them look absolutely stunning but also add another layer of texture and flavor.
- Storage: Store any leftover Oreo Cheesecake Cookie Cups in an airtight container in the refrigerator for up to 3-4 days. While they are delicious right away, I find they often taste even better the next day once the flavors have had more time to meld. They make fantastic make-ahead desserts for parties or just a delightful treat throughout the week!
- Enjoy your homemade delight: And there you have it! Your very own batch of homemade, irresistible Oreo Cheesecake Cookie Cups. Each bite offers a delightful crunch from the Oreo crust, followed by a smooth, tangy, and sweet cheesecake filling studded with more Oreo bits. These are truly individual portions of pure joy, perfect for sharing (or not!). I hope you love making and devouring these as much as I do!
Conclusion:
Well, my friends, we’ve come to the delicious end of our journey with these incredible treats, and I truly hope you’re feeling inspired to get into the kitchen. After walking you through every step, I can confidently say that these aren’t just any ordinary desserts; they are a revelation. This recipe combines the comforting crunch of an Oreo cookie with the smooth, tangy richness of cheesecake, all nestled in a convenient, bite-sized cup. It’s an ingenious blend of textures and flavors that will undoubtedly become a new favorite in your baking repertoire. There’s a reason why I’m so enthusiastic about them – they effortlessly deliver an extraordinary dessert experience without demanding hours of intricate work. Imagine the delighted expressions on the faces of your loved ones when you present them with something so uniquely delightful. This recipe truly offers the best of both worlds: gourmet taste with home-baked accessibility, making it an undeniable must-try for any occasion.
What makes these particular treats an absolute standout? It’s the perfect marriage of a familiar, beloved cookie crust creating a stable, flavorful base, then crowned with that creamy, dreamy cheesecake filling, expertly studded with even more crushed Oreo pieces. Every single bite is a symphony of sweet, creamy, and crunchy. Forget complicated water baths or elaborate cake decorating; these Oreo Cheesecake Cookie Cups are designed for maximum impact with minimal fuss. They look incredibly impressive, yet they are surprisingly simple to execute, making them ideal for both seasoned bakers looking for a quick win and beginners eager to impress. I’ve personally seen them disappear from dessert platters faster than anything else, always prompting requests for the recipe. They are, without a doubt, a dessert that promises to satisfy every single craving for something decadently sweet and utterly delightful, making your efforts incredibly rewarding.
Now, let’s talk about how to truly elevate your experience with these delightful cookie cups. While they are undeniably perfect straight out of the fridge, offering a cool and creamy bite, there are countless ways to enjoy them. For a simple yet satisfying treat, serve them alongside a tall glass of cold milk or a freshly brewed cup of coffee or tea – the classic pairing really brings out their rich flavors. If you’re feeling a little more indulgent, consider serving them slightly chilled with a generous dollop of freshly whipped cream and a few extra Oreo crumbs sprinkled on top for an added flourish. For an even more decadent experience, a small scoop of premium vanilla bean ice cream or a warm drizzle of rich chocolate fudge or gooey caramel sauce transforms them into a truly show-stopping dessert. Imagine the comforting warmth of a brownie a la mode, but with the added cool, creamy texture of cheesecake! They’re also fantastic for parties; arrange them artfully on a tiered serving platter, and watch them become the undisputed star of your dessert table, guaranteed to garner compliments.
Get Creative with Your Cookie Cups!
The beauty of this recipe isn’t just in its current perfection, but also in its incredible versatility. Don’t be afraid to experiment and make these cookie cups truly your own. Instead of the traditional Oreo base, why not try a different cookie? Chocolate chip cookies, peanut butter cookies, or even graham crackers for a more classic cheesecake crust could all offer unique and delicious twists. You could also play with the mix-ins for the cheesecake filling. While crushed Oreo is supreme, imagine tiny pieces of different candy bars like Snickers or Reese’s, colorful sprinkles for a festive look, or even some finely chopped nuts for added texture and a nutty flavor profile. For a seasonal touch, a hint of peppermint extract and crushed candy canes during the holidays, or a swirl of pumpkin puree and a dash of cinnamon in the fall, could make these truly special and seasonally appropriate. If you’re looking to simplify the process even further, a good quality pre-made cookie dough for the base would also work wonderfully. The possibilities are truly endless, limited only by your imagination and what delicious combinations you can dream up in your kitchen!
So, what are you waiting for? I wholeheartedly encourage you to roll up your sleeves, gather your ingredients, and give this fantastic recipe a try. You’ll be amazed at how easily these come together and how utterly satisfying they are. Baking should be a joyful and rewarding experience, and I promise you, these cookie cups deliver on both counts. Once you’ve whipped up your batch, I would absolutely love to hear about your experience! Did you stick to the original recipe, or did you venture into some exciting variations? Please, share your baking triumphs, your delicious photos, and any creative twists you came up with. Your feedback and personal touches inspire me and countless other home bakers to keep exploring new flavors and techniques. Let’s build a community of delicious desserts together, one perfectly baked cookie cup at a time!
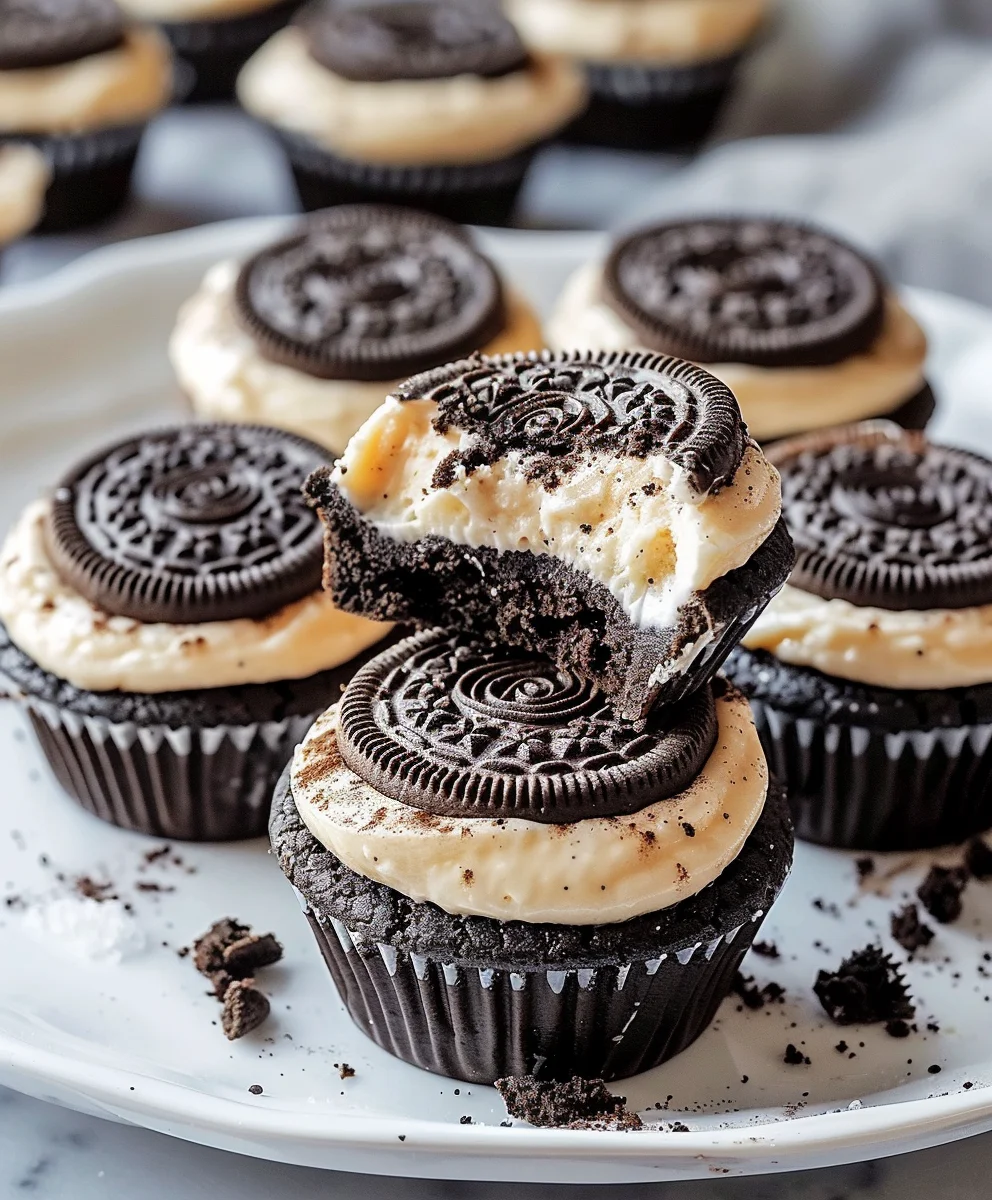
Oreo Cheesecake Cookie Cups
Experience pure dessert bliss with these quick and easy Oreo Cheesecake Cookie Cups. A delightful fusion of beloved Oreo cookies, creamy cheesecake, and a sturdy cookie base, these bite-sized treats offer all the decadence of a traditional cheesecake in a perfectly portioned, mess-free package. Ideal for any gathering, they combine irresistible textures and flavors for a truly satisfying sweet indulgence.
Ingredients
-
20 Oreo Cookies, crumbled
-
5 tablespoons Unsalted Butter, melted
-
16 ounces Cream Cheese, softened
-
1/2 cup Sugar
-
1/2 cup Sour Cream or Greek yogurt
-
1/2 cup Mini Chocolate Chips (optional)
-
1 cup Lightly Sweetened Whipped Cream
Instructions
-
Step 1
Preheat oven to 350°F (175°C). Line a 12-cup muffin pan. Combine 20 crushed Oreo cookies with 5 tablespoons melted unsalted butter. Press mixture firmly into the bottom of each muffin liner. -
Step 2
Bake the crusts for 5 minutes. Remove from oven and let cool slightly on a wire rack. -
Step 3
In a large mixing bowl, beat 16 ounces softened cream cheese until smooth and fluffy. Gradually add 1/2 cup granulated sugar and 1/2 cup sour cream (or Greek yogurt), mixing until well combined and smooth. Gently fold in 1/2 cup mini chocolate chips, if using. -
Step 4
Spoon the creamy cheesecake filling evenly over the cooled Oreo crusts in the muffin pan. Bake for approximately 18-22 minutes, or until the edges appear set and slightly puffed, but the centers still have a slight jiggle. -
Step 5
Carefully remove the muffin pan from the oven and place it on a wire rack to cool completely at room temperature (about 30-60 minutes). Once cooled, transfer the pan to the refrigerator and chill for a minimum of 3-4 hours, or ideally overnight, until the cheesecake is fully set and firm. -
Step 6
Once thoroughly chilled, carefully remove the Oreo Cheesecake Cookie Cups from the muffin pan. Top each cookie cup with a dollop of 1 cup lightly sweetened whipped cream just before serving. Store any leftover cookie cups in an airtight container in the refrigerator for up to 3-4 days.
Important Information
Nutrition Facts (Per Serving)
It is important to consider this information as approximate and not to use it as definitive health advice.
Allergy Information
Please check ingredients for potential allergens and consult a health professional if in doubt.