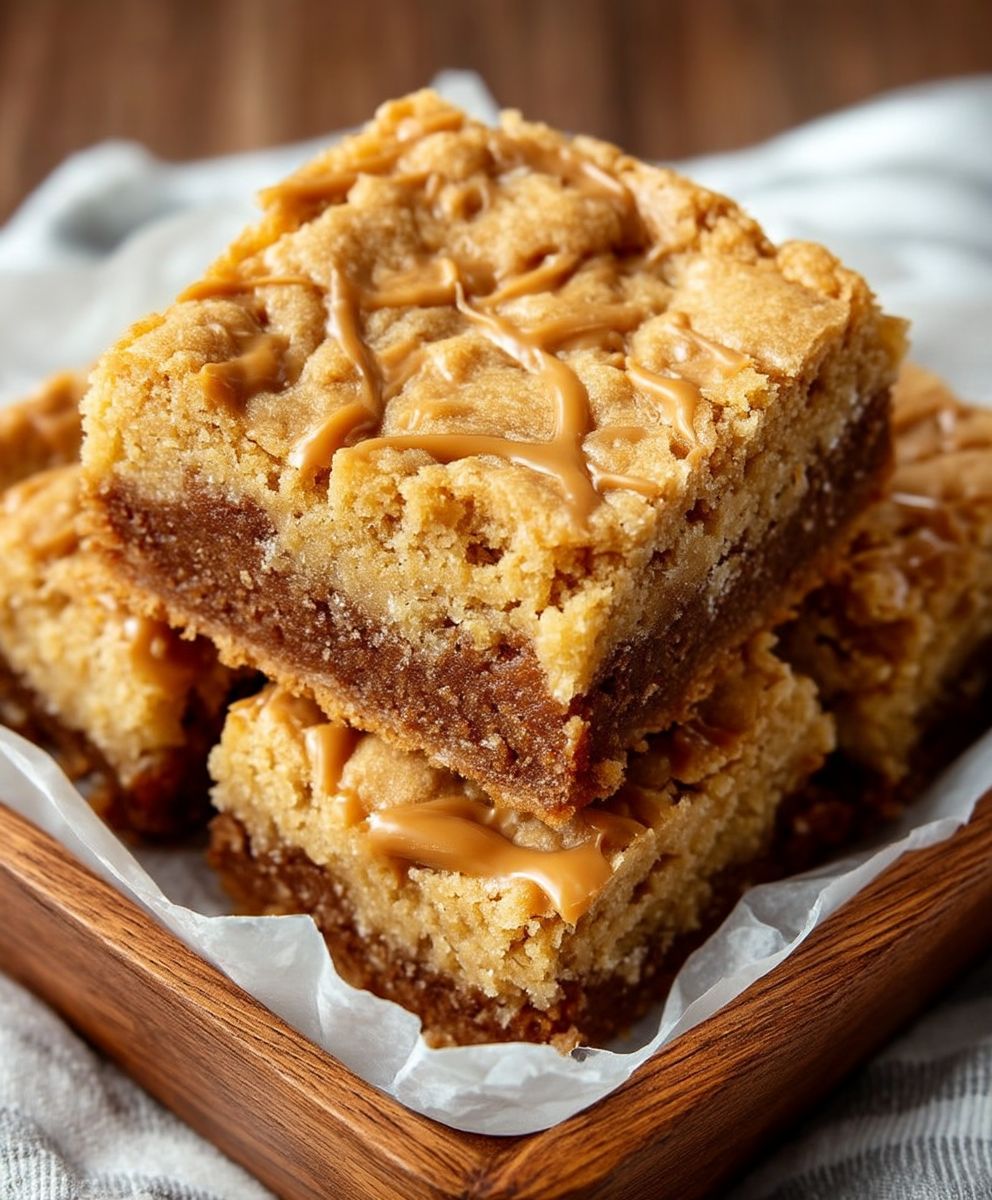
Peanut Butter Blondies: Prepare to meet your new favorite dessert! Imagine sinking your teeth into a chewy, fudgy bar, bursting with the irresistible combination of sweet and salty peanut butter. These aren’t your average blondies; they’re a decadent treat that will have everyone begging for the recipe.
While the exact origins of blondies are debated, they’re often considered the vanilla counterpart to the chocolate brownie, emerging in American kitchens in the late 19th or early 20th century. Over time, creative bakers have elevated the humble blondie with countless variations, and the addition of peanut butter is a stroke of pure genius.
What makes these Peanut Butter Blondies so universally loved? It’s the perfect marriage of textures – a slightly crisp top giving way to a soft, almost gooey center. The rich, nutty flavor of peanut butter complements the sweetness beautifully, creating a balanced and addictive treat. Plus, they’re incredibly easy to make! Whether you’re a seasoned baker or just starting out, you can whip up a batch of these delightful blondies in no time. They are perfect for a quick dessert, a potluck contribution, or simply a sweet indulgence to brighten your day. Get ready to experience blondie perfection!

Ingredients:
- 1 cup (2 sticks) unsalted butter, melted
- 1 ½ cups packed light brown sugar
- ½ cup granulated sugar
- 2 large eggs
- 1 teaspoon vanilla extract
- 1 cup creamy peanut butter
- 2 cups all-purpose flour
- 1 teaspoon baking powder
- ½ teaspoon baking soda
- ½ teaspoon salt
- 1 cup peanut butter chips
- ½ cup chopped peanuts, for topping (optional)
Preparing the Blondie Batter
Okay, let’s get started! First things first, we need to melt that butter. I usually do this in the microwave in 30-second intervals, stirring in between, until it’s completely melted. Be careful not to overheat it!
- Melt the Butter: In a large microwave-safe bowl, melt the butter. Let it cool slightly for a few minutes. This is important because we don’t want to cook the eggs when we add them later.
- Combine Sugars: Add the brown sugar and granulated sugar to the melted butter. Whisk them together really well until the mixture is smooth and there are no lumps of brown sugar. This step is crucial for getting that perfect chewy texture.
- Add Eggs and Vanilla: Now, add the eggs one at a time, whisking well after each addition. Make sure the eggs are fully incorporated into the sugar and butter mixture. Then, stir in the vanilla extract. The vanilla really enhances the flavor, so don’t skip it!
- Incorporate Peanut Butter: Add the creamy peanut butter to the mixture and whisk until everything is well combined and smooth. Make sure there are no streaks of peanut butter left. This is where the magic happens!
- Dry Ingredients: In a separate medium bowl, whisk together the flour, baking powder, baking soda, and salt. Whisking ensures that the baking powder and baking soda are evenly distributed, which is essential for a good rise.
- Combine Wet and Dry: Gradually add the dry ingredients to the wet ingredients, mixing until just combined. Be careful not to overmix! Overmixing can lead to tough blondies. A few streaks of flour are okay at this point.
- Add Peanut Butter Chips: Gently fold in the peanut butter chips. I love using a rubber spatula for this to avoid overmixing.
Baking the Blondies
Now comes the fun part – baking! Make sure your oven is preheated and your baking pan is ready to go.
- Preheat Oven: Preheat your oven to 350°F (175°C).
- Prepare Baking Pan: Grease and flour a 9×13 inch baking pan. You can also line it with parchment paper, leaving an overhang on the sides, for easy removal. I find that parchment paper makes cleanup a breeze!
- Pour Batter into Pan: Pour the blondie batter into the prepared baking pan and spread it evenly.
- Add Toppings (Optional): If you’re using chopped peanuts, sprinkle them evenly over the top of the batter. This adds a nice crunch and visual appeal.
- Bake: Bake for 25-30 minutes, or until a toothpick inserted into the center comes out with a few moist crumbs attached. Be careful not to overbake, as this will result in dry blondies.
- Cool: Let the blondies cool completely in the pan before cutting into squares. This is important because they will continue to set as they cool. If you used parchment paper, you can lift the blondies out of the pan and onto a cutting board for easier slicing.
Cutting and Serving
Patience is key here! Letting the blondies cool completely makes them much easier to cut and prevents them from crumbling.
- Cool Completely: Allow the blondies to cool completely in the pan. This usually takes about an hour or two.
- Cut into Squares: Once cooled, cut the blondies into squares. I usually cut them into 24 squares, but you can adjust the size to your preference.
- Serve: Serve the peanut butter blondies and enjoy! They are delicious on their own, but you can also serve them with a scoop of vanilla ice cream or a drizzle of chocolate sauce for an extra special treat.
Tips and Variations
Want to customize your blondies? Here are a few ideas:
- Chocolate Chips: Add chocolate chips along with the peanut butter chips for a chocolate-peanut butter explosion.
- Pretzel Pieces: Fold in some crushed pretzel pieces for a salty-sweet combination.
- Different Nut Butters: Experiment with other nut butters, such as almond butter or cashew butter.
- Swirl with Jelly: Swirl a spoonful of your favorite jelly into the batter before baking for a PB&J twist.
- Espresso Powder: Add a teaspoon of espresso powder to the dry ingredients to enhance the flavor.
- Sea Salt: Sprinkle a pinch of sea salt on top of the blondies before baking for a salty-sweet contrast.
Storing Your Blondies
These blondies are best enjoyed fresh, but they can be stored for later too!
- Room Temperature: Store the blondies in an airtight container at room temperature for up to 3 days.
- Refrigerator: For longer storage, store them in the refrigerator for up to a week.
- Freezer: You can also freeze the blondies for up to 2 months. Wrap them individually in plastic wrap and then place them in a freezer-safe bag or container. Let them thaw at room temperature before serving.
Troubleshooting
Sometimes things don’t go exactly as planned. Here are a few common issues and how to fix them:
- Dry Blondies: Overbaking is the most common cause of dry blondies. Make sure to check them frequently towards the end of the baking time and remove them from the oven when a toothpick inserted into the center comes out with a few moist crumbs attached.
- Gummy Blondies: This can be caused by undermixing the batter. Make sure to whisk the wet ingredients together thoroughly before adding the dry ingredients.
- Blondies Too Dense: This can be caused by overmixing the batter after adding the dry ingredients. Mix until just combined.
- Uneven Baking: Make sure your oven is properly calibrated and that the baking pan is placed in the center of the oven.
Why This Recipe Works
This recipe is a winner because it strikes the perfect balance between chewy and fudgy. The combination of brown sugar and granulated sugar creates a moist and flavorful blondie, while the peanut butter adds a rich and nutty taste. The baking powder and baking soda provide just the right amount of lift, resulting in a blondie that is both dense and tender. And of course, the peanut butter chips add an extra burst of peanut butter goodness!
Nutritional Information (Approximate)
Please note that the following nutritional information is an estimate and may vary depending on the specific ingredients used.
- Calories: Approximately 250-300 per square
- Fat: 15-20g
- Saturated Fat: 8-10g
- Cholesterol: 40-50mg
- Sodium: 150-200mg
- Carbohydrates: 25-30g
- Sugar: 15-20g
- Protein: 5-7g
Enjoy your delicious homemade Peanut Butter Blondies! I hope you love them as much as I do!
Conclusion:
These Peanut Butter Blondies are truly something special, and I wholeheartedly believe you need to try them. They’re not just another dessert; they’re a symphony of textures and flavors that will have you reaching for seconds (and maybe thirds!). The fudgy center, the slightly chewy edges, and that intense peanut butter flavor – it’s a winning combination that’s surprisingly easy to achieve. Forget complicated baking projects; this recipe is straightforward and yields impressive results every single time. I’ve made these for countless gatherings, and they’re always the first thing to disappear.
But what makes these blondies a must-bake? It’s the perfect balance of sweet and salty, the satisfyingly dense texture, and the sheer joy they bring. They’re comforting, indulgent, and utterly irresistible. Plus, they’re incredibly versatile!
Serving Suggestions and Variations
Want to take your Peanut Butter Blondies to the next level? Here are a few ideas:
* Ice Cream Dream: Serve them warm with a scoop of vanilla ice cream and a drizzle of chocolate sauce. The contrast of warm blondie and cold ice cream is pure bliss.
* Chocolate Chunk Extravaganza: Fold in some chocolate chunks (milk, dark, or white – the choice is yours!) for an extra layer of decadence.
* Pretzel Perfection: Press some crushed pretzels into the top of the blondies before baking for a salty-sweet crunch.
* Nutty Delight: Add chopped peanuts or other nuts to the batter for added texture and flavor.
* Espresso Boost: A teaspoon of instant espresso powder added to the batter will enhance the richness and depth of the peanut butter flavor.
* Gluten-Free Goodness: Substitute the all-purpose flour with a gluten-free blend for a delicious treat that everyone can enjoy. Just be sure to use a blend that’s designed for baking.
* Brown Butter Bliss: Brown the butter before adding it to the batter for a nutty, caramelized flavor that will elevate these blondies to gourmet status.
* Peanut Butter Cup Surprise: Press mini peanut butter cups into the batter before baking for a hidden pocket of peanut butter goodness.
These are just a few ideas to get you started. Feel free to experiment and create your own unique variations! The possibilities are endless.
I’m so excited for you to try this recipe and experience the magic of these Peanut Butter Blondies for yourself. I truly believe they’ll become a new favorite in your household.
So, preheat your oven, gather your ingredients, and get ready to bake! Don’t be afraid to get creative and put your own spin on the recipe. And most importantly, have fun!
Once you’ve made them, I’d absolutely love to hear about your experience. Did you try any of the variations? What did you think of the texture and flavor? Share your photos and comments with me – I can’t wait to see your creations! Happy baking! Let me know what you think of my Peanut Butter Blondies!
Peanut Butter Blondies: The Ultimate Guide to Baking Perfection
Chewy and fudgy peanut butter blondies packed with peanut butter chips. Easy to make and perfect for any occasion!
Ingredients
Instructions
Recipe Notes
- Don’t Overbake: Overbaking will result in dry blondies.
- Cool Completely: Letting the blondies cool completely makes them much easier to cut and prevents them from crumbling.
- Variations: Add chocolate chips, pretzel pieces, or swirl with jelly for different flavors.
- Storage: Store in an airtight container at room temperature for up to 3 days, in the refrigerator for up to a week, or freeze for up to 2 months.
- Troubleshooting: If blondies are dry, reduce baking time. If gummy, whisk wet ingredients thoroughly. If dense, avoid overmixing.