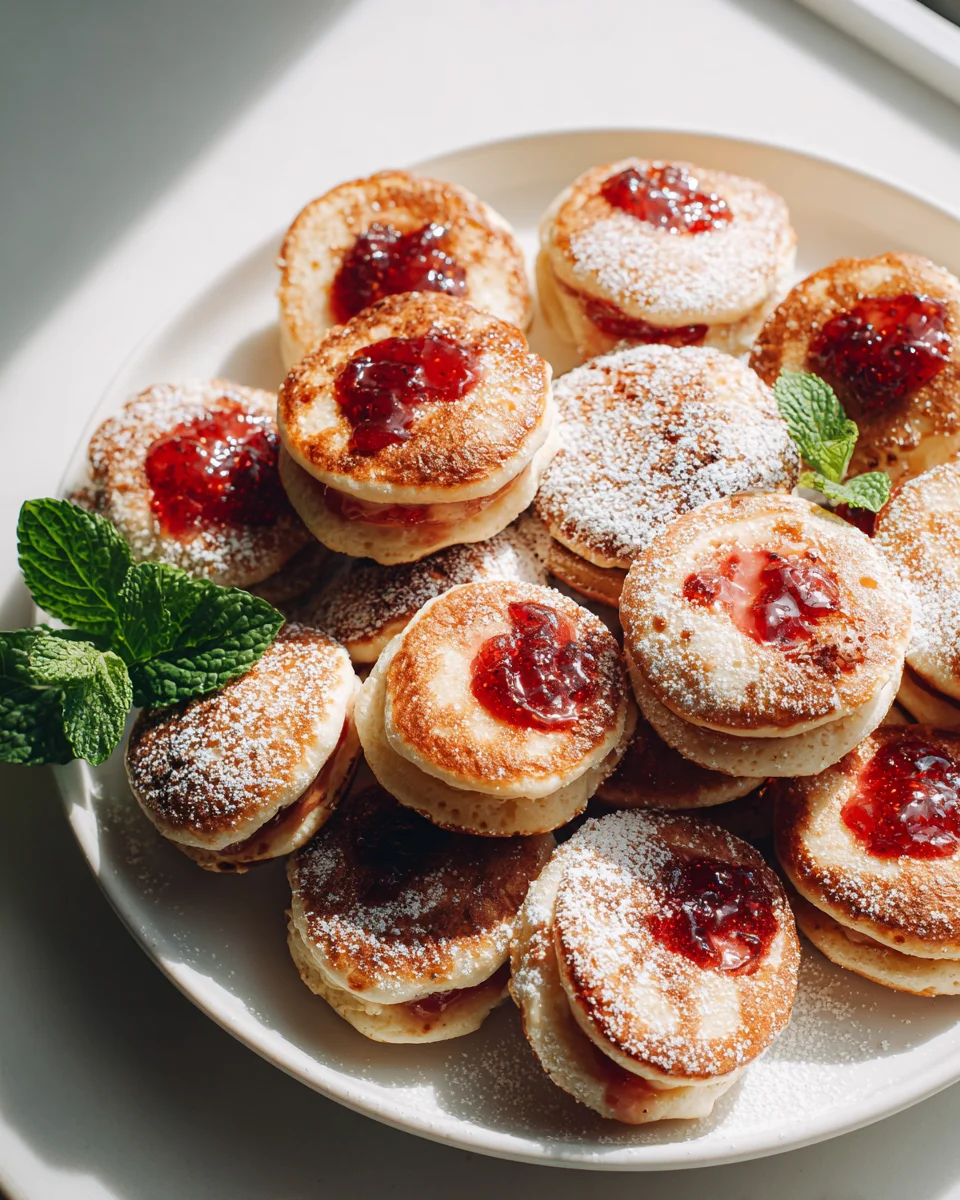
Peanut Butter And Jelly Pancake Poppers
Oh my goodness, get ready to dive headfirst into a world of pure deliciousness with these Peanut Butter And Jelly Pancake Poppers! I don’t know about you, but I’m a huge fan of combining beloved classics, and this recipe does exactly that in the most irresistible way. We’re taking everything you love about fluffy pancakes and marrying it with the nostalgic comfort of a peanut butter and jelly sandwich, all wrapped up in a fun, bite-sized package. What makes these little gems so special is that every golden-brown popper holds a delightful surprise – a warm, gooey center of creamy peanut butter and sweet, fruity jelly. Seriously, who can resist a perfect bite of warm pancake, melty peanut butter, and sweet jelly all at once? You and your family are going to absolutely adore these because they’re not just incredibly tasty; they’re also super fun to make and eat, perfect for a cozy weekend breakfast, a special brunch treat, or even a playful dessert. Prepare yourselves for an explosion of flavor and a whole lot of smiles!

Ingredient Notes
Oh, these Peanut Butter and Jelly Pancake Poppers are a dream come true for breakfast lovers and nostalgic snackers alike! Getting them just right starts with understanding the star ingredients. Here’s what you’ll need and some friendly thoughts on substitutions:
Pancake Batter
- The Foundation: For convenience, I often reach for a good quality boxed pancake mix. It makes whipping up these poppers super quick. Just follow the package instructions for preparing the batter.
- Homemade Option: If you’re feeling ambitious, a simple homemade pancake batter is fantastic! You’ll need all-purpose flour, baking powder (for that perfect fluffy rise!), a pinch of salt, a little sugar, milk, an egg, and a touch of melted butter or oil. The key is to not overmix; a few lumps are totally fine and lead to tender pancakes.
- Dairy/Gluten-Free: Many excellent dairy-free milks (almond, soy, oat) work beautifully in pancake batter. For gluten-free, opt for a gluten-free pancake mix or a homemade batter using a GF flour blend. Just ensure your chosen mix has a good texture for holding fillings.
Peanut Butter
- The Creamy Core: I typically use creamy peanut butter for its smooth texture, which makes it easy to dollop into the poppers. It melts wonderfully inside, creating that gooey center.
- Crunchy Alternative: If you love a bit of texture, crunchy peanut butter works too! Just be aware that the nut pieces might make it slightly trickier to get a perfectly smooth dollop, but the flavor is undeniably delicious.
- Allergy-Friendly Options: For those with peanut allergies, almond butter, cashew butter, or sunflower seed butter (SunButter) are excellent substitutes. They all provide that rich, creamy texture and nutty flavor that pairs perfectly with jelly.
Jelly/Jam
- Classic Grape or Strawberry: You absolutely can’t go wrong with classic grape or strawberry jelly. They are the quintessential PB&J experience! Choose your favorite brand, or even better, use a homemade jam if you have it.
- Flavor Variations: Don’t limit yourself! Raspberry jam offers a delightful tartness, while apricot or mixed berry jams can add a sophisticated twist. Fruit preserves with small pieces of fruit add lovely texture and intense fruit flavor.
- Reduced Sugar Options: If you’re watching your sugar intake, many excellent reduced-sugar or sugar-free jams are available and work just as well in these poppers.
Other Essential Bits
- Milk and Egg: For your batter, unless using a “just add water” mix. Fresh is best!
- Oil or Butter: For greasing your pancake popper pan. I prefer a neutral oil like vegetable or canola, or a slick of melted unsalted butter, for a beautiful golden crust.
- Powdered Sugar (Optional): For dusting, because who doesn’t love a pretty finish?
Step-by-Step Instructions
Alright, let’s get those Peanut Butter and Jelly Pancake Poppers cooking! The key here is a little patience and the right technique to get that wonderful surprise filling inside each fluffy bite. I promise, it’s easier than it sounds!
- Prepare Your Batter:
- If using a boxed mix, follow the package instructions to prepare your pancake batter. For homemade batter, whisk together your dry ingredients (flour, baking powder, sugar, salt) in one bowl, and your wet ingredients (milk, egg, melted butter/oil) in another. Pour the wet into the dry and mix until just combined. A few lumps are fine! Set aside for 5-10 minutes to let the batter rest.
- Your batter should be thick enough to hold its shape but pourable. If it’s too thick, add a tablespoon of milk at a time until it reaches the right consistency.
- Heat Your Pan:
- Place your aebelskiver pan (pancake popper pan) over medium-low heat. This lower heat is crucial for cooking the poppers thoroughly without burning the outside before the inside is done.
- Once hot, lightly grease each well with a tiny bit of oil or melted butter. I find a pastry brush or a crumpled paper towel dipped in oil works perfectly. You don’t want too much oil, just enough to prevent sticking.
- First Batter Pour:
- Using a small ladle or a measuring spoon (about 1.5-2 tablespoons), pour batter into each well, filling it about one-third to halfway. The batter should sizzle gently.
- Let this cook for about 1-2 minutes, or until you see small bubbles forming on the surface and the edges look slightly set.
- Add the Fillings:
- Now for the magic! Into the center of each partially cooked pancake, carefully dollop about ½ to ¾ teaspoon of peanut butter. Don’t overfill, or it’ll spill out.
- Immediately after, place about ½ teaspoon of your chosen jelly or jam directly on top of the peanut butter.
- Seal the Poppers:
- Quickly pour another small amount of batter (about 1-1.5 tablespoons) over the peanut butter and jelly, just enough to completely cover the filling and fill the well to the top.
- Cook and Turn:
- Let this cook for another 2-3 minutes, or until the bottom is golden brown and the edges are firm enough to turn.
- Using two wooden skewers, chopsticks, or even a small fork, carefully pry the popper from the well and rotate it 90 degrees. This will allow the uncooked batter to flow down and start forming the spherical shape.
- Continue turning the poppers every minute or so, rotating them gently until they are fully round and beautifully golden brown on all sides. This usually takes about 5-7 minutes total per popper after the initial pour. The filling should be warm and gooey, and the pancake fully cooked through.
- Remove and Repeat:
- Once cooked, carefully remove the Peanut Butter and Jelly Pancake Poppers from the pan and place them on a plate.
- Regrease the wells lightly if needed, and repeat the process with the remaining batter and filling until you’ve made all your poppers.
- Serve Warm:
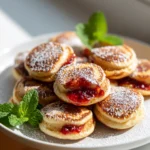
- Dust with powdered sugar if desired, and serve immediately. They are truly best when warm and the centers are still delightfully melty!
Tips & Suggestions
Making these Peanut Butter and Jelly Pancake Poppers is a joy, and with a few tricks up your sleeve, you’ll be a popper pro in no time! Here are my favorite tips for perfect results:
- Batter Consistency is Key: Your pancake batter needs to be just right – not too thin that it runs everywhere, and not so thick that it’s hard to pour and spread. If your homemade batter feels too thick, add milk a tablespoon at a time until it’s easily pourable but still holds its shape. If it’s too thin, a tablespoon or two of extra flour can help thicken it up.
- Mastering Heat Control: This is probably the most important tip! Keep your pan on a consistent medium-low heat. If the heat is too high, the outside will burn before the inside has a chance to cook through, leaving you with raw centers. Too low, and they’ll take ages and might not get that lovely golden crust. Adjust as needed.
- Don’t Overfill: This is tempting, I know! But resist the urge to add too much peanut butter or jelly. Overfilling will cause the delicious goo to leak out as you turn the poppers, creating a sticky mess and less of that perfect surprise center. About ½ to ¾ teaspoon of each filling per popper is generally ideal.
- The Turning Technique: Those wooden skewers or chopsticks are your best friends here. Don’t rush the turning. Wait until the first pour of batter has set and the bottom is golden before you start turning. Gradual turns – 90 degrees at a time – help achieve that perfectly round shape.
- Flavor Boosters for Batter: Feel free to add a pinch of cinnamon or nutmeg to your pancake batter for an extra layer of warmth. A teaspoon of vanilla extract also always elevates the flavor.
- Vary Your Fillings: While classic PB&J is divine, feel free to experiment! Try other nut butters (almond, cashew), different jams (raspberry, apricot), or even a combination. A tiny piece of banana with the peanut butter, or a few mini chocolate chips, could also be delightful additions!
- Serving Suggestions: Beyond a simple dusting of powdered sugar, these poppers are fantastic with a drizzle of maple syrup, a dollop of whipped cream, or a small side of extra jelly for dipping. They’re also brilliant packed into a lunchbox for a fun, handheld snack.
- Make Ahead Tip: These poppers are fantastic fresh, but they also hold up well if made in advance. See the storage section for more details!
- Patience, Young Grasshopper: The first few poppers might not be perfect, and that’s totally okay! It takes a little practice to get the feel for your pan and the right turning technique. Enjoy the process, and remember that even imperfect poppers still taste amazing.
Storage
These Peanut Butter and Jelly Pancake Poppers are undeniably at their absolute best when enjoyed warm and fresh from the pan, with the fillings still gooey and melty. However, they also store and reheat surprisingly well, making them fantastic for meal prep or enjoying a quick treat later!
Cooling Before Storage
- Crucial Step: Always allow your poppers to cool completely to room temperature before storing them. Storing them while still warm can create condensation, which leads to soggy poppers and can encourage bacterial growth. Lay them out in a single layer on a wire rack until they are no longer warm to the touch.
Refrigeration
- Airtight Container: Once fully cooled, transfer the Peanut Butter and Jelly Pancake Poppers to an airtight container. This will protect them from absorbing other fridge odors and keep them fresh.
- Duration: Stored properly in the refrigerator, they will remain fresh and delicious for about 3-4 days.
- Reheating from Fridge:
- Microwave: For a quick reheat, pop a few poppers into the microwave for 15-30 seconds, or until warmed through. Be careful not to overheat, as this can make them tough.
- Toaster Oven/Oven: For a slightly crispier exterior, reheat them in a toaster oven or a regular oven preheated to 300°F (150°C) for about 5-8 minutes, or until heated through. This method is great for restoring some of their original texture.
Freezing
- Long-Term Freshness: Peanut Butter and Jelly Pancake Poppers freeze beautifully, making them an excellent candidate for batch cooking!
- Flash Freeze: After they’ve cooled completely, arrange the poppers in a single layer on a baking sheet lined with parchment paper. Place the baking sheet in the freezer for about 1-2 hours, or until the poppers are solid. This prevents them from sticking together when you bag them.
- Airtight Storage: Once flash-frozen, transfer the solid poppers to a freezer-safe bag or an airtight freezer container. Remove as much air as possible to prevent freezer burn.
- Duration: They can be stored in the freezer for up to 1-2 months. Beyond that, the quality might start to decline slightly, though they would still be safe to eat.
- Reheating from Freezer:
- Oven/Toaster Oven: This is my preferred method for reheating from frozen. Preheat your oven or toaster oven to 325°F (160°C). Place the frozen poppers on a baking sheet and bake for 10-15 minutes, or until heated through and slightly crispy on the outside.
- Microwave: While quicker, microwaving from frozen can sometimes make the poppers a little chewy. Heat in 30-second intervals until warmed through.
- Air Fryer: A fantastic option! Place frozen poppers in a single layer in your air fryer basket. Cook at 350°F (175°C) for 5-7 minutes, shaking the basket halfway through, until hot and slightly crispy.
No matter how you store and reheat them, these poppers are a delightful treat that brings a smile to my face every time!
Final Thoughts
There you have it! I truly believe these Peanut Butter And Jelly Pancake Poppers are an absolute game-changer for breakfast, brunch, or even a delightful snack. What makes them a must-try isn’t just the incredible convenience of a bite-sized treat, but the perfect harmony of textures and flavors. That fluffy pancake exterior, encasing the warm, gooey embrace of peanut butter and jelly, truly makes each popper a miniature marvel.
I find them to be a fantastic way to enjoy a beloved classic in a fun, new format that appeals to everyone. Whether you’re whipping them up for a special weekend occasion, a quick weekday pick-me-up, or even a unique party appetizer, I promise you, these Peanut Butter And Jelly Pancake Poppers are guaranteed to bring smiles and satisfied cravings. Go on, give this recipe a whirl – your taste buds will thank you for discovering such a delightful little burst of happiness!
Peanut Butter & Jelly Pancake Poppers: Breakfast Bliss!
- Total Time: 45 minutes
- Yield: 4 servings
Description
Dive into the deliciousness of Peanut Butter and Jelly Pancake Poppers, where fluffy pancakes meet the nostalgic comfort of a classic PB&J sandwich. These bite-sized treats are perfect for breakfast, brunch, or a playful dessert!
Ingredients
- Good quality boxed pancake mix or homemade pancake batter ingredients: all-purpose flour, baking powder, salt, sugar, milk, egg, melted butter or oil
- Creamy peanut butter or crunchy peanut butter
- Classic grape or strawberry jelly or jam, or raspberry jam, apricot jam, mixed berry jam
- Milk
- Egg
- Oil or butter for greasing
- Powdered sugar (optional)
Instructions
- Prepare your batter: If using a boxed mix, follow the package instructions. For homemade batter, whisk together dry ingredients (flour, baking powder, sugar, salt) in one bowl, and wet ingredients (milk, egg, melted butter/oil) in another. Combine and let rest for 5-10 minutes.
- Heat your pan: Place your aebelskiver pan over medium-low heat and lightly grease each well with oil or melted butter.
- First batter pour: Pour about 1.5-2 tablespoons of batter into each well, filling it about one-third to halfway. Cook for 1-2 minutes until bubbles form on the surface.
- Add the fillings: Carefully dollop about ½ to ¾ teaspoon of peanut butter into the center of each pancake, followed by about ½ teaspoon of jelly or jam on top.
- Seal the poppers: Pour another small amount of batter over the filling to cover it completely.
- Cook and turn: Cook for another 2-3 minutes until golden brown. Use skewers or chopsticks to turn the poppers 90 degrees and continue turning until fully round and golden brown.
- Remove and repeat: Carefully remove the poppers from the pan and repeat the process with the remaining batter and filling.
- Serve warm: Dust with powdered sugar if desired and serve immediately.
- Prep Time: 15 mins
- Cook Time: 30 mins
- Category: Breakfast
- Method: Pan-frying
- Cuisine: American
Nutrition
- Serving Size: 1 popper
- Calories: 150
- Sugar: 5 g
- Sodium: 200 mg
- Fat: 7 g
- Saturated Fat: 2 g
- Unsaturated Fat: 4 g
- Trans Fat: 0 g
- Carbohydrates: 20 g
- Fiber: 1 g
- Protein: 4 g
- Cholesterol: 30 mg
Keywords: Ensure your batter consistency is just right, not too thin or thick. Keep the heat on medium-low to avoid burning the outside before the inside cooks. Experiment with different nut butters and jams for variety!