Easy Mini Halloween Pizzas are here to transform your spooky season into a delightfully delicious celebration! Are you ready to cast a delicious spell this Halloween? Forget the ghostly ghouls for a moment; I invite you to conjure up some culinary magic that will have everyone, from tiny trick-or-treaters to the grown-up goblins, reaching for more. Halloween, with its ancient roots in Samhain, has evolved into a beloved time for costumes, community, and, of course, delightful treats. What better way to honor this tradition of fun and feasting than by giving a classic comfort food a festive makeover?
This isn’t just any snack; it’s a canvas for creativity and a guaranteed crowd-pleaser. We all know the universal love for pizza, and when you combine that irresistible appeal with the playful spirit of Halloween, you get something truly special. The joy of customizing each bite, combined with the irresistible taste of warm, gooey cheese and your favorite toppings, makes these miniature marvels a standout. They offer the perfect blend of savory goodness, satisfying textures—from a crispy crust to a soft, cheesy top—and undeniable convenience, especially when catering to diverse tastes or busy party schedules. These delightful easy mini Halloween pizzas are sure to be the star of any gathering, offering both a fun activity and a scrumptious treat.
Why Everyone Loves These Spooky Bites
People adore this dish because it perfectly marries the comfort of classic pizza with the excitement of a holiday theme. Their convenient size makes them ideal for snacking, while the simple preparation ensures even novice cooks can join in the fun. It’s a fantastic way to engage children in the kitchen, letting them design their own edible monster or ghost pizzas. Plus, who can resist a warm, cheesy bite that’s as fun to look at as it is to eat?

Ingredients:
-
For the Mini Pizza Bases:
- Pre-made mini pizza bases: 12-18 pieces. I highly recommend using pre-made mini pizza crusts or flatbreads for these Easy Mini Halloween Pizzas to save a significant amount of time and effort. You can find these in most grocery stores in the bread aisle or frozen section. English muffins, pita bread, or even large tortillas cut into rounds also work wonderfully as a canvas for your spooky creations. The key is a sturdy base that can hold up to the toppings and baking.
- Olive oil: 1-2 tablespoons, for brushing (optional, but highly recommended). A light brush of olive oil on the edges of your chosen bases before adding sauce can create a lovely golden, slightly crisp crust, adding another layer of texture and flavor to your mini pizzas.
-
For the Spooky Sauce:
- Marinara sauce or pizza sauce: 1 cup (240ml). Choose your favorite jarred sauce for convenience. I personally love a good quality marinara with a rich, slightly sweet tomato flavor. It’s the perfect base to let our spooky toppings shine.
- Garlic powder: 1/2 teaspoon. This adds a subtle, warm depth to the sauce, enhancing its savory notes without being overpowering.
- Dried oregano: 1/2 teaspoon. A classic pizza herb, oregano brings that quintessential Italian-American flavor we all associate with delicious pizza.
- Red pepper flakes: A small pinch (optional). If you enjoy a very subtle hint of heat, a tiny pinch of red pepper flakes can awaken the flavors in the sauce. Be mindful not to add too much, especially if serving to children or those sensitive to spice.
-
For the Cheesy Layer:
- Low-moisture mozzarella cheese, shredded: 2 cups (approximately 8 oz or 225g). This is the quintessential pizza cheese. Its excellent melting properties create that satisfying pull and creamy texture. Opt for low-moisture shredded mozzarella for best results, as it won’t make your pizzas soggy.
- Provolone cheese, sliced or shredded: 1/2 cup (optional). Adding a bit of provolone, either shredded and mixed with the mozzarella or in thin slices, can lend a slightly sharper, more complex flavor and an even stretchier melt. It’s a fantastic addition if you want to elevate the cheese factor of your Easy Mini Halloween Pizzas.
- White cheddar cheese slices: 4-6 slices. This is specifically for creating our adorable ghost shapes! Choose a mild white cheddar that’s easy to cut and holds its shape well when melted. Provolone slices can also work here if you don’t have white cheddar.
-
For the Spooky Toppings:
- Pepperoni slices: 24-36 small ones. These are incredibly versatile! They’ll be used for classic pepperoni pizzas, but more importantly, they are essential for creating the bodies of our spooky spider pizzas. The small, mini pepperonis work best for these designs, but you can always cut larger ones down to size.
- Black olives, pitted: 1/2 cup. Black olives are the MVP of Halloween pizza toppings! They are perfect for spider bodies and legs, ghastly eyes for mummies and ghosts, and general spooky accents. I recommend buying them pre-pitted for ease of use. You’ll want some whole olives for eyes and some sliced ones for legs and pupils.
- Green olives, pitted: 1/4 cup (sliced, optional). If you want to add another layer of color and a briny tang, green olives can be sliced and used for more diverse “monster” eyes or unique accents on your Halloween pizzas. They provide a nice contrast to the black olives.
- Bell pepper (any color), finely diced or julienned: 1/4 cup. These can be used for small accents like monster mouths, colorful stripes, or even tiny witches’ hats if you’re feeling extra creative! Green and orange peppers are especially festive for Halloween.
- Fresh basil leaves: A few sprigs, for garnish (optional). While not directly a “spooky” topping, a little fresh basil added after baking can brighten up the flavors and add a touch of gourmet elegance to your finished pizzas. It’s a lovely way to add fresh aromatic notes.
Prepping for Spooktacular Fun
-
Preheat Your Oven and Prepare Baking Sheets:
Let’s get the oven ready for action! Preheat your oven to 400°F (200°C). This temperature is ideal for getting those mini pizza bases perfectly crisp and the cheese wonderfully melted and bubbly without overcooking your toppings. While the oven preheats, line two large baking sheets with parchment paper. Parchment paper is a fantastic non-stick solution that ensures your Easy Mini Halloween Pizzas slide right off the tray without any fuss, and it makes cleanup an absolute breeze. If you don’t have parchment paper, a light spray of cooking oil can also help prevent sticking, but I truly find parchment paper superior for this task. Ensure you have enough space on your baking sheets so the pizzas aren’t too crowded; this allows for even baking and prevents them from steaming instead of crisping. You might need to bake in batches depending on the size of your trays and how many pizzas you’re making.
-
Prepare Your Mini Pizza Bases:
Carefully unwrap your pre-made mini pizza bases, English muffins, or pita bread. If you’re using English muffins or pita bread, I recommend lightly toasting them for 2-3 minutes in a toaster or the preheating oven before adding toppings. This helps prevent them from becoming soggy under the sauce and cheese and provides a better texture. If you’re using frozen mini crusts, make sure they are fully thawed according to package instructions. Arrange your bases in a single layer on your prepared baking sheets, leaving a little space between each one. If you chose to use olive oil, now is the time to lightly brush the edges of each base with a small amount of extra virgin olive oil. This step is purely optional but adds a lovely golden hue and a bit of extra flavor to the crust.
-
Whisk Together the Spooky Sauce:
In a small bowl, combine your marinara or pizza sauce with the garlic powder and dried oregano. If you’re adding red pepper flakes, toss them in now too. Give everything a good stir with a spoon or whisk until all the seasonings are thoroughly incorporated. Taste the sauce and adjust seasonings if necessary. Sometimes, different brands of sauce vary in saltiness or sweetness, so feel free to add a tiny pinch more oregano or even a dash of salt if you feel it needs it. This simple seasoning step elevates a basic jarred sauce into something that tastes much more homemade and flavorful, providing a delicious foundation for our Easy Mini Halloween Pizzas.
-
Prepare All Your Spooky Toppings:
This is where the magic really begins to take shape! Get all your toppings ready before you start assembling.
- Shredded Cheeses: If your mozzarella or provolone isn’t pre-shredded, now is the time to shred it. Freshly shredded cheese often melts better and more evenly than pre-shredded varieties, which can sometimes contain anti-caking agents.
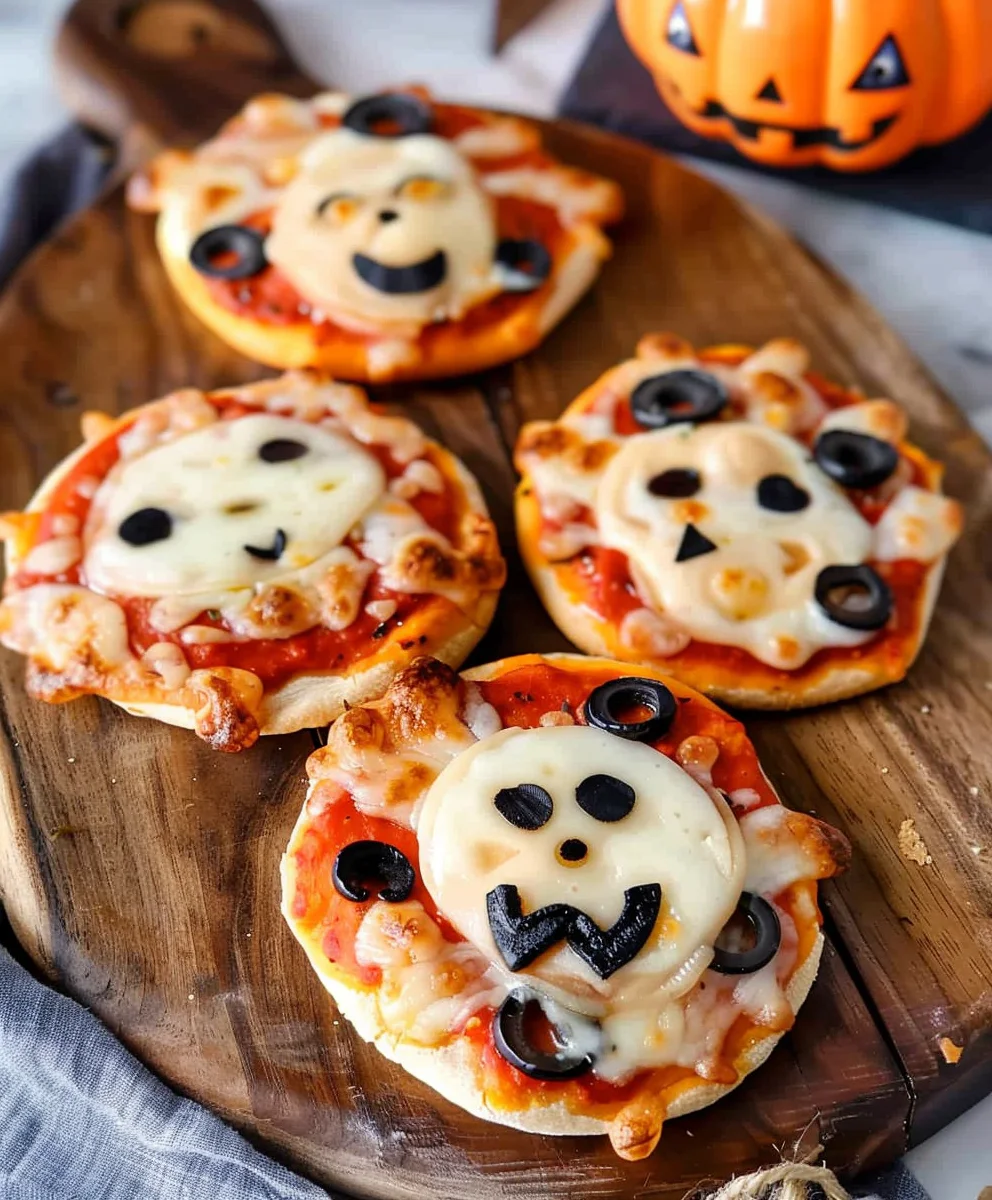
- White Cheddar Ghosts: Take your slices of white cheddar cheese. Using a small, sharp knife or even a tiny cookie cutter (a simple round cutter can be manipulated, or a ghost-shaped one if you’re lucky!), carefully cut out ghost shapes. Don’t worry about perfection; rustic ghosts look just as charmingly spooky! Aim for shapes that are small enough to fit nicely on your mini pizzas. You’ll need one ghost per ghost-themed pizza.
- Pepperoni: Separate your pepperoni slices. If using larger pepperonis for spider bodies, you might want to trim them slightly to fit your mini pizzas better. You’ll need whole ones for the spider bodies and possibly some for general topping.
- Black Olives: This is critical for our spooky designs! Slice half of your pitted black olives into thin rounds – these will be used for spider legs and pupils for the mummy and ghost eyes. Keep the other half of the black olives whole – these will form the bodies of our spiders and some larger mummy eyes.
- Green Olives (if using): If you’re incorporating green olives for extra monster eye variety, slice them into thin rounds as well.
- Bell Peppers: If you plan to add bell pepper accents, finely dice them or cut them into thin julienne strips, depending on your desired design (e.g., small squares for a monster’s teeth, thin strips for a wicked grin).
Having all these components prepped and laid out in separate bowls makes the assembly process smooth, fun, and efficient, especially if you have little helpers joining in on the fun of creating these Easy Mini Halloween Pizzas!
Crafting Your “Easy Mini Halloween Pizzas”
-
Spread the Spooky Sauce:
Now for the foundational layer of flavor! Take a spoonful of your seasoned marinara sauce and spread it evenly over each mini pizza base, leaving a small border around the edge for the crust. A good rule of thumb is about 1 to 1.5 tablespoons per mini pizza, but adjust based on the size of your bases. Don’t overload the pizzas with sauce, as this can make them soggy. We want just enough to coat the surface and provide that tangy tomato goodness. This step sets the stage for all the delicious, spooky fun to come!
-
Add the Cheesy Layer:
Sprinkle a generous amount of your shredded mozzarella and provolone cheese mixture over the sauced bases. Aim for an even layer that almost covers the sauce completely. We’re building a nice, gooey bed for our Halloween creations. The amount of cheese is truly up to your personal preference, but remember, these are pizzas, so a good amount of cheese is key! Ensure you leave a bit of space around the edges if you want a classic crust, but don’t be afraid to go edge-to-edge if you prefer a cheesier bite all the way through. This cheesy layer will melt into a golden, bubbling blanket, making every bite of these Easy Mini Halloween Pizzas utterly delicious.
-
Design Your Spooky Toppings – Get Creative!
This is the most exciting and artistic part of making your Easy Mini Halloween Pizzas! Let your imagination run wild and have fun creating these classic spooky designs. You can mix and match, or stick to one theme per pizza.
Mummy Pizzas:
To create a fantastic mummy pizza, take thin strips of your shredded mozzarella or provolone cheese. You can either gently pull apart the shredded cheese into longer strands or use a sharp knife to cut thin strips from a cheese slice. Lay these strips crisscrossing over the cheesy base, making them resemble bandages. Leave a small gap near the top center for the mummy’s eyes. Then, take two whole black olive halves (or two black olive slices for smaller eyes) and place them in the gap for the eyes. You can even add a tiny dot of the remaining sauce in the center of the olive slices for pupils if you want to be extra detailed. The cheese strips will melt and intertwine during baking, giving a wonderfully authentic “bandaged” look. These are always a crowd-plepleaser!
Spider Pizzas:
For our creepy-crawly spider pizzas, place one whole pepperoni slice (or a slightly larger black olive) in the center of the pizza to form the spider’s body. Then, take two small slices of black olives and position them above the body for the eyes. Now for the legs: using your thinly sliced black olives, arrange eight thin strips (four on each side of the body) extending outwards to create the spider’s legs. You can curve them slightly to make them look like they’re crawling. If you only have larger olives, cut them into thin crescent shapes for the legs. The black olives against the melted cheese really make these spiders pop and are such a fun, spooky touch for your Easy Mini Halloween Pizzas.
Ghost Pizzas:
These are adorable and super simple! Carefully place one of your pre-cut white cheddar ghost shapes on top of the shredded mozzarella and sauce. Position it slightly off-center or wherever you think it looks best. Then, take two tiny pieces of black olive slices (or even just tiny slivers from the whole olives) and place them on the ghost’s “head” for the eyes. If you want, you can also add a tiny sliver of olive for a spooky mouth! As the pizza bakes, the ghost cheese will melt just enough to become slightly softened and meld with the pizza, but it will largely retain its shape, giving you a charmingly ghostly topping.
Other Spooky Ideas:
Don’t limit yourself! You can also create one-eyed monsters with a single large black olive eye and bell pepper eyebrows, or use the finely diced bell peppers to create small, colorful fangs or zig-zag mouths. Small pieces of pepperoni can also be arranged to look like tiny bats. This is where you can truly express your Halloween spirit! Once all your pizzas are topped and looking ghoulishly good, they’re ready for the oven.
Baking Your Haunted Treats
-
Bake Until Golden and Bubbly:
Carefully transfer your baking sheets laden with your expertly crafted Easy Mini Halloween Pizzas into your preheated 400°F (200°C) oven. Bake for approximately 8-12 minutes. Baking time can vary slightly depending on your oven’s calibration and the thickness of your pizza bases, so keep a close eye on them. You’re looking for the cheese to be completely melted, bubbly, and a beautiful golden-brown around the edges. The crust should also be nicely crisped and lightly golden. If you notice one side of your oven cooks faster, you can rotate the baking sheets halfway through the baking time to ensure even browning. The aroma filling your kitchen will be absolutely irresistible, a sure sign that your spooky creations are almost ready to be devoured!
-
Cool Slightly Before Serving:
Once your Easy Mini Halloween Pizzas are perfectly baked and looking fantastically spooky, carefully remove the baking sheets from the oven. It’s crucial to let them cool on the baking sheets for about 2-3 minutes before transferring them. This short cooling period allows the cheese to set slightly, preventing it from sliding off the crust, and makes the pizzas much easier to handle. It also helps prevent you (or your excited guests!) from burning your mouth on molten cheese. You can then use a spatula to transfer them to a wire cooling rack or directly to a serving platter.
Serving Your Ghoulishly Good Pizzas
-
Serve Warm for Maximum Enjoyment:
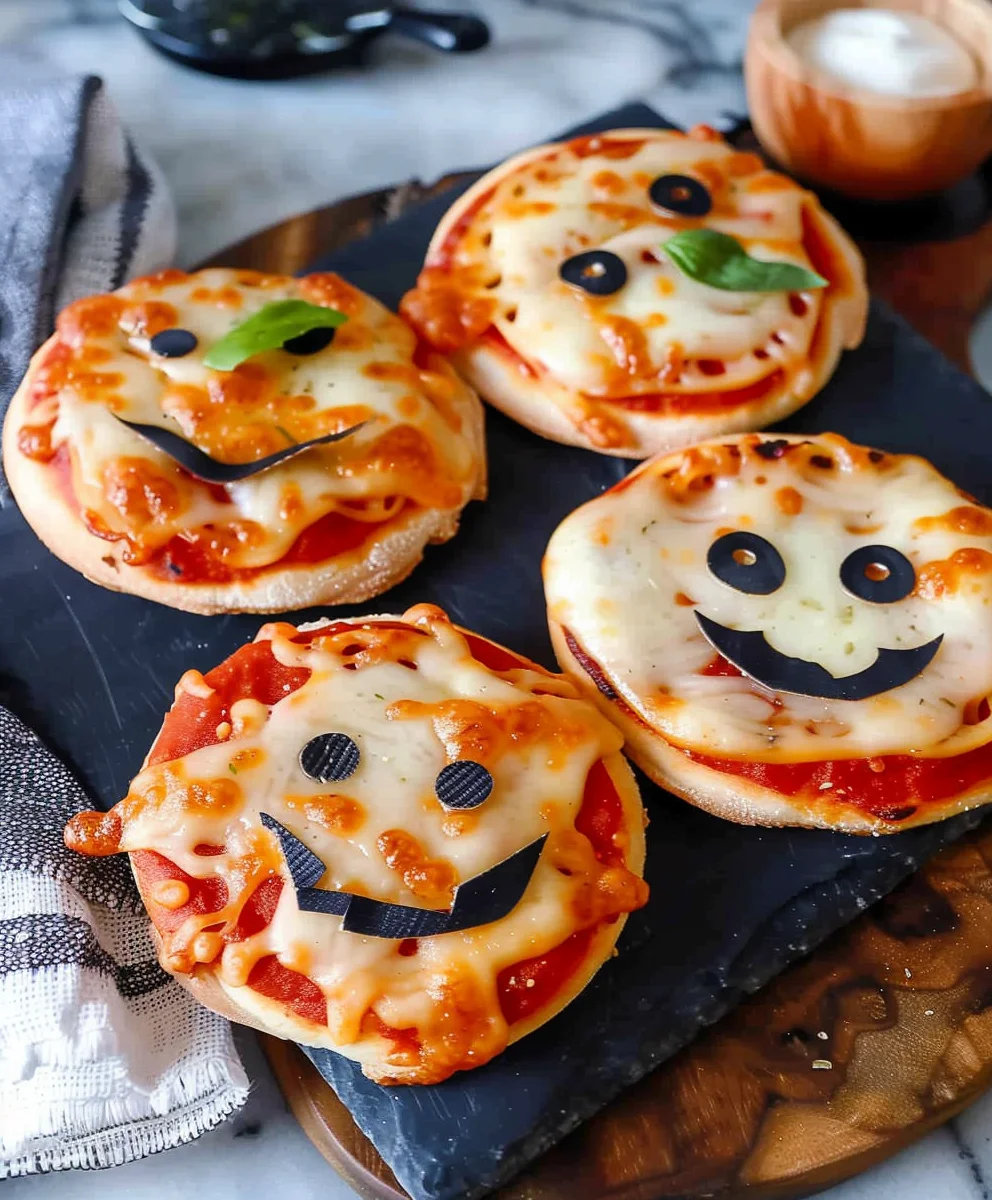
These Easy Mini Halloween Pizzas are absolutely best served warm, straight out of the oven. The melted, gooey cheese and the crisp crust are at their peak. Arrange them artfully on a large platter for a stunning Halloween spread. Imagine the delight on everyone’s faces as they choose their favorite spooky design! If you’re hosting a party, you can keep a fresh batch coming out of the oven every 10-15 minutes to ensure everyone gets to enjoy them at their prime. Don’t be surprised if these disappear incredibly quickly; they are always a massive hit for their fun factor and deliciousness.
-
Garnish (Optional) and Enjoy:
For a touch of freshness and a vibrant pop of color, consider garnishing your finished pizzas with a few fresh basil leaves. Simply tear or chop a few leaves and sprinkle them over the hot pizzas right before serving. The heat from the pizzas will release their lovely aroma, adding an extra layer of flavor. While completely optional, it really elevates the presentation and taste. These Easy Mini Halloween Pizzas are not just a meal; they’re an experience – a perfect blend of fun, creativity, and deliciousness that will make your Halloween celebration unforgettable. Enjoy every spooky, cheesy bite!
Conclusion:
So, there you have it! This recipe isn’t just about making food; it’s about crafting smiles, sparking creativity, and creating genuinely memorable moments, especially during the enchanting spooky season. I truly believe these Easy Mini Halloween Pizzas are an absolute game-changer for any festive gathering, offering a delightful blend of simplicity, versatility, and undeniable charm that will win over hearts and taste buds alike. They effortlessly bridge the gap between a quick, satisfying snack and a show-stopping party appetizer, making them an indispensable addition to your holiday repertoire.
Think about it – busy weeknights when you need a fun, quick dinner, last-minute party invites where you need an impressive yet easy contribution, or just a delightful family activity to get everyone involved in the kitchen. These pizzas fit every single bill with remarkable ease. They’re quick enough for a casual snack to satisfy those instant cravings, yet they are also incredibly impressive and adaptable enough to be the undisputed star of your Halloween buffet spread. The real magic, in my opinion, lies not only in their irresistible miniature size but also in the endless possibilities for customization. Each small circle of dough becomes a blank canvas, ready to be transformed into a ghoulishly good treat that is uniquely yours. Kids absolutely adore helping to assemble their own spooky creations, turning what could be just another meal preparation into an interactive and exciting culinary adventure. And for us adults? They’re the perfect finger food to gracefully graze on while mingling and socializing, completely eliminating the need for cumbersome plates and cutlery, allowing for a more relaxed and enjoyable atmosphere.
Now, let’s talk about how you can take your Easy Mini Halloween Pizzas experience to the next level. While they are undeniably delicious and perfectly satisfying on their own, consider serving these alongside a vibrant green salad, perhaps with some black olive ‘spiders’ scattered throughout, to add a fresh and welcome counterpoint to the richness of the cheese and sauce. For dipping, a classic warm marinara sauce is always a surefire winner, but don’t hesitate to venture into new territories with a creamy homemade garlic dip or even a zesty, spicy sriracha ranch for those who crave an extra kick. You could arrange them artfully on a large, themed platter, perhaps incorporating some decorative cobwebs or even using a bit of food-safe dry ice to create a mysterious, smoky mist around them for a truly theatrical presentation that will captivate your guests. For a potluck, they transport beautifully and maintain their deliciousness in a covered container, making them a stress-free option to share.
The true brilliance and enduring appeal of these mini pizzas truly lie in their remarkable adaptability. Please, don’t ever feel tied down to just using mozzarella! Experiment fearlessly with different cheeses; try provolone for a slightly sharper, tangier taste, a robust blend of Italian cheeses for added complexity and depth, or even a wonderfully smoky gouda for a truly unique and sophisticated flavor profile. For the toppings, let your wildest imagination run absolutely wild! Beyond the classic pepperoni arranged to create cute ‘mummy wraps,’ think about using carefully placed black olive halves to form spooky spider bodies or thin, vibrant strips of bell pepper to form eerie, watchful eyes. Small, Halloween-themed cookie cutters can transform slices of cheese into charming little bats or friendly ghosts before baking, adding an extra layer of festivity. For a delicious vegetarian option, mushroom slices can become ominous toadstools, while finely diced peppers, onions, and spinach add both vibrant color and a delightful crunch. You could even set up a fun ‘build-your-own’ mini pizza station, laying out a variety of prepped toppings and letting your guests unleash their inner artists. This not only adds immensely to the fun and interactive nature of the meal but also thoughtfully caters to diverse tastes and dietary preferences, including those looking for gluten-free options if you opt for a suitable crust base.
I’m genuinely excited for each and every one of you to bring this wonderfully festive recipe to life in your own kitchen. It’s so much more than just following a set of steps; it’s about embracing the pure spirit of fun, joy, and boundless creativity that defines the Halloween season. So, gather your ingredients, enlist your eager little helpers (or big ones!), and get ready to bake some seriously delightful and memorable treats. Once you’ve whipped up your very own batch of these fantastic pizzas, I would absolutely love, love, love to hear all about your experience! Did you come up with any clever new topping designs or ghoulish embellishments? What was your family’s favorite part of the cooking or eating process? Please, please, don’t hesitate for a moment to share your wonderful photos and inspiring stories with me. Your feedback, your ingenious creative interpretations, and your joyful moments inspire me endlessly, and I always find immense pleasure in seeing how you make these recipes uniquely your own. It’s a truly wonderful and fulfilling feeling to know that I’ve helped bring a little bit of extra joy, deliciousness, and festive spirit to your cherished celebrations. Happy baking, everyone, and a very happy Halloween!
Easy Mini Halloween Pizzas
Transform your spooky season with these delightfully delicious and customizable Halloween Tortilla Pizzas. A fun, creative, and guaranteed crowd-pleasing treat for all ages, perfect for a festive gathering.
Ingredients
-
1 (28 oz) can whole tomatoes, drained
-
2 cloves garlic, minced
-
1 Tbsp olive oil
-
1 tsp white wine vinegar
-
1 tsp dried oregano
-
Salt and freshly ground black pepper to taste
-
3 (10-inch) flour tortillas
-
2 tsp olive oil (for brushing bases)
-
4 slices Mozzarella cheese
-
1 slice Cheddar cheese
-
4 large black olives
-
1/4 cup pizza sauce
-
2 Tbsp shredded Mozzarella cheese
Instructions
-
Step 1
Preheat oven to 400°F (200°C). Line a baking sheet with parchment paper. If desired for ‘mini’ pizzas, cut 10-inch tortillas into smaller rounds. Arrange tortillas on the sheet and lightly brush edges with 2 tsp olive oil. -
Step 2
Cut ghost shapes from the 1 slice of Cheddar cheese. Halve and slice the 4 large black olives for eyes, spider bodies, and legs. -
Step 3
Spread the 1/4 cup pizza sauce evenly over the tortilla bases, leaving a small border for the crust. Sprinkle with 2 Tbsp shredded Mozzarella cheese. -
Step 4
Get creative! For ghosts, place a Cheddar ghost shape on a pizza and add small olive pieces for eyes. For mummies, tear thin strips from the 4 Mozzarella slices, crisscross them over a pizza, leaving a gap for two olive halves as eyes. For spiders, use an olive half for the body and arrange thin olive slices for 8 legs. -
Step 5
Bake for 8-12 minutes, or until the cheese is melted and bubbly and the tortillas are crisp and lightly golden. Carefully remove from oven and let cool on the baking sheet for 2-3 minutes before serving warm for maximum enjoyment.
Important Information
Nutrition Facts (Per Serving)
It is important to consider this information as approximate and not to use it as definitive health advice.
Allergy Information
Please check ingredients for potential allergens and consult a health professional if in doubt.