Roasted Garlic Dip: Prepare to be amazed! This isn’t just any dip; it’s a flavor explosion waiting to happen. Imagine the sweet, mellow taste of roasted garlic blended into a creamy, dreamy base. It’s so good, you’ll want to put it on everything!
Garlic, in its raw form, has been a culinary staple for centuries, dating back to ancient civilizations. But roasting it transforms its pungent bite into a sweet, almost caramelized delight. This technique, while simple, unlocks a depth of flavor that elevates even the most humble ingredients. While the exact origins of Roasted Garlic Dip are difficult to pinpoint, the concept of using roasted garlic to enhance dips and spreads has likely evolved over time, influenced by various culinary traditions.
What makes this dip so irresistible? It’s the perfect balance of sweet and savory. The roasting process mellows the garlic’s sharpness, leaving behind a subtle sweetness that complements the creamy base beautifully. People love it because it’s incredibly versatile – perfect with crusty bread, fresh vegetables, or even as a spread for sandwiches. Plus, it’s surprisingly easy to make, requiring minimal effort for maximum flavor payoff. Trust me, once you try this Roasted Garlic Dip, you’ll never buy store-bought dip again!

Ingredients:
- 1 large head of garlic
- 2 tablespoons olive oil, plus more for drizzling
- 8 ounces cream cheese, softened
- 1/2 cup sour cream
- 1/4 cup mayonnaise
- 1/4 cup grated Parmesan cheese
- 2 tablespoons chopped fresh chives
- 1 tablespoon chopped fresh parsley
- 1 teaspoon lemon juice
- 1/2 teaspoon garlic powder
- 1/4 teaspoon onion powder
- 1/4 teaspoon red pepper flakes (optional)
- Salt and freshly ground black pepper to taste
- Assorted vegetables, crackers, or bread for serving
Roasting the Garlic: The Foundation of Flavor
- Preheat your oven to 400°F (200°C). This is crucial for even roasting and that beautiful, caramelized garlic.
- Prepare the garlic head. Using a sharp knife, carefully slice off the top quarter of the garlic head, exposing the individual cloves. Don’t be shy; you want to see those cloves!
- Drizzle with olive oil. Place the garlic head on a piece of aluminum foil. Drizzle generously with about 2 tablespoons of olive oil, making sure the oil gets down into the exposed cloves.
- Season and wrap. Sprinkle the garlic with a pinch of salt and pepper. Wrap the foil tightly around the garlic head, creating a sealed packet. This will steam the garlic as it roasts, making it incredibly soft and spreadable.
- Roast the garlic. Place the foil packet in the preheated oven and roast for 45-60 minutes, or until the garlic cloves are very soft and golden brown. The roasting time will depend on the size of your garlic head, so keep an eye on it. You’ll know it’s ready when the cloves are easily pierced with a fork.
- Cool slightly. Carefully remove the foil packet from the oven and let it cool slightly before handling. Be careful, as the steam inside will be hot!
Preparing the Dip Base: Creamy Goodness
- Squeeze out the roasted garlic. Once the garlic is cool enough to handle, carefully open the foil packet. Squeeze the roasted garlic cloves out of their skins into a medium-sized mixing bowl. They should easily pop out with a gentle squeeze.
- Mash the garlic. Using a fork, mash the roasted garlic into a smooth paste. You want to eliminate any large chunks for a creamy, even texture in the dip.
- Add the cream cheese. Add the softened cream cheese to the bowl with the mashed garlic. Make sure your cream cheese is truly softened; otherwise, it will be difficult to incorporate smoothly.
- Incorporate the sour cream and mayonnaise. Add the sour cream and mayonnaise to the bowl. These ingredients add moisture and tang to the dip, balancing the richness of the cream cheese and garlic.
- Mix well. Using an electric mixer (handheld or stand mixer) or a sturdy whisk, beat the ingredients together until smooth and creamy. Be sure to scrape down the sides of the bowl to ensure everything is evenly incorporated.
Adding Flavor and Texture: The Finishing Touches
- Incorporate the Parmesan cheese. Add the grated Parmesan cheese to the bowl. Parmesan adds a salty, nutty flavor that complements the roasted garlic beautifully.
- Add the fresh herbs. Add the chopped fresh chives and parsley to the bowl. Fresh herbs brighten the flavor of the dip and add a pop of color. If you don’t have fresh herbs, you can substitute dried herbs, but use about half the amount.
- Add the lemon juice. Add the lemon juice to the bowl. The lemon juice adds a touch of acidity that balances the richness of the dip and enhances the other flavors.
- Season with spices. Add the garlic powder, onion powder, and red pepper flakes (if using) to the bowl. These spices add depth and complexity to the flavor of the dip.
- Season to taste. Season the dip with salt and freshly ground black pepper to taste. Be sure to taste the dip and adjust the seasoning as needed. Remember that the Parmesan cheese is already salty, so start with a small amount of salt and add more as needed.
- Mix thoroughly. Using a spoon or spatula, gently fold all the ingredients together until well combined. Be careful not to overmix, as this can make the dip tough.
Chilling and Serving: The Grand Finale
- Chill the dip. Cover the bowl with plastic wrap and refrigerate for at least 30 minutes, or preferably 1-2 hours, to allow the flavors to meld together. Chilling also helps the dip to thicken slightly.
- Prepare your dippers. While the dip is chilling, prepare your assorted vegetables, crackers, or bread for serving. Some great options include carrot sticks, celery sticks, cucumber slices, bell pepper strips, pita bread, baguette slices, and your favorite crackers.
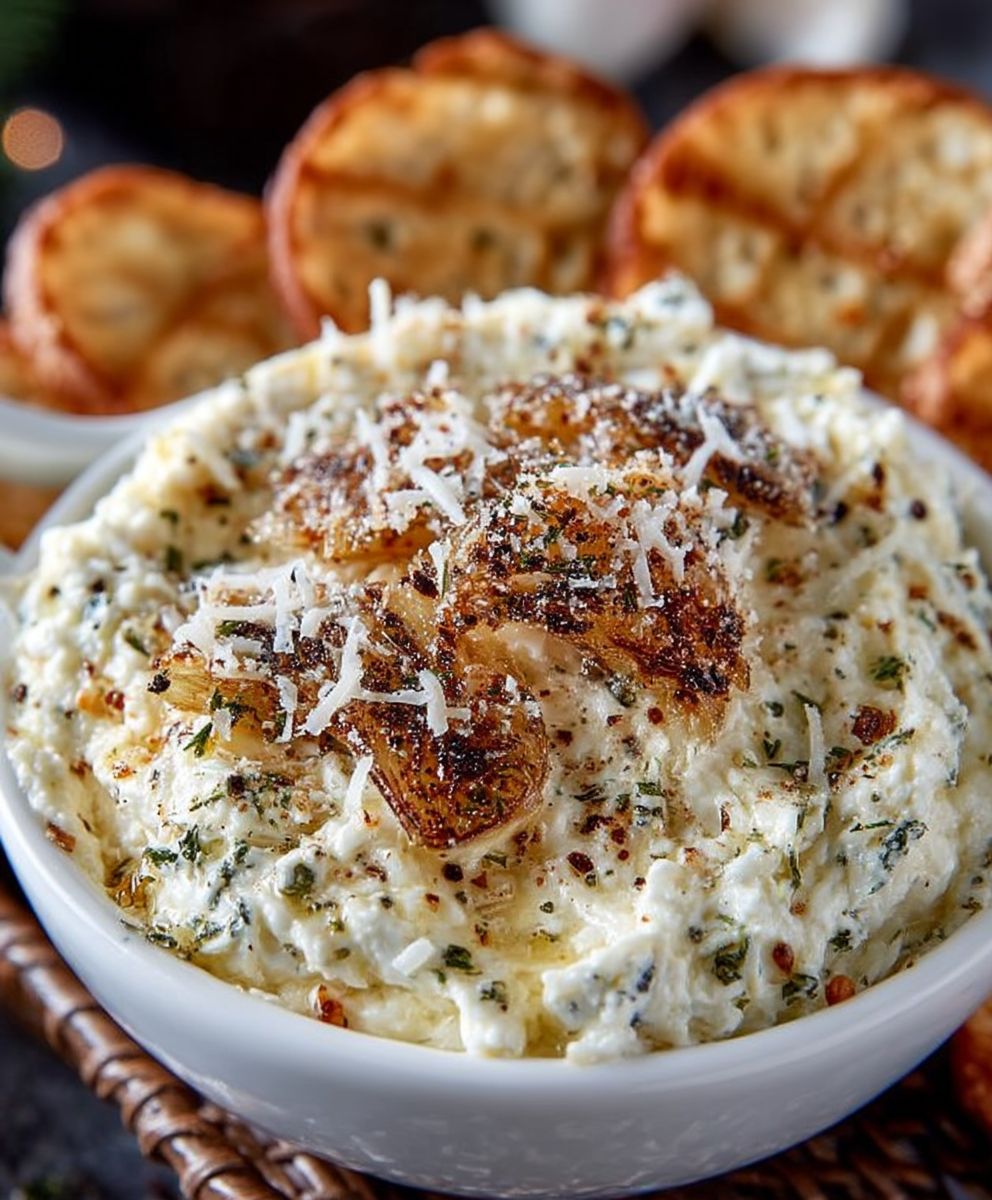
- Serve and enjoy! Remove the dip from the refrigerator and transfer it to a serving bowl. Drizzle with a little extra olive oil and garnish with a sprinkle of fresh chives or parsley, if desired. Serve immediately with your prepared dippers and enjoy!
Tips and Variations:
- Make it vegan: Substitute vegan cream cheese, sour cream, and mayonnaise for the dairy-based ingredients. You can also use nutritional yeast in place of Parmesan cheese for a cheesy flavor.
- Add some heat: Increase the amount of red pepper flakes or add a pinch of cayenne pepper for a spicier dip.
- Experiment with herbs: Try adding other fresh herbs, such as rosemary, thyme, or oregano, for a different flavor profile.
- Use different cheeses: Try using a different type of cheese, such as goat cheese or feta cheese, in place of Parmesan cheese.
- Make it ahead: This dip can be made up to 3 days in advance and stored in the refrigerator.
- Serving suggestions: This dip is also delicious served with grilled chicken, fish, or vegetables. You can also use it as a spread for sandwiches or wraps.
Storage Instructions:
Store leftover roasted garlic dip in an airtight container in the refrigerator for up to 3 days. The dip may thicken slightly as it chills, so you may need to stir in a little milk or cream to restore it to its original consistency before serving.
Nutritional Information (approximate, per serving):
Please note that the nutritional information is an estimate and may vary depending on the specific ingredients used.
- Calories: 150-200
- Fat: 12-16g
- Saturated Fat: 7-9g
- Cholesterol: 30-40mg
- Sodium: 200-300mg
- Carbohydrates: 5-7g
- Fiber: 1-2g
- Sugar: 2-3g
- Protein: 3-5g
Conclusion:
This Roasted Garlic Dip isn’t just another appetizer; it’s a flavor explosion waiting to happen, and trust me, you absolutely need this in your life! The creamy texture, the subtly sweet and nutty notes of the roasted garlic, and the bright, herbaceous finish create a symphony of flavors that will have everyone reaching for more. It’s incredibly easy to make, requiring minimal effort for maximum impact, making it the perfect go-to recipe for any occasion, from casual weeknight snacking to elegant dinner parties.
Why is this a must-try? Because it elevates the humble garlic to superstar status! Roasting the garlic transforms its pungent bite into a mellow, almost caramelized sweetness that blends seamlessly with the other ingredients. It’s a sophisticated dip that’s surprisingly versatile and universally appealing. Forget those bland, store-bought dips – this homemade version is in a league of its own.
But the fun doesn’t stop there! This recipe is just a starting point for your culinary creativity. Feel free to experiment with different variations to suit your taste. For a spicier kick, add a pinch of red pepper flakes or a dash of your favorite hot sauce. If you’re a cheese lover, stir in some crumbled feta or goat cheese for added tang and texture. A squeeze of lemon juice can brighten the flavors even further, while a sprinkle of toasted pine nuts adds a delightful crunch.
Serving suggestions are endless! Of course, it’s fantastic with crusty bread, pita chips, or vegetable sticks. But don’t limit yourself! Try spreading it on sandwiches or wraps for an extra layer of flavor. Use it as a base for homemade pizza or flatbreads. Dollop it on grilled chicken or fish for a delicious and healthy meal. You can even thin it out with a little olive oil and use it as a salad dressing. The possibilities are truly limitless!
Serving Suggestions and Variations:
* Classic: Serve with warm pita bread, crusty baguette slices, or an assortment of fresh vegetables like carrots, celery, and cucumbers.
* Mediterranean: Add chopped Kalamata olives, sun-dried tomatoes, and a sprinkle of oregano for a Mediterranean twist.
* Spicy: Incorporate a pinch of red pepper flakes or a drizzle of chili oil for a fiery kick.
* Cheesy: Stir in crumbled feta cheese, goat cheese, or grated Parmesan cheese for added richness and flavor.
* Herby: Mix in chopped fresh herbs like parsley, chives, or dill for a vibrant and aromatic dip.
* As a Spread: Use it as a spread for sandwiches, wraps, or burgers.
* As a Sauce: Thin it out with a little olive oil and use it as a sauce for pasta or grilled meats.
I’m so excited for you to try this Roasted Garlic Dip! I know you’ll love it as much as I do. It’s a guaranteed crowd-pleaser that’s sure to impress your friends and family. So, gather your ingredients, preheat your oven, and get ready to experience the magic of roasted garlic.
Once you’ve made it, I’d love to hear about your experience! Share your photos and comments on social media using [Your Hashtag] or tag me [Your Social Media Handle]. Let me know what variations you tried and how you served it. I can’t wait to see your creations and hear your feedback. Happy dipping!
Roasted Garlic Dip: The Ultimate Guide to Creamy Perfection
Creamy, flavorful roasted garlic dip, perfect with vegetables, crackers, or bread. Easy to make and packed with savory goodness!
Ingredients
Instructions
Recipe Notes
- Make it vegan: Substitute vegan cream cheese, sour cream, and mayonnaise for the dairy-based ingredients. You can also use nutritional yeast in place of Parmesan cheese for a cheesy flavor.
- Add some heat: Increase the amount of red pepper flakes or add a pinch of cayenne pepper for a spicier dip.
- Experiment with herbs: Try adding other fresh herbs, such as rosemary, thyme, or oregano, for a different flavor profile.
- Use different cheeses: Try using a different type of cheese, such as goat cheese or feta cheese, in place of Parmesan cheese.
- Make it ahead: This dip can be made up to 3 days in advance and stored in the refrigerator.
- Serving suggestions: This dip is also delicious served with grilled chicken, fish, or vegetables. You can also use it as a spread for sandwiches or wraps.
- Store leftover roasted garlic dip in an airtight container in the refrigerator for up to 3 days. The dip may thicken slightly as it chills, so you may need to stir in a little milk or cream to restore it to its original consistency before serving.