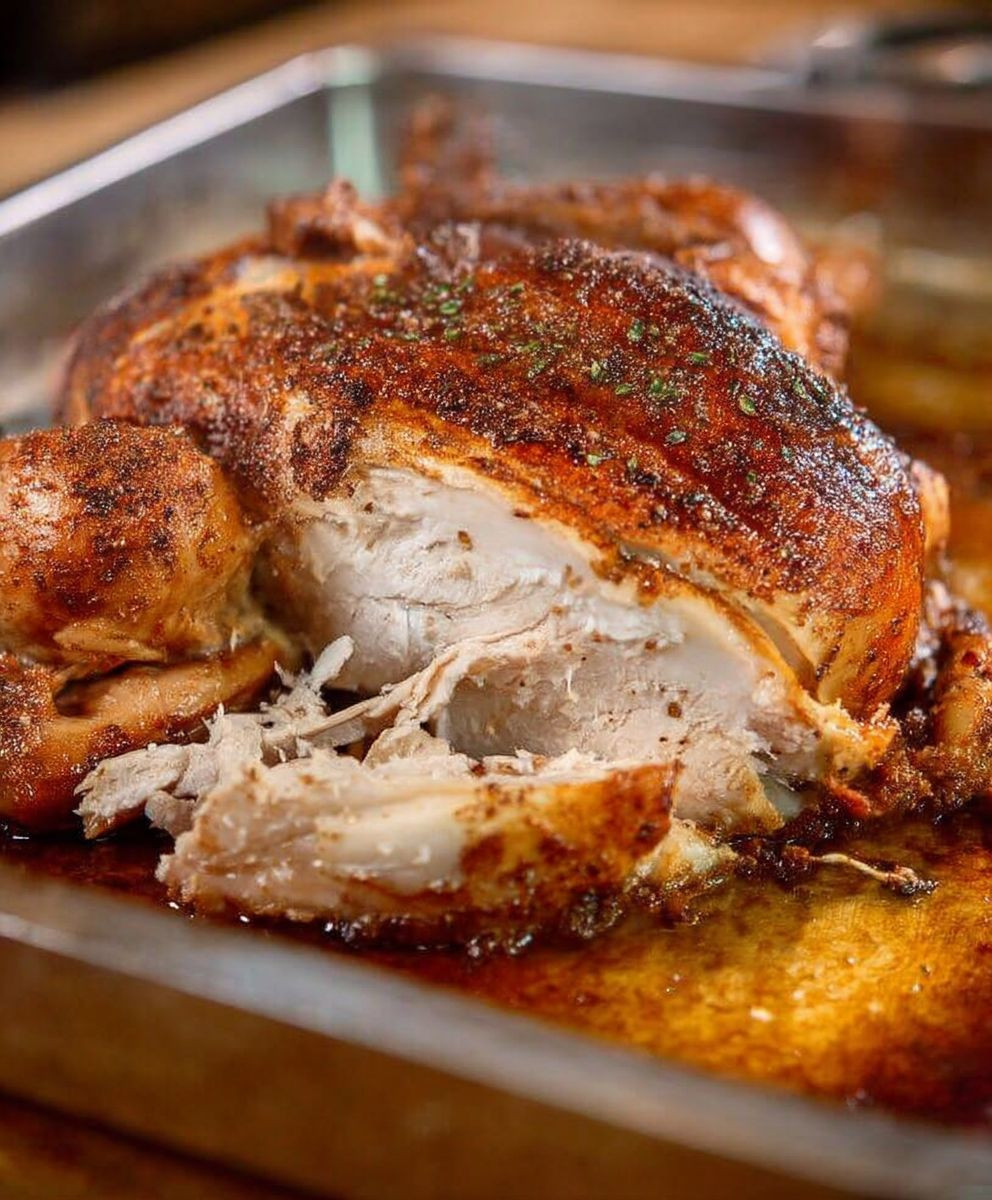
Rotisserie Chicken: the ultimate weeknight dinner hero! Are you tired of slaving away in the kitchen after a long day? Imagine this: succulent, juicy chicken with crispy, golden skin, ready to devour in minutes. Forget complicated recipes and hours of prep time; this is about maximizing flavor with minimal effort.
The concept of roasting chicken over an open fire dates back centuries, with variations found in cultures worldwide. While the modern rotisserie machine is a relatively recent invention, the desire for perfectly cooked, evenly browned poultry is timeless. It’s a technique that ensures the chicken bastes itself in its own juices, resulting in unparalleled tenderness and flavor.
People adore Rotisserie Chicken for its incredible versatility and convenience. It’s a blank canvas for countless meals! Shred it for tacos, slice it for sandwiches, toss it in salads, or simply enjoy it as is with your favorite sides. The possibilities are endless! Plus, the aroma alone is enough to make your mouth water. It’s a comforting, satisfying meal that’s perfect for busy families and anyone who appreciates delicious, fuss-free cooking. So, ditch the takeout menu and discover the magic of rotisserie chicken – you won’t regret it!

Ingredients:
- 1 Rotisserie Chicken (about 3 pounds)
- 1 tablespoon olive oil
- 1 large yellow onion, chopped
- 2 carrots, peeled and chopped
- 2 celery stalks, chopped
- 4 cloves garlic, minced
- 8 cups chicken broth (low sodium preferred)
- 1 teaspoon dried thyme
- 1/2 teaspoon dried rosemary
- 1/4 teaspoon dried sage
- 1 bay leaf
- 1 cup uncooked long-grain rice (or egg noodles for chicken noodle soup)
- 1/2 cup chopped fresh parsley
- Salt and freshly ground black pepper to taste
- Optional: 1/2 cup heavy cream or milk for a creamier soup
Preparing the Chicken:
Okay, let’s get started! The first thing we need to do is break down that beautiful rotisserie chicken. Don’t worry, it’s easier than it looks. We’re going to separate the meat from the bones and skin. This is where you get to use your hands – my favorite part!
- Remove the Chicken from the Packaging: Carefully take the rotisserie chicken out of its container. Be mindful of any hot juices that might spill. Place it on a large cutting board.
- Separate the Legs and Thighs: Using a sharp knife or kitchen shears, cut through the skin and joint connecting the legs and thighs to the body of the chicken. Wiggle the leg to find the joint, and then cut through it. Repeat on the other side.
- Remove the Wings: Similar to the legs, cut through the skin and joint connecting the wings to the body. Wiggle the wing to locate the joint, and then cut through it. Repeat on the other side.
- Remove the Breast Meat: Now for the breast meat! This is the most prized part of the chicken. Using your fingers or a fork, gently pull the breast meat away from the bone. You can also use a knife to carefully slice the meat off the bone. Try to get as much meat as possible.
- Shred the Chicken: Once you’ve removed all the meat, shred it into bite-sized pieces. I like to use two forks for this, but you can also use your fingers. Be sure to remove any small bones or cartilage that you might find. Set the shredded chicken aside in a bowl.
- Save the Carcass: Don’t throw away that chicken carcass! We’re going to use it to make a richer, more flavorful broth. Place the carcass in a large pot or Dutch oven.
Making the Broth (Optional, but Highly Recommended!):
This step is optional, but trust me, it’s worth the extra effort. Making your own broth from the rotisserie chicken carcass will take your soup to the next level. It adds so much depth of flavor that you just can’t get from store-bought broth.
- Add Vegetables to the Carcass: To the pot with the chicken carcass, add the chopped onion, carrots, and celery. These vegetables will add even more flavor to the broth.
- Add Water and Seasonings: Pour about 10-12 cups of water into the pot, enough to cover the carcass and vegetables. Add the thyme, rosemary, sage, and bay leaf. Season with a pinch of salt and pepper.
- Bring to a Boil, Then Simmer: Bring the mixture to a boil over high heat. Once it’s boiling, reduce the heat to low, cover the pot, and let it simmer for at least 1 hour, or up to 3 hours. The longer it simmers, the more flavorful the broth will be.
- Strain the Broth: After simmering, carefully strain the broth through a fine-mesh sieve or cheesecloth-lined colander into a large bowl or pot. Discard the solids (bones, vegetables, and herbs).
- Degrease the Broth (Optional): If you want to remove some of the fat from the broth, you can let it cool slightly and then skim off the fat that rises to the top. Alternatively, you can refrigerate the broth overnight and the fat will solidify on top, making it easy to remove.
Making the Soup:
Alright, now we’re ready to make the soup! Whether you used homemade broth or store-bought, this part is where the magic happens. We’re going to build layers of flavor and create a comforting and delicious soup.
- Sauté the Vegetables: In a large pot or Dutch oven, heat the olive oil over medium heat. Add the chopped onion, carrots, and celery and cook until softened, about 5-7 minutes. Stir occasionally to prevent burning.
- Add the Garlic: Add the minced garlic and cook for another minute, until fragrant. Be careful not to burn the garlic, as it can become bitter.
- Add the Broth: Pour the chicken broth (either homemade or store-bought) into the pot.
- Add the Seasonings: Add the thyme, rosemary, sage, and bay leaf. Season with salt and pepper to taste. Remember that the rotisserie chicken is already seasoned, so start with a small amount of salt and adjust as needed.
- Bring to a Simmer: Bring the soup to a simmer over medium heat.
- Add the Rice (or Noodles): Add the uncooked rice (or egg noodles) to the soup. If using rice, it will take about 20-25 minutes to cook. If using egg noodles, they will cook much faster, usually in about 8-10 minutes. Follow the package directions for cooking times.
- Cook Until Rice (or Noodles) are Tender: Cook the soup until the rice (or noodles) are tender and the vegetables are cooked through. Stir occasionally to prevent the rice from sticking to the bottom of the pot.
- Add the Shredded Chicken: Once the rice (or noodles) are cooked, add the shredded rotisserie chicken to the soup.
- Heat Through: Heat the chicken through, about 2-3 minutes. Be careful not to overcook the chicken, as it can become dry.
- Stir in Parsley: Stir in the chopped fresh parsley.
- Optional: Add Cream (or Milk): If you want a creamier soup, stir in the heavy cream or milk. Heat through gently, but do not boil.
- Remove Bay Leaf: Before serving, remove the bay leaf from the soup.
- Taste and Adjust Seasonings: Taste the soup and adjust the seasonings as needed. You may need to add more salt, pepper, or herbs to your liking.
Serving:
Finally, the moment we’ve been waiting for! It’s time to serve up this delicious and comforting rotisserie chicken soup. I like to serve it with a side of crusty bread or crackers for dipping.
- Ladle into Bowls: Ladle the soup into bowls.
- Garnish (Optional): Garnish with a sprinkle of fresh parsley or a dollop of sour cream or Greek yogurt.
- Serve Immediately: Serve the soup immediately and enjoy!
Tips and Variations:
- Vegetable Variations: Feel free to add other vegetables to the soup, such as peas, corn, green beans, or potatoes.
- Spice it Up: Add a pinch of red pepper flakes for a little heat.
- Lemon Juice: A squeeze of fresh lemon juice at the end can brighten up the flavors of the soup.
- Make it Gluten-Free: Use gluten-free noodles or rice to make this soup gluten-free.
- Storage: Leftover soup can be stored in the refrigerator for up to 3-4 days.
- Freezing: This soup freezes well. Let it cool completely before transferring it to freezer-safe containers. Freeze for up to 2-3 months. Thaw overnight in the refrigerator before reheating.
Enjoy your homemade Rotisserie Chicken Soup! I hope you love it as much as I do!
Conclusion:
So there you have it! This isn’t just another recipe; it’s your ticket to consistently delicious and incredibly versatile meals, all starting with a simple, perfectly cooked rotisserie chicken. I truly believe this method unlocks the full potential of this grocery store staple, transforming it from a convenient shortcut into a culinary cornerstone.
Why is this a must-try? Because it’s easy, it’s economical, and it delivers restaurant-quality results without the restaurant price tag. You’re not just getting a meal; you’re getting a foundation for countless culinary adventures. Think about it: perfectly seasoned, juicy chicken ready to be shredded, sliced, or even enjoyed whole. The possibilities are truly endless!
But the real magic lies in its adaptability. Feeling like a light and refreshing lunch? Toss shredded rotisserie chicken with crisp lettuce, juicy tomatoes, creamy avocado, and a zesty vinaigrette for a vibrant salad. Craving something warm and comforting? Use the leftover chicken to create a hearty chicken noodle soup, a creamy chicken pot pie, or even a flavorful chicken chili. The bones can even be used to make a rich and flavorful bone broth!
And don’t even get me started on the variations! For a spicier kick, try adding a pinch of cayenne pepper or a dash of hot sauce to the chicken before roasting. For a more Mediterranean flavor profile, incorporate lemon zest, oregano, and a drizzle of olive oil. Or, for an Asian-inspired twist, brush the chicken with a mixture of soy sauce, ginger, and garlic. The only limit is your imagination!
Here are a few serving suggestions to get you started:
Serving Suggestions:
- Classic Chicken Dinner: Serve the rotisserie chicken with roasted vegetables like potatoes, carrots, and Brussels sprouts.
- Chicken Tacos: Shred the chicken and use it as a filling for tacos, topped with your favorite salsa, guacamole, and sour cream.
- Chicken Caesar Salad: Add sliced rotisserie chicken to a classic Caesar salad for a protein-packed and satisfying meal.
- Chicken Quesadillas: Combine shredded chicken with cheese and your favorite fillings in a quesadilla for a quick and easy lunch or dinner.
- Chicken Fried Rice: Dice the chicken and add it to fried rice for a flavorful and complete meal.
I’m genuinely excited for you to try this recipe and experience the joy of a perfectly cooked rotisserie chicken. It’s a game-changer in the kitchen, and I know you’ll love it as much as I do.
So, what are you waiting for? Head to your local grocery store, grab a rotisserie chicken, and get ready to create some culinary magic. And most importantly, don’t forget to share your experience! I’d love to hear how you used your rotisserie chicken and what delicious creations you came up with. Tag me in your photos on social media and let me know your favorite variations. Happy cooking! I can’t wait to see what you create!
Rotisserie Chicken: The Ultimate Guide to Perfecting Your Roast
Cozy, flavorful Rotisserie Chicken Soup with tender shredded chicken, aromatic vegetables, and a rich broth. Perfect comfort food! Use the rotisserie chicken carcass for deeper flavor.
Ingredients
Instructions
Recipe Notes
- Vegetable Variations: Add peas, corn, green beans, or potatoes.
- Spice it Up: Add a pinch of red pepper flakes.
- Lemon Juice: A squeeze of fresh lemon juice brightens the flavors.
- Gluten-Free: Use gluten-free noodles or rice.
- Storage: Leftover soup can be stored in the refrigerator for up to 3-4 days.
- Freezing: Let it cool completely before transferring it to freezer-safe containers. Freeze for up to 2-3 months. Thaw overnight in the refrigerator before reheating.
- Using the rotisserie chicken carcass to make the broth is highly recommended for a richer, more flavorful soup.
- Be careful not to burn the garlic when sautéing.
- Start with a small amount of salt and adjust as needed, as the rotisserie chicken is already seasoned.
- Do not overcook the chicken when heating it through, as it can become dry.