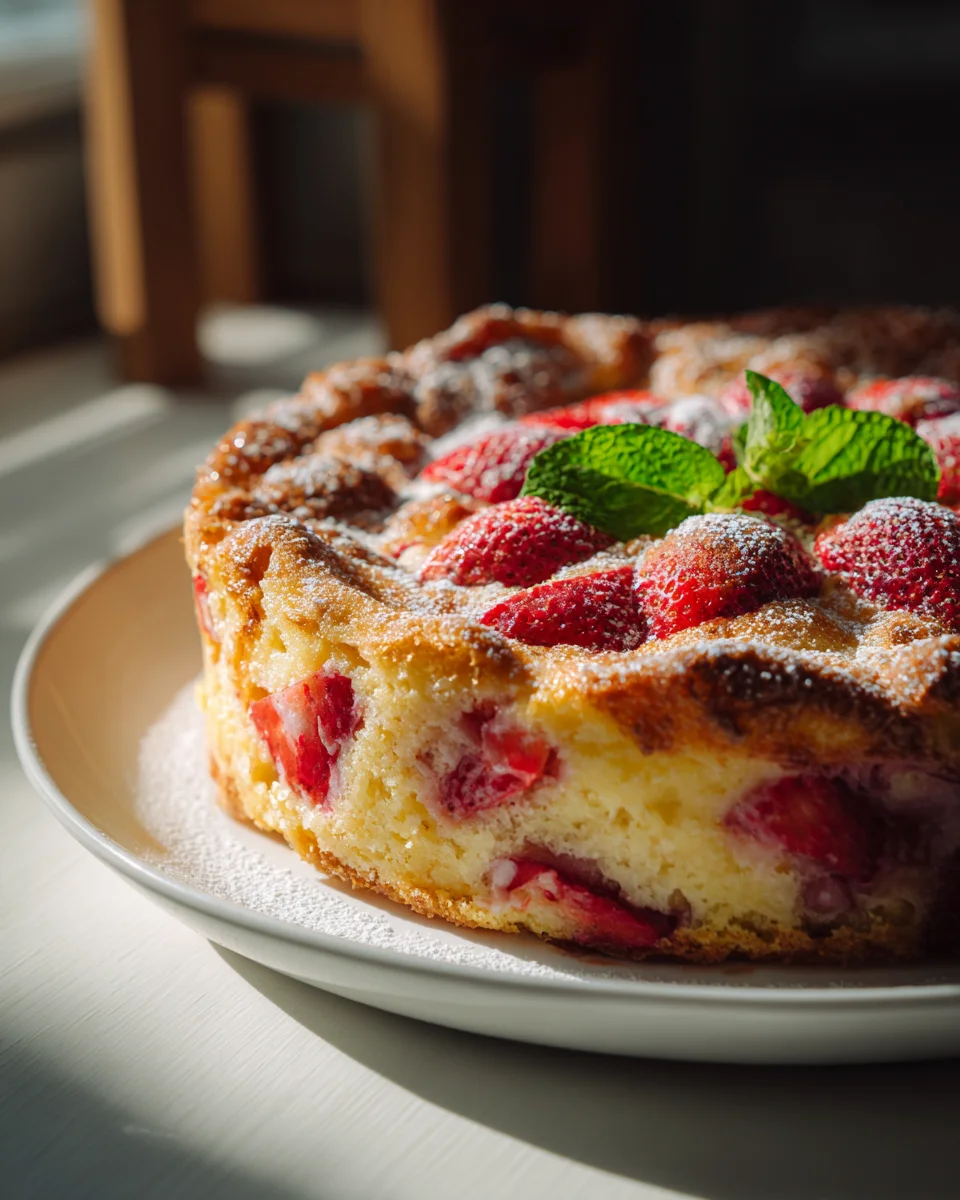
Strawberry Cheesecake Dump Cake
Oh boy, do I have a treat for you today! Get ready to fall head over heels for my Strawberry Cheesecake Dump Cake, I promise it’s going to be your new favorite go-to dessert. This isn’t just any sweet treat; it’s a glorious mash-up of everything wonderful. What makes it so special? Well, imagine the creamy, tangy delight of a luscious strawberry cheesecake meeting the effortless, gooey goodness of a classic dump cake. It’s truly a match made in heaven, delivering all the complex flavors with none of the fuss!
You are absolutely going to adore this recipe because it delivers maximum flavor with minimum effort – seriously, it’s almost embarrassingly easy to make. Forget complicated steps and piles of dishes; we’re talking about layering a few simple ingredients and letting your oven do all the hard work. In a nutshell, we combine sweet, vibrant strawberry pie filling with a rich, tangy cream cheese mixture, top it all with a dry yellow cake mix, and drizzle it generously with melted butter. As it bakes, it transforms into a warm, bubbling, fruity, and irresistibly creamy cake with a perfectly golden, crumbly topping that tastes like pure joy. It’s the ultimate fuss-free dessert for any occasion, perfect for satisfying those cheesecake cravings without all the fuss!

Ingredient Notes
Hello, fellow dessert lovers! When it comes to making a Strawberry Cheesecake Dump Cake, the beauty lies in its simplicity and the magic of a few key ingredients coming together. I’m going to walk you through what you’ll need, along with a few friendly tips for choosing the best.
-
Strawberry Pie Filling
First up, you’ll need one large can (about 21 ounces) of strawberry pie filling. This forms the delightful fruity base of our dump cake. I always recommend opting for a good quality brand here, as the flavor really shines through. While we’re making a strawberry version, feel free to experiment with cherry, blueberry, or even a mixed berry pie filling if you ever want to change things up – but for this recipe, it’s all about that vibrant strawberry!
-
Cream Cheese
To achieve that luscious “cheesecake” swirl, you’ll need one 8-ounce block of cream cheese. It’s absolutely critical that your cream cheese is softened to room temperature before you start. This makes it incredibly easy to mix until smooth, ensuring no lumps in your creamy layer. Full-fat cream cheese works best for richness, but a reduced-fat version can also be used if you prefer a lighter touch.
-
Granulated Sugar & Vanilla Extract
You’ll need about 1/4 cup of granulated sugar and 1 teaspoon of vanilla extract to sweeten and flavor our cream cheese layer. These two humble ingredients are essential for creating that classic sweet, aromatic cheesecake taste that pairs so wonderfully with the strawberries.
-
Yellow Cake Mix
The “dump” part of the cake truly comes alive with one box (about 15.25 ounces) of yellow cake mix. And here’s the crucial part: you’re going to use it straight from the box, dry! Do NOT prepare it according to the package directions. The dry mix is what creates the cakey, crumbly, and slightly crunchy topping once it bakes. While yellow is traditional and gives a beautiful golden hue, a white cake mix can be used as a substitute if that’s what you have on hand.
-
Unsalted Butter
Finally, we need one stick (1/2 cup) of unsalted butter. I prefer to slice my butter into thin pats, but you can also melt it and drizzle it over the top. The butter is what saturates the dry cake mix, allowing it to bake into that glorious golden-brown, crispy crust we all love in a dump cake. Using unsalted butter gives you control over the overall saltiness, but salted butter can work in a pinch – just know your cake might be a tiny bit saltier.
Step-by-Step Instructions
Making a Strawberry Cheesecake Dump Cake is unbelievably easy, I promise! It’s called a “dump cake” for a reason – you basically just layer everything and let the oven do its magic. Follow these simple steps, and you’ll have a stunning dessert in no time.
-
1. Prepare Your Dish and Oven
Before we get started, preheat your oven to 350°F (175°C). Grab a 9×13 inch baking dish and give it a light spray with non-stick cooking spray. This little step makes sure our delicious cake doesn’t stick and makes clean-up a breeze.
-
2. Spread the Strawberry Base
Open that can of strawberry pie filling. Without any fuss, simply “dump” the entire can into the bottom of your prepared baking dish. Use a spatula or the back of a spoon to spread it out into an even layer. This vibrant red layer is the delicious foundation for our cake.
-
3. Create the Cheesecake Layer
In a medium bowl, combine your softened cream cheese, granulated sugar, and vanilla extract. Using an electric mixer (or a good old-fashioned whisk and some elbow grease), beat these ingredients together until the mixture is completely smooth and creamy, with no lumps of cream cheese visible. Now, take spoonfuls of this luscious cheesecake mixture and dollop it over the strawberry pie filling. You don’t need to spread it perfectly; leaving it in dollops allows for beautiful swirls and pockets of creamy cheesecake once baked.
-
4. Sprinkle the Dry Cake Mix
Next, grab your box of yellow cake mix. Remember, we’re using it dry! Evenly sprinkle the entire contents of the cake mix over the cream cheese and strawberry layers. Try to get a consistent layer across the whole dish. This dry mix will absorb the moisture from the fruit and butter as it bakes, transforming into a tender cakey topping.
-
5. Add the Butter
Now for the butter! Arrange your thinly sliced pats of butter evenly over the dry cake mix. My goal is to cover as much of the surface area as possible, as this ensures the cake mix gets thoroughly saturated and bakes into a lovely, golden, and slightly crispy crust. If you opted for melted butter, drizzle it as evenly as you can over the cake mix.
-
6. Bake to Golden Perfection
Pop your baking dish into your preheated oven. Bake for approximately 45-55 minutes, or until the top is beautifully golden brown, the strawberry filling is bubbly around the edges, and the cake mix has transformed into a set, crumbly topping. You shouldn’t see any dry pockets of cake mix remaining. The aroma filling your kitchen will be incredible!
-
7. Cool and Serve
Once baked, carefully remove the cake from the oven. This is the hardest part: let it cool! I recommend letting it cool on a wire rack for at least 20-30 minutes before serving. This cooling time allows the layers to set properly, especially the cheesecake portion. If you try to dig in too soon, it might be a bit too runny. Trust me, the wait is worth it!
Tips & Suggestions
Making a Strawberry Cheesecake Dump Cake is pretty straightforward, but I’ve picked up a few tricks along the way that can elevate your experience and ensure a perfect outcome every time. Here are my favorite tips and suggestions to help you out:
-
Don’t Stir!
This is probably the most crucial rule for any dump cake, and especially for our cheesecake version. Once you’ve layered your ingredients – strawberries, cream cheese dollops, dry cake mix, and butter – resist the urge to stir! The magic of a dump cake happens as the layers cook together, creating distinct textures and flavors without you having to do any mixing. Stirring will just combine everything into a muddled mess, losing the charm of the distinct layers.
-
Even Butter Distribution is Key
To achieve that perfectly crisp, golden-brown topping, try your best to distribute the butter evenly over the dry cake mix. Whether you’re using thin slices or drizzling melted butter, aim for maximum coverage. The butter saturates the cake mix, allowing it to brown beautifully and create a delightful contrast to the soft fruit and creamy cheesecake underneath. If there are dry spots, they tend to remain powdery, which isn’t as pleasant.
-
Patience with Cooling
I know it’s hard to wait when your kitchen smells incredible, but truly, give your Strawberry Cheesecake Dump Cake ample time to cool. At least 20-30 minutes is ideal, but for a firmer cheesecake layer, I often let it cool for an hour or even chill it slightly in the refrigerator before serving. This allows the creamy cheesecake layer to set up properly, giving you that lovely, defined texture that makes this cake so special.
-
Amp Up the Cheesecake Flavor
Want an even more pronounced cheesecake flavor? You can add a tiny pinch of lemon zest (about 1/4 teaspoon) to your cream cheese mixture. The bright citrus notes really complement the strawberries and enhance the “cheesecake” tang. Alternatively, a little extra vanilla extract (up to 1.5 teaspoons) can deepen the creamy notes.
-
Optional Add-Ins for Extra Decadence
If you’re feeling a little extra, consider sprinkling a handful of white chocolate chips over the dry cake mix layer before adding the butter. They melt beautifully and add another layer of sweetness and richness. A sprinkle of slivered almonds or chopped pecans can also add a delightful crunch to the topping.
-
Serving Suggestions
This cake is fantastic on its own, warm from the oven. However, it’s absolutely heavenly served with a dollop of fresh whipped cream, a scoop of vanilla bean ice cream, or even a few fresh strawberry slices on the side. The contrast of warm cake with cold toppings is simply divine!
Storage
Once you’ve enjoyed your first glorious slices of Strawberry Cheesecake Dump Cake, you’ll want to make sure you store any leftovers properly to keep them fresh and delicious. Because this cake contains a cream cheese layer, refrigeration is key.
-
Refrigeration is a Must
Due to the dairy content in the cheesecake layer, your Strawberry Cheesecake Dump Cake should always be stored in the refrigerator. Never leave it out at room temperature for more than two hours, especially if your kitchen is warm.
-
Airtight Container
To keep your cake from drying out and to prevent it from absorbing any unwanted fridge odors, transfer any leftover portions into an airtight container. If you’re storing it directly in the baking dish, make sure to cover it tightly with plastic wrap or aluminum foil. This helps maintain its moisture and flavor.
-
Shelf Life
When stored properly in the refrigerator, your Strawberry Cheesecake Dump Cake will stay fresh and delightful for about 3 to 4 days. Beyond that, while it might still be safe to eat, the quality and freshness will start to decline.
-
Serving Leftovers
You can enjoy leftover dump cake cold, straight from the fridge – it’s quite delicious and the cheesecake layer becomes wonderfully firm. If you prefer it warm, simply scoop a portion onto a microwave-safe plate and heat it gently for 30-60 seconds, or until warmed through. Alternatively, you can warm larger portions in the oven at a low temperature (around 250°F or 120°C) for about 10-15 minutes, covering with foil to prevent drying.
-
Freezing for Longer Storage
Yes, you can freeze Strawberry Cheesecake Dump Cake! If you find yourself with more cake than you can eat within a few days, freezing is a great option. I recommend cutting the cake into individual servings first. Wrap each slice tightly in plastic wrap, then again in aluminum foil, and place them in a freezer-safe bag or container. It can be frozen for up to 1 month.
When you’re ready to enjoy a frozen slice, simply transfer it to the refrigerator overnight to thaw, or thaw it on the counter for a couple of hours. Once thawed, you can enjoy it cold or gently warm it as described above.
Final Thoughts
So there you have it – the utterly irresistible and unbelievably simple Strawberry Cheesecake Dump Cake! I genuinely believe this recipe is a true marvel for anyone who adores a decadent dessert without the fuss. The genius of the Strawberry Cheesecake Dump Cake lies in its straightforward approach; you simply layer the ingredients, and your oven works its magic, creating something extraordinary from such minimal effort.
What you end up with is a warm, bubbling, incredibly moist cake that beautifully combines sweet, juicy strawberries with rich, creamy pockets of cheesecake, all topped with a delightful, golden crumble. It’s that perfect harmony of fruit, tang, and sweetness, with textures that are simply divine. Whether you’re preparing it for a relaxed family meal, a cheerful gathering, or just as a comforting treat for yourself, this Strawberry Cheesecake Dump Cake promises smiles with every single spoonful.
I truly urge you to try this brilliant recipe. You’ll be amazed at how effortlessly you can create such a spectacular dessert. Get ready to experience the pure joy and incredible flavor of your very own Strawberry Cheesecake Dump Cake!
Strawberry Cheesecake Dump Cake – Quick, Decadent Dessert
- Total Time: 52 minute
- Yield: 8 servings 1x
Description
Indulge in the delightful flavors of Strawberry Cheesecake Dump Cake, a simple yet decadent dessert that combines creamy cheesecake and fruity strawberry goodness. This easy-to-make treat is perfect for satisfying your sweet cravings without the fuss!
Ingredients
- 1 large can (about 21 ounces) of strawberry pie filling
- 1 8-ounce block of cream cheese, softened
- 1/4 cup of granulated sugar
- 1 teaspoon of vanilla extract
- 1 box (about 15.25 ounces) of yellow cake mix
- 1 stick (1/2 cup) of unsalted butter
Instructions
- Preheat your oven to 350°F (175°C) and spray a 9×13 inch baking dish with non-stick cooking spray.
- Dump the entire can of strawberry pie filling into the bottom of the prepared baking dish and spread it out into an even layer.
- In a medium bowl, combine the softened cream cheese, granulated sugar, and vanilla extract. Beat until smooth and creamy, then dollop the mixture over the strawberry pie filling.
- Sprinkle the entire contents of the dry yellow cake mix evenly over the cream cheese and strawberry layers.
- Arrange thin pats of butter evenly over the dry cake mix, or drizzle melted butter over the top.
- Bake for approximately 45-55 minutes, or until the top is golden brown and the filling is bubbly.
- Let the cake cool on a wire rack for at least 20-30 minutes before serving.
- Prep Time: 15 mins
- Cook Time: 45-55 mins
- Category: Dessert
- Method: Baking
- Cuisine: American
Nutrition
- Serving Size: 1 slice
- Calories: 350
- Sugar: 20 g
- Sodium: 300 mg
- Fat: 18 g
- Saturated Fat: 10 g
- Unsaturated Fat: 6 g
- Trans Fat: 0 g
- Carbohydrates: 42 g
- Fiber: 1 g
- Protein: 4 g
- Cholesterol: 40 mg
Keywords: Avoid stirring the layers once they are assembled to maintain distinct textures. For a richer cheesecake flavor, consider adding a pinch of lemon zest or extra vanilla extract. Optional add-ins like white chocolate chips or nuts can enhance the cake's flavor and texture.