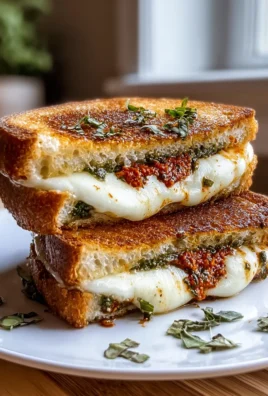
Turkey Melt Sandwich: the ultimate comfort food, elevated! Are you craving a satisfying lunch or a quick and easy dinner that’s bursting with flavor? Look no further! This isn’t just any sandwich; it’s a symphony of savory turkey, melted cheese, and perfectly toasted bread that will have you coming back for more.
While the exact origins of the melt sandwich are debated, its popularity soared in the mid-20th century, becoming a diner staple across America. It represents a time of simple pleasures and hearty meals, a tradition we’re keeping alive with this delicious Turkey Melt Sandwich recipe. Think of it as a sophisticated grilled cheese, but with the added protein and flavor of tender turkey.
What makes this sandwich so irresistible? It’s the perfect combination of textures – the crispiness of the toasted bread, the gooeyness of the melted cheese, and the tenderness of the turkey. The savory flavors blend harmoniously, creating a truly unforgettable culinary experience. Plus, it’s incredibly versatile! You can customize it with your favorite cheeses, spreads, and toppings to create a sandwich that’s uniquely yours. Whether you’re looking for a quick weeknight meal or a satisfying weekend lunch, this turkey melt is sure to hit the spot. Get ready to experience sandwich perfection!

Ingredients:
- 1 pound cooked turkey breast, sliced (deli-style or leftover Thanksgiving turkey works great!)
- 8 slices sourdough bread (or your favorite bread for sandwiches)
- 8 slices Swiss cheese (or Gruyere, provolone, or your preferred melting cheese)
- 1/4 cup mayonnaise
- 2 tablespoons Dijon mustard
- 4 tablespoons butter, softened
- 1/4 cup cranberry sauce (optional, but highly recommended!)
- 1/4 cup caramelized onions (optional, for extra flavor)
- Salt and freshly ground black pepper to taste
- Optional toppings: Lettuce, tomato slices, avocado slices
Preparing the Turkey Melt
- Prepare the Turkey: If you’re using leftover turkey, make sure it’s sliced thinly. Deli-style turkey is perfect for this recipe because it melts beautifully with the cheese. If your turkey is cold, you can gently warm it in a skillet or microwave for a few seconds before assembling the sandwiches. This will help the cheese melt more evenly.
- Mix the Spread: In a small bowl, combine the mayonnaise and Dijon mustard. This mixture will add a creamy tang to the sandwich that complements the turkey and cheese perfectly. You can adjust the ratio of mayonnaise to mustard to your liking. For a spicier kick, add a dash of hot sauce or a pinch of cayenne pepper.
- Butter the Bread: Spread softened butter evenly on one side of each slice of bread. This will help the sandwiches get golden brown and crispy when they’re cooked. Make sure the butter is softened, not melted, so it spreads easily without tearing the bread.
- Assemble the Sandwiches: Now it’s time to put everything together! On the unbuttered side of four slices of bread, spread a generous layer of the mayonnaise-mustard mixture. This will act as a barrier to prevent the bread from getting soggy.
- Add the Cheese: Layer two slices of Swiss cheese on top of the mayonnaise-mustard spread on each of the four bread slices. Make sure the cheese covers the entire surface of the bread so you get cheesy goodness in every bite.
- Pile on the Turkey: Divide the sliced turkey evenly among the four sandwiches, placing it on top of the cheese. Don’t be shy with the turkey! The more, the merrier.
- Add Optional Toppings: If you’re using cranberry sauce and caramelized onions, now’s the time to add them. Spread a spoonful of cranberry sauce over the turkey on each sandwich. The sweetness of the cranberry sauce pairs wonderfully with the savory turkey and cheese. Then, sprinkle the caramelized onions over the cranberry sauce. The caramelized onions add a depth of flavor that takes this sandwich to the next level.
- Top with More Cheese: Add two more slices of Swiss cheese on top of the turkey and any additional toppings. This will ensure that the cheese melts evenly and holds everything together.
- Top with Bread: Place the remaining four slices of bread on top of the cheese, buttered side up. Make sure the buttered side is facing up so it gets nice and crispy when you cook the sandwiches.
Cooking the Turkey Melt
- Heat the Skillet: Heat a large skillet or griddle over medium heat. You want the skillet to be hot enough to melt the cheese and toast the bread, but not so hot that it burns the bread before the cheese melts.
- Cook the Sandwiches: Carefully place the sandwiches in the hot skillet, making sure not to overcrowd the pan. You may need to cook them in batches.
- Press the Sandwiches: Use a spatula or a panini press to gently press down on the sandwiches. This will help them cook evenly and get nice and flat. If you don’t have a panini press, you can use a heavy skillet or pot to press down on the sandwiches.
- Cook Until Golden Brown: Cook the sandwiches for about 3-5 minutes per side, or until the bread is golden brown and the cheese is melted and gooey. Keep a close eye on them to prevent them from burning. If the bread is browning too quickly, reduce the heat slightly.
- Check for Doneness: To check if the sandwiches are done, gently lift one edge with a spatula. The bread should be golden brown and crispy, and the cheese should be melted and gooey. If the cheese isn’t fully melted, continue cooking for a minute or two longer.
- Remove from Skillet: Once the sandwiches are cooked to perfection, carefully remove them from the skillet and place them on a cutting board.
Serving the Turkey Melt
- Let Cool Slightly: Allow the sandwiches to cool for a minute or two before cutting them. This will prevent the cheese from oozing out too much when you cut them.
- Cut and Serve: Using a sharp knife, cut the sandwiches in half diagonally. This makes them easier to handle and eat.
- Add Optional Sides: Serve the turkey melts immediately with your favorite sides. Some great options include:
- Potato chips
- Coleslaw
- Pickles
- Soup
- Salad
- Enjoy! Now it’s time to sit back, relax, and enjoy your delicious turkey melt sandwich! The combination of the savory turkey, melted cheese, creamy mayonnaise-mustard spread, and crispy bread is simply irresistible.
Tips and Variations:
- Cheese Variations: While Swiss cheese is a classic choice for turkey melts, feel free to experiment with other types of cheese. Gruyere, provolone, cheddar, and Monterey Jack are all great options.
- Bread Variations: Sourdough bread is my personal favorite for turkey melts, but you can use any type of bread you like. Rye bread, whole wheat bread, and even ciabatta rolls would all work well.
- Add Vegetables: For a healthier twist, add some fresh vegetables to your turkey melt. Lettuce, tomato slices, avocado slices, and sprouts are all great additions.
- Spice it Up: If you like a little heat, add a dash of hot sauce or a pinch of cayenne pepper to the mayonnaise-mustard spread. You can also use pepper jack cheese for an extra kick.
- Make it a Panini: If you have a panini press, you can use it to cook the turkey melts. This will give them a nice, even crust and help the cheese melt more quickly.
- Use Different Spreads: Instead of mayonnaise-mustard spread, try using pesto, hummus, or even a flavored cream cheese.
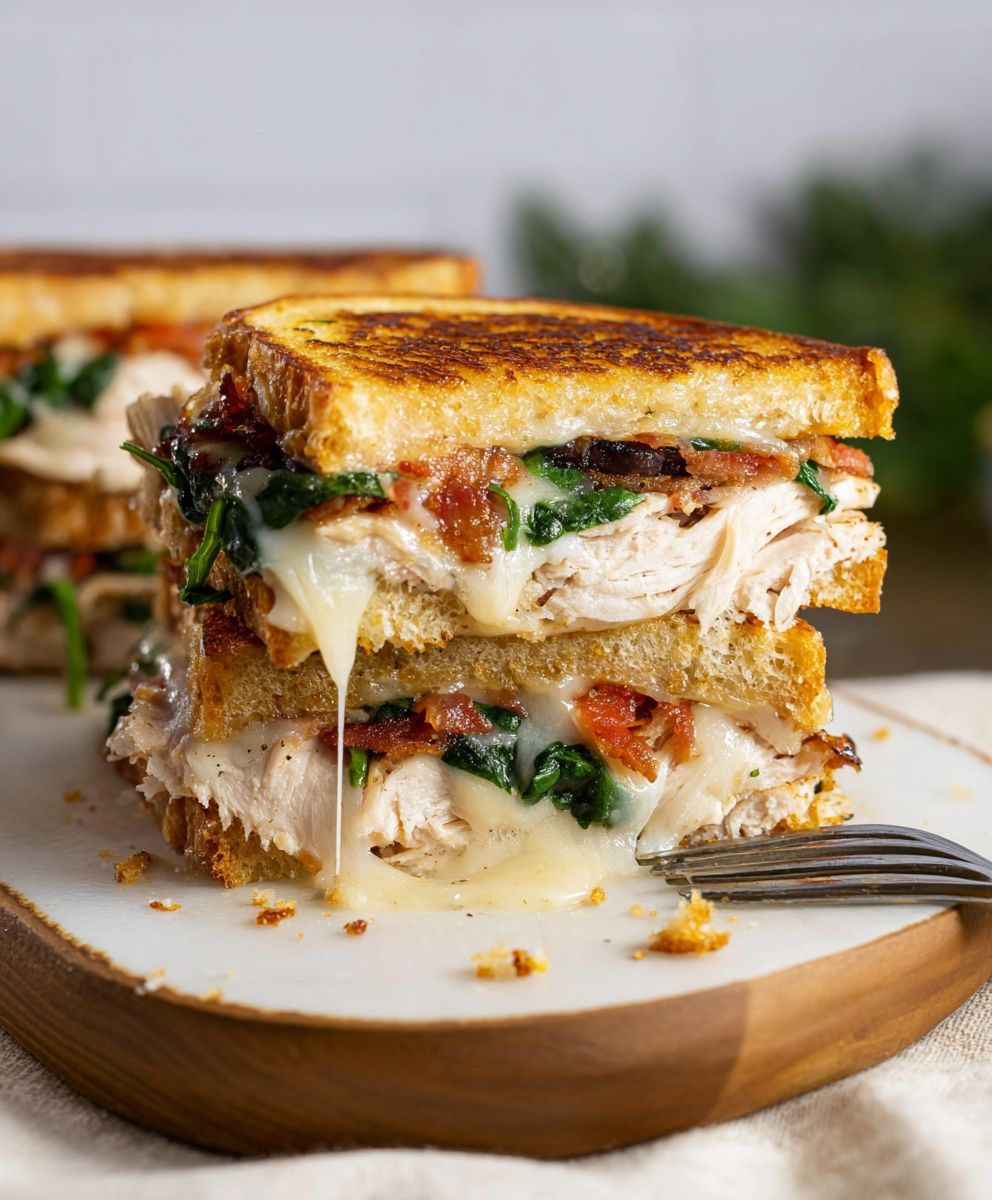
- Add Bacon: Everything’s better with bacon, right? Add a few slices of crispy bacon to your turkey melt for an extra layer of flavor.
- Make it Vegetarian: For a vegetarian version of this sandwich, substitute the turkey with grilled vegetables, such as zucchini, eggplant, and bell peppers.
- Make it Gluten-Free: Use gluten-free bread to make this sandwich gluten-free.
- Make it Ahead: You can assemble the sandwiches ahead of time and store them in the refrigerator until you’re ready to cook them. Just be sure to wrap them tightly to prevent the bread from drying out.
Storage Instructions:
If you have any leftover turkey melts, you can store them in the refrigerator for up to 2 days. To reheat them, simply warm them in a skillet or microwave until heated through. The bread may not be as crispy as it was when freshly made, but they’ll still be delicious.
Nutritional Information (approximate, per sandwich):
Calories: 600-800
Protein: 40-50g
Fat: 30-40g
Carbohydrates: 40-50g
Note: Nutritional information may vary depending on the specific ingredients used.
Conclusion:
This isn’t just another sandwich; it’s a Turkey Melt Sandwich experience! From the satisfying crunch of the toasted bread to the savory explosion of flavors from the turkey, cheese, and tangy additions, this recipe is a guaranteed crowd-pleaser. I truly believe this is a must-try because it elevates the humble sandwich to something truly special, perfect for a quick lunch, a comforting dinner, or even a sophisticated picnic. It’s simple enough for a weeknight meal but impressive enough to serve to guests.
But the best part? It’s incredibly versatile! Feel free to experiment with different types of bread. Sourdough adds a delightful tang, while rye brings a nutty depth. For cheese lovers, the possibilities are endless! Gruyere offers a sophisticated, nutty flavor, while provolone provides a mild and creamy melt. Havarti is another excellent choice for its smooth texture and buttery taste. If you’re feeling adventurous, try adding a slice of pepper jack for a spicy kick.
Beyond the bread and cheese, consider adding some extra layers of flavor. A smear of cranberry sauce adds a touch of sweetness and tartness that complements the turkey perfectly, especially around the holidays. Caramelized onions bring a savory sweetness that elevates the sandwich to gourmet status. And don’t underestimate the power of a good Dijon mustard! It adds a tangy bite that cuts through the richness of the cheese and turkey.
For serving suggestions, this Turkey Melt Sandwich pairs wonderfully with a simple side salad. A crisp green salad with a light vinaigrette provides a refreshing contrast to the richness of the sandwich. Alternatively, a bowl of creamy tomato soup is a classic pairing that’s perfect for a chilly day. If you’re looking for something a little more substantial, try serving it with some sweet potato fries or a side of coleslaw.
And if you’re looking to make it a complete meal, consider adding a side of homemade potato chips. They’re surprisingly easy to make and add a satisfying crunch to your meal. You can even experiment with different seasonings, such as paprika, garlic powder, or even a sprinkle of chili powder for a spicy kick.
Don’t be afraid to get creative and make this recipe your own! That’s the beauty of cooking – it’s all about experimenting and finding what you love. I encourage you to try this recipe and share your experience with me. What variations did you try? What were your favorite combinations of ingredients? Did you make any substitutions? I’m always eager to hear your feedback and learn from your culinary adventures.
So, go ahead, grab your ingredients, and get ready to create a Turkey Melt Sandwich that will become a new favorite. I promise you won’t be disappointed! And remember, the most important ingredient is love, so put your heart into it and enjoy the process. Happy cooking! I can’t wait to hear all about your creations. Let me know in the comments below!
Turkey Melt Sandwich: The Ultimate Guide to a Delicious Lunch
Sliced turkey, Swiss cheese, and creamy Dijon mustard grilled to golden perfection. Optional cranberry sauce and caramelized onions add a gourmet touch.
Ingredients
Instructions
Recipe Notes
- Cheese Variations: Gruyere, provolone, cheddar, and Monterey Jack are all great options.
- Bread Variations: Rye bread, whole wheat bread, and even ciabatta rolls would all work well.
- Add Vegetables: Lettuce, tomato slices, avocado slices, and sprouts are all great additions.
- Spice it Up: Add a dash of hot sauce or a pinch of cayenne pepper to the mayonnaise-mustard spread. You can also use pepper jack cheese for an extra kick.
- Make it a Panini: If you have a panini press, you can use it to cook the turkey melts.
- Use Different Spreads: Instead of mayonnaise-mustard spread, try using pesto, hummus, or even a flavored cream cheese.
- Add Bacon: Add a few slices of crispy bacon to your turkey melt for an extra layer of flavor.
- Make it Vegetarian: For a vegetarian version of this sandwich, substitute the turkey with grilled vegetables, such as zucchini, eggplant, and bell peppers.
- Make it Gluten-Free: Use gluten-free bread to make this sandwich gluten-free.
- Make it Ahead: You can assemble the sandwiches ahead of time and store them in the refrigerator until you’re ready to cook them. Just be sure to wrap them tightly to prevent the bread from drying out.
- Storage Instructions: Store leftover turkey melts in the refrigerator for up to 2 days. Reheat in a skillet or microwave.