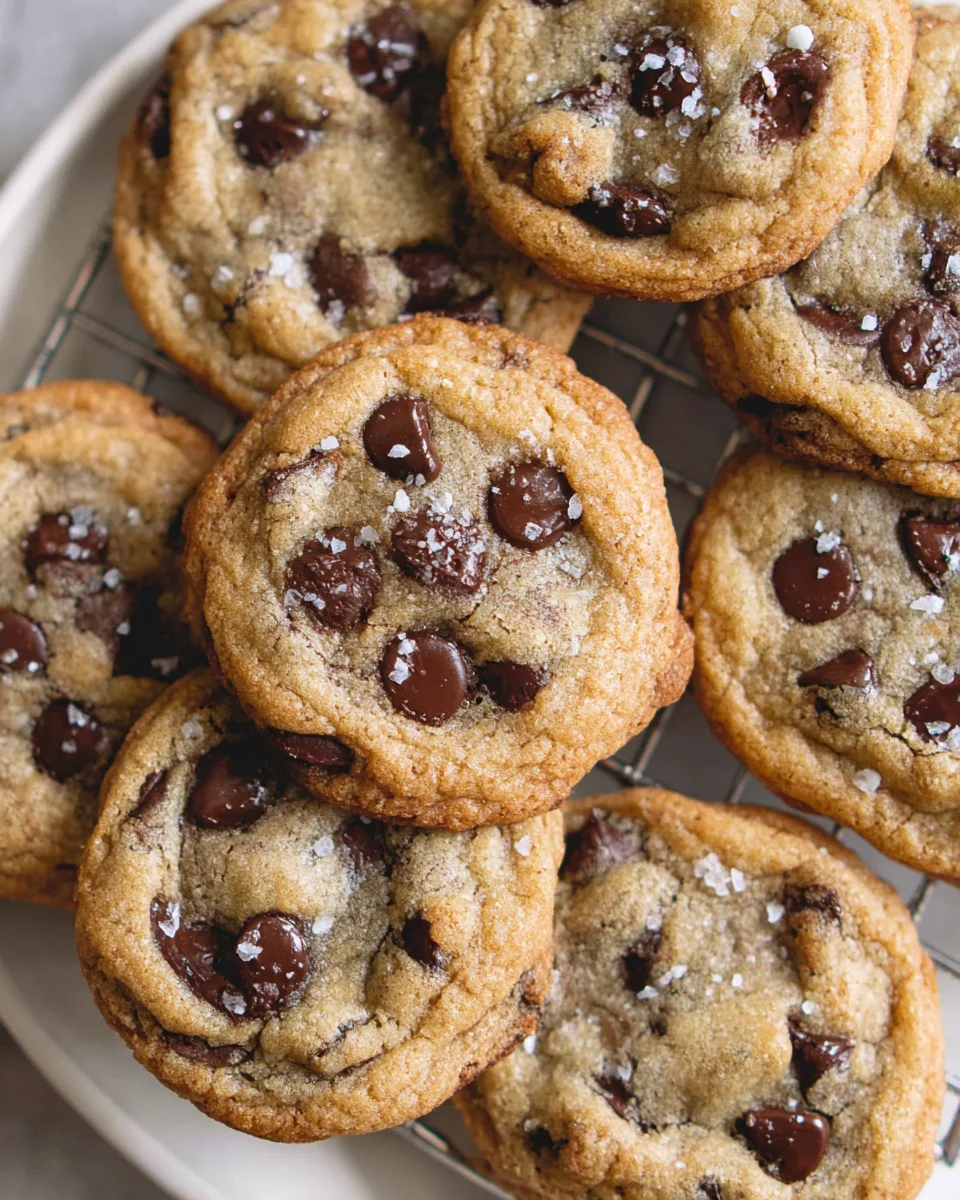
Crispy And Chewy Chocolate Chip Cookies – I believe this elusive texture combination is what we all truly crave when we dream of the perfect homemade treat. That moment when the edges shatter delicately, yet the center yields to a soft, melt-in-your-mouth delight, studded with rich chocolate. It’s not just a cookie; it’s an experience, a symphony of textures that elevates a simple snack into something truly extraordinary and utterly satisfying.
The humble chocolate chip cookie holds a storied place in culinary history, first created by Ruth Graves Wakefield at the Toll House Inn in Whitman, Massachusetts, back in the 1930s. What started as an innovative addition to her menu quickly became an American icon, a symbol of comfort, home, and simple joys enjoyed by generations. Its enduring appeal lies not only in its delicious versatility but also in the heartwarming nostalgia it evokes for so many of us, linking us to cherished childhood memories and family kitchens.
People worldwide adore these cookies for that magical contrast: the satisfying snap of the golden-brown crust giving way to a gooey, almost fudgy interior brimming with pockets of melted chocolate. It’s the ultimate comfort food, a delightful balance of sweetness and richness that satisfies every craving, making any moment a little sweeter. Whether enjoyed warm from the oven with a glass of milk or savored later with a cup of coffee, truly exceptional Crispy And Chewy Chocolate Chip Cookies are guaranteed to bring a smile to anyone’s face. Join me as we unlock the secrets to achieving this timeless baking masterpiece in your own kitchen.

Ingredients:
- 2 ½ cups (300g) All-Purpose Flour: I always make sure to measure this properly by spooning the flour into a measuring cup and then leveling it off with the back of a knife. This prevents over-measuring, which can lead to dry, dense cookies. It’s absolutely crucial for achieving that perfect balance of crispy edges and a wonderfully chewy center in your Crispy And Chewy Chocolate Chip Cookies.
- 1 teaspoon Baking Soda: This is our leavening agent. I always double-check the expiration date because old baking soda won’t give your cookies the lift they need.
- 1 teaspoon Fine Sea Salt: Salt isn’t just for seasoning; it balances the sweetness and enhances the flavor of the chocolate. I prefer fine sea salt for its even distribution.
- 1 cup (226g) Unsalted Butter: This is two sticks of butter, and it absolutely must be softened to room temperature. This is non-negotiable for proper creaming with the sugars. Softened butter incorporates air much better, leading to a lighter, more tender cookie. If it’s too cold, it won’t cream properly; if it’s melted, it will make your cookies greasy and flat.
- ¾ cup (150g) Granulated Sugar: This contributes to the spread and crispiness of the cookie edges.
- 1 ½ cups (300g) Light Brown Sugar: Packed firmly. The molasses in brown sugar is key to that signature chewy texture and adds a lovely depth of flavor. The higher ratio of brown sugar to white sugar is one of my go-to tricks for extra chewiness in my Crispy And Chewy Chocolate Chip Cookies.
- 2 Large Eggs: Also at room temperature. Just like the butter, room temperature eggs emulsify better with the fat and sugar, creating a smoother, more uniform dough. I often take them out of the fridge about 30 minutes to an hour before I plan to start baking.
- 2 teaspoons Pure Vanilla Extract: Please, use good quality vanilla! It makes a world of difference in the overall flavor profile. It’s truly the soul of a good chocolate chip cookie.
- 1 ½ cups (255g) Semi-Sweet Chocolate Chips: I love using a mix of different types and sizes of chocolate chips for a more complex chocolate experience. Semi-sweet is classic.
- ½ cup (85g) Milk Chocolate Chips (optional): For an extra touch of sweetness and creaminess.
- ½ cup (85g) Dark Chocolate Chunks or a chopped high-quality chocolate bar (optional): These melt beautifully and create those irresistible chocolate puddles throughout your cookies. This is my secret weapon for a truly gourmet Crispy And Chewy Chocolate Chip Cookie.
Preparing the Ultimate Cookie Dough
- Prepare Your Dry Ingredients: In a medium bowl, I start by whisking together the all-purpose flour, baking soda, and fine sea salt. Whisking ensures that the leavening agent and salt are evenly distributed throughout the flour, which is important for uniform baking and flavor. I set this bowl aside for now, ready for when our wet ingredients are perfectly combined. This step, while simple, is fundamental to the overall structure and taste of our Crispy And Chewy Chocolate Chip Cookies.
- Cream the Butter and Sugars: Now for the magic! In a large bowl, using an electric mixer (either a stand mixer with the paddle attachment or a hand mixer), I combine the softened unsalted butter with the granulated sugar and the firmly packed light brown sugar. I start on low speed to prevent a sugar cloud, then gradually increase to medium-high. I beat this mixture for a full 2 to 3 minutes, or until it becomes light, fluffy, and noticeably paler in color. This creaming process is absolutely vital. It incorporates air into the butter and sugar, which creates tiny pockets that expand in the oven, giving our cookies their soft, airy texture while maintaining those desirable crispy edges. Don’t rush this step; it’s a foundational element for truly amazing Crispy And Chewy Chocolate Chip Cookies.
- Incorporate the Eggs and Vanilla: Once the butter and sugars are perfectly creamed, I reduce the mixer speed to low. I add one large, room-temperature egg at a time, beating well after each addition until it is fully incorporated into the mixture. It’s important to scrape down the sides of the bowl after each egg to ensure everything is evenly mixed. After both eggs are in, I pour in the pure vanilla extract. Then, I increase the speed to medium and beat for another minute or so until the mixture looks smooth, light, and thoroughly combined. The room temperature eggs help maintain the emulsification we worked so hard to achieve with the butter and sugar, contributing to a wonderfully consistent dough.
- Combine Wet and Dry Ingredients: With the mixer on its lowest speed, I gradually add the dry ingredient mixture to the wet ingredients. I add about one-third of the flour mixture at a time, mixing only until just combined after each addition. The key here is not to overmix! Overmixing develops the gluten in the flour too much, which can result in tough, dense cookies. We want tender, chewy cookies, so I stop mixing as soon as no streaks of flour are visible. A slightly shaggy dough is perfectly fine at this stage.
- Fold in the Chocolate: This is the fun part! I remove the bowl from the mixer and, using a sturdy spatula, I gently fold in all the chocolate chips, milk chocolate chips, and dark chocolate chunks. I make sure to distribute them evenly throughout the dough. I like to fold them in by hand to avoid overworking the dough and to ensure the chocolate stays intact. You want generous pockets of chocolate in every bite of your Crispy And Chewy Chocolate Chip Cookies!
The Secret to Crispy Edges and Chewy Centers: Chilling and Shaping
-
Chill the Dough (The Golden Rule for Crispy And Chewy Chocolate Chip Cookies): This step is absolutely critical and non-negotiable for achieving the perfect Crispy And Chewy Chocolate Chip Cookies. Once the dough is ready, I cover the bowl tightly with plastic wrap and refrigerate it for at least 2 hours. However, for truly spectacular results, I often chill it for 24 to 72 hours. Chilling the dough does several wonderful things:
- Flavor Development: The flavors, especially from the vanilla and brown sugar, have time to meld and intensify, resulting in a more complex and delicious cookie.
- Texture Control: The butter solidifies, which prevents the cookies from spreading too much in the oven, helping them maintain a thicker, chewier center. It also allows the flour to fully hydrate, contributing to that signature chewy texture.
- Crispiness: The slower spread contributes to those beautifully golden, crispy edges we all love.
If I’m chilling for an extended period, I might even divide the dough into two portions before chilling to make it easier to work with later. Trust me on this: patience here is rewarded tenfold in the final texture of your Crispy And Chewy Chocolate Chip Cookies.
- Preheat Your Oven and Prepare Baking Sheets: About 20-30 minutes before I’m ready to bake, I preheat my oven to 375°F (190°C). It’s essential that the oven is fully preheated to the correct temperature, as this initial blast of heat helps set the edges quickly, contributing to their crispiness. I line two large baking sheets with parchment paper or silicone baking mats. Parchment paper is my preference as it prevents sticking and helps with even baking and easy cleanup. Avoid greasing the pans directly, as this can cause cookies to spread too much.
- Scoop the Cookie Dough: Once the dough is thoroughly chilled, I use a 2-tablespoon cookie scoop (or a medium ice cream scoop) to portion out the dough. Consistent scoop size is key for even baking. I roll each scoop into a neat ball with my hands. If the dough is very cold and hard, I let it sit out for 10-15 minutes to soften just enough to scoop without too much effort. I place the dough balls about 2 inches apart on the prepared baking sheets to allow for proper spreading. Crowding the cookies can lead to uneven baking and prevent air circulation, which can affect both crispiness and chewiness.
Baking Your Crispy And Chewy Chocolate Chip Cookies to Perfection
- Bake the Cookies: I place one baking sheet at a time into the preheated oven. I bake for 10 to 13 minutes. Baking time can vary depending on your oven, so it’s important to watch them closely. For Crispy And Chewy Chocolate Chip Cookies, I’m looking for cookies that have golden-brown edges, are slightly puffed, and still look a little pale and underbaked in the very center. Do not overbake! This is the absolute biggest mistake people make, leading to dry, hard cookies instead of that glorious crispy and chewy balance. The residual heat from the baking sheet will continue to cook them as they cool.
- Rotate for Even Baking (Optional but Recommended): If your oven has hot spots (and most do!), I recommend rotating the baking sheet halfway through the baking time (around the 5-6 minute mark). This ensures that all the cookies bake evenly and achieve that consistent golden-brown color on their edges.
- Cool on the Baking Sheet: Once the cookies are out of the oven, I let them cool on the hot baking sheet for 5 to 10 minutes. This is another crucial step for our Crispy And Chewy Chocolate Chip Cookies. During this time, the centers will continue to set and firm up without becoming overcooked. Trying to move them too soon will cause them to break apart because they are very delicate when hot. The parchment paper makes it easy to slide them off when they are ready.
- Transfer to a Wire Rack: After the initial cooling period on the baking sheet, I carefully transfer the cookies to a wire rack to cool completely. Air circulation all around the cookie helps them to cool evenly and prevents them from becoming soggy on the bottom. Allowing them to cool completely on the rack will ensure their edges become perfectly crispy while the centers remain wonderfully chewy.
Achieving the Perfect Texture and Storage Tips
- Checking for Doneness: How do I know when my Crispy And Chewy Chocolate Chip Cookies are just right? I look for that perfect balance: the edges should be beautifully golden brown and firm, indicating crispiness, while the very center should still look a little soft, perhaps even slightly underbaked. When I gently touch the center, it should feel soft but not raw. This slight underbaking is the secret to a gooey, chewy interior once they cool down. If they’re firm all the way through when they come out of the oven, they’re likely overbaked and will be less chewy.
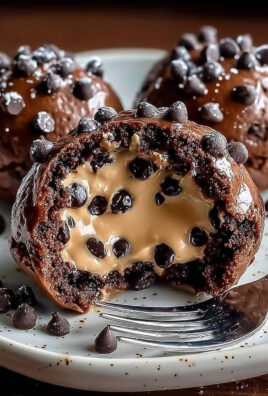
- The “Puddle” Factor: A sign of truly amazing Crispy And Chewy Chocolate Chip Cookies is those glorious pools of melted chocolate. If you used chocolate chunks or chopped chocolate bar, you might see them create beautiful, molten puddles on the surface of your cookies. If they seem too flat or if the chocolate hasn’t melted sufficiently, your oven might be too cool, or your dough wasn’t chilled enough. Conversely, if they spread too much and are very thin, your butter might have been too warm, or you might have overmixed the dough.
- Storage for Lasting Freshness: Once completely cooled, I store my Crispy And Chewy Chocolate Chip Cookies in an airtight container at room temperature for up to 5 days. To maintain their chewiness, I sometimes add half a slice of bread or a tortilla into the container – the cookies will absorb moisture from it, keeping them soft. If you want to keep them for longer, the unbaked cookie dough balls can be frozen for up to 3 months. Just arrange them on a baking sheet and freeze until solid, then transfer to a freezer-safe bag. When you’re ready to bake, you can bake them directly from frozen, adding a couple of extra minutes to the baking time.
-
Troubleshooting Common Issues:
- Cookies Spreading Too Much: If your cookies turn into flat discs, it’s often due to butter that was too warm (melted, not just softened), an oven that wasn’t fully preheated (or too cool), or dough that wasn’t chilled long enough. Make sure to use room temperature butter that is still solid, preheat your oven thoroughly, and always chill your dough!
- Cookies Too Cakey: This typically happens from overmixing the dough (developing too much gluten) or using too much flour. Ensure you spoon and level your flour and mix only until just combined.
- Cookies Too Hard: The culprit here is almost always overbaking. Remember to pull them out when the centers still look a little soft. They will continue to cook as they cool.
Following these steps and tips carefully will ensure you achieve the absolute best batch of Crispy And Chewy Chocolate Chip Cookies every single time! Enjoy every glorious bite!
Conclusion:
Well, my friends, we’ve reached the sweet finale of our baking journey, and I genuinely hope you’re as excited as I am about the prospect of these incredible treats. This isn’t just another cookie recipe; it’s a carefully crafted experience designed to deliver pure joy with every single bite. What makes these particular cookies a non-negotiable addition to your baking repertoire? It’s the unparalleled texture, that perfect dance between a golden-brown, satisfyingly crisp edge and a wonderfully soft, almost fudgy center. Imagine biting into that perfect balance – the initial crackle giving way to a rich, warm, melt-in-your-mouth interior studded with luscious pockets of chocolate. This is the hallmark of truly exceptional Crispy And Chewy Chocolate Chip Cookies, and I truly believe that once you taste them, you’ll understand why I’m so passionate about sharing this recipe. It consistently produces batches that disappear almost as quickly as they emerge from the oven, leaving behind only crumbs and contented sighs. The aroma alone, as they bake to perfection, is enough to warm any home and lift any spirit. Trust me, this recipe is a keeper, one that you’ll return to again and again because it simply delivers on its promise of cookie perfection.
But the magic doesn’t stop once these beauties are cooled. Oh no, the possibilities for enjoyment are endless! Of course, the classic pairing with a tall, cold glass of milk is always a winner, especially when the cookies are still slightly warm and gooey. They also make an absolutely divine accompaniment to your morning coffee or an afternoon cup of tea, elevating a simple break into a moment of pure indulgence. For a truly decadent dessert experience, try sandwiching a scoop of your favorite vanilla bean ice cream between two of them – hello, ultimate ice cream sandwich! A drizzle of warm chocolate sauce or a dollop of freshly whipped cream can transform them into an elegant dessert plate, perfect for entertaining a casual get-together or even a celebratory meal. You can even crumble them over yogurt or a fruit salad for a delightful textural contrast.
Creative Twists and Serving Suggestions:
- The Classic Refresh: Pair with an ice-cold glass of milk, ensuring that perfect balance of sweet and creamy.
- Morning Indulgence: A perfect companion to your freshly brewed coffee or a comforting cup of herbal tea.
- Dessert Dynamo: Sandwich a generous scoop of vanilla, chocolate, or even mint chip ice cream between two cookies for an unforgettable treat.
- Elevated Elegance: Serve warm with a dollop of freshly whipped cream and a sprinkle of cocoa powder or a drizzle of caramel sauce for a sophisticated presentation.
- Crunchy Garnish: Crumble cooled cookies over sundaes, puddings, or even overnight oats for added texture and flavor.
Now, if you’re feeling adventurous – and I always encourage a little culinary exploration – there are so many ways to personalize this recipe and make it truly your own. Think about adding a handful of chopped walnuts or pecans for an extra layer of texture and a nutty warmth. A sprinkle of flaky sea salt on top right after they come out of the oven can miraculously enhance the chocolate flavor, creating that irresistible sweet-and-salty contrast that so many of us adore. Don’t be afraid to mix up your chocolate types either; a combination of dark, milk, and even white chocolate chunks can create a complex flavor profile that will keep everyone guessing and wanting more. You could even fold in some toffee bits for a buttery crunch or a few dried cranberries for a touch of tartness and chewiness. For a subtle spice, a pinch of cinnamon or even a tiny whisper of cayenne pepper can add an unexpected depth that will truly surprise and delight your taste buds. The beauty of a great cookie base is its versatility, allowing you to tailor it to your cravings or whatever delightful additions you have in your pantry. Each variation, no matter how small, offers a new delightful experience waiting to be discovered.
So, I implore you, clear your schedule, preheat your oven, and gather your ingredients. Don’t just read about these cookies; go make them! There’s an immense satisfaction that comes from baking something delicious from scratch, especially when the result is so universally loved and brings smiles to faces. I promise you, the effort is minimal compared to the incredible reward of a warm, perfectly baked cookie in your hand. Share them with your loved ones, bring them to a potluck, or simply enjoy them all to yourself – no judgment here, we all deserve a treat! Most importantly, I’d absolutely love to hear about your experience. Did you add a secret ingredient? Did you discover a new favorite serving suggestion? Please, come back and share your baking triumphs, your creative variations, and your joyful moments in the comments. Your feedback truly makes my day and helps build our wonderful community of home bakers. Thank you for joining me on this delicious adventure; I can’t wait to see what you create!
Crispy & Chewy Chocolate Chip Cookies
Achieve the ultimate texture: cookies with delicate crispy edges and a soft, melt-in-your-mouth chewy center, studded with rich chocolate. This classic American treat is a symphony of textures, perfect for any occasion.
Ingredients
Instructions
Important Information
Nutrition Facts (Per Serving)
It is important to consider this information as approximate and not to use it as definitive health advice.
Allergy Information
Please check ingredients for potential allergens and consult a health professional if in doubt.