Witches Brew Hard Candy Swirls Recipe – the very name conjures images of bubbling cauldrons and mystical concoctions, yet the reality is a delightful and surprisingly approachable confection that brings a touch of magic to any occasion. I am absolutely thrilled to guide you through crafting these mesmerizing, vibrant candies, perfect for adding a spellbinding touch to your autumn gatherings or simply indulging your inner witch or wizard. Forget the toil and trouble; this recipe is pure joy and promises to be an enchanting experience from start to finish. Get ready to create something truly spectacular!
Historically, hard candies have graced celebrations for centuries, offering a long-lasting burst of flavor and visual appeal. The “Witches Brew” concept, of course, leans into the playful and mysterious spirit of Halloween and the broader autumn season, a time when culinary creativity often takes a fantastical turn. These swirls are not just a treat; they’re an experience, embodying the whimsy and wonder of the season in every glossy, colorful piece. Imagine the delight on your guests’ faces as they discover these shimmering treasures, each one a miniature masterpiece.
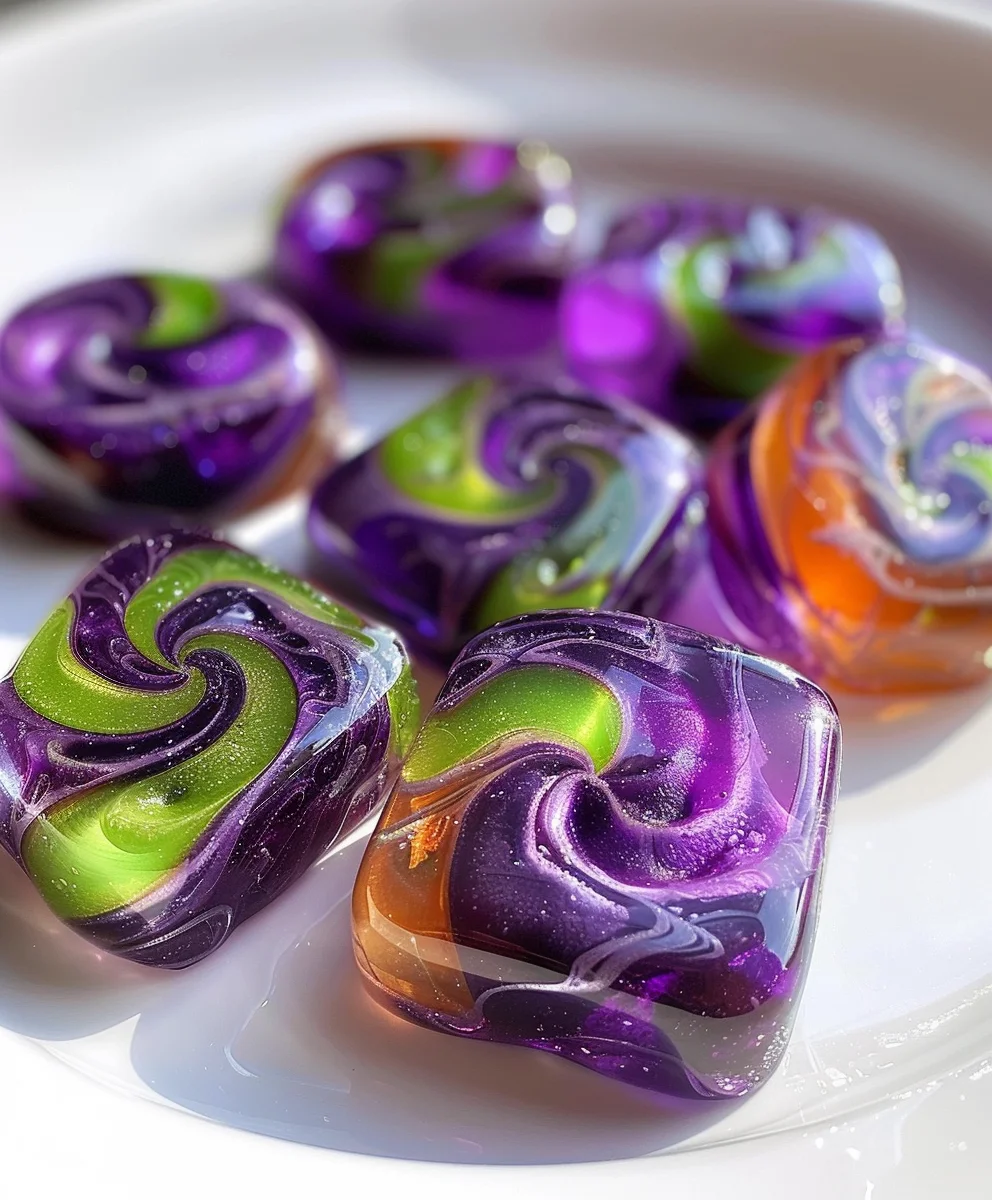
People absolutely adore this dish for myriad reasons. Firstly, the stunning visual appeal of the vibrant, interconnected swirls is simply irresistible, making each piece a miniature work of art that draws the eye. Beyond their beauty, the satisfying crunch and explosion of customizable flavors make them incredibly addictive and wonderfully versatile. They offer a nostalgic comfort while simultaneously feeling fresh and exciting, especially when presented as a unique party favor or a thoughtful, handmade gift. Crafting this Witches Brew Hard Candy Swirls Recipe is not only fun but also incredibly rewarding, allowing you to infuse your personality into every bewitching batch you create.

Ingredients:
- Granulated Sugar: 4 cups (approximately 800g). This is the primary base for our hard candy, providing structure and sweetness. When making hard candy, using good quality granulated sugar ensures a clear, crisp finish.
- Light Corn Syrup: 1 ½ cups (approximately 360ml). Essential for preventing crystallization and keeping our candy smooth and clear. Don’t substitute this with regular syrup or honey; light corn syrup is crucial for achieving the desired hard crack stage and maintaining clarity in hard candy. It interferes with sugar crystal formation, keeping your candy perfectly transparent.
- Filtered Water: 1 cup (240ml). Helps dissolve the sugar initially and ensures an even heat distribution during the cooking process. Using filtered water can sometimes prevent mineral deposits that could affect clarity.
- Candy Flavoring Oils:
- Blackcurrant or Grape Flavoring: ½ to 1 teaspoon (or to taste), highly concentrated oil. This will be for our deep purple “brew” color, offering a rich, fruity depth.
- Green Apple or Lime Flavoring: ½ to 1 teaspoon (or to taste), highly concentrated oil. This will be for our vibrant green “elixir” color, providing a tangy, zesty contrast.
- Note on Flavorings: Always use concentrated candy flavoring oils, not extracts. Extracts are alcohol-based, and the alcohol can evaporate too quickly, causing the candy to seize or become cloudy. Flavoring oils are designed for high-heat applications like candy making. Start with ½ teaspoon of each, and you can always add a tiny bit more if you taste a carefully cooled drop and desire a stronger flavor.
- Gel Food Colorings:
- Deep Purple Gel Food Coloring: A few drops, or as needed, to achieve a rich, mystical purple. Gel colors are preferred over liquid ones as they don’t add excess moisture to the candy syrup.
- Vibrant Green Gel Food Coloring: A few drops, or as needed, to achieve a bright, otherworldly green. Think neon green for maximum impact.
- Black Gel Food Coloring (optional): Just a tiny drop or two for some darker marbling effects, or to deepen the purple or green slightly, adding to the “witches brew” mystique.
- Edible Glitter (optional, but highly recommended for the “Witches Brew” effect):
- Silver or Iridescent Edible Glitter: ½ teaspoon or more, for a magical shimmer that catches the light beautifully. This adds an undeniable magical touch.
- Black Edible Glitter (optional): For an extra touch of dark magic and depth within the swirls.
- Powdered Sugar or Cornstarch: ¼ cup, for dusting the finished candies to prevent them from sticking together. This step is crucial for proper storage and presentation.
Equipment You’ll Definitely Need:
- Heavy-Bottomed Saucepan: A large one, at least 3-4 quart capacity, is ideal. A heavy bottom helps prevent scorching and ensures even heat distribution, which is vital for consistent candy making.
- Candy Thermometer: Absolutely crucial for accurate temperature readings. A digital thermometer with a clip that attaches to the side of the pan is highly recommended for precision. Without one, achieving the hard crack stage is incredibly difficult and often results in failure.
- Silicone Baking Mats (2-3 large ones): Non-negotiable for pouring and working with hot candy without it sticking. These are superior to parchment paper because they offer a truly non-stick surface and can withstand high temperatures without curling or tearing.
- Heat-Resistant Spatulas or Metal Spoons: Two or three are helpful – one for stirring the initial sugar mixture, and separate ones for mixing colors and flavors into the divided hot syrup.
- Heat-Resistant Gloves (multiple pairs are helpful): Essential for protecting your hands when handling and shaping the still-hot candy. I recommend wearing a pair of clean cotton gloves underneath a pair of food-grade, disposable nitrile gloves. The cotton provides insulation, and the nitrile gloves provide a non-stick, protective outer layer. You will be touching very hot candy, so personal safety is paramount.
- Small Heat-Safe Bowls or Pyrex Measuring Cups: At least two, and preferably three if you want distinct separate colors, for dividing and coloring the hot candy syrup. Glass or metal bowls are best as they can withstand high temperatures.
- Kitchen Scissors or a Buttered Knife: For cutting the candy ropes into individual pieces. Buttering the blade prevents sticking.
- Small Paintbrush (new, food-safe): For applying edible glitter to specific areas or for dusting.
- Baking Sheets: Two to three, for holding your silicone mats and then for cooling the finished candy pieces.
Phase 1: Gathering Your Tools and Prepping Your Station
Alright, my fellow candy alchemists, before we even think about turning on the stove, we need to set ourselves up for success. Hard candy making is a glorious dance between intense heat, precise sugar science, and rapid execution. Once the syrup reaches its target temperature, things move incredibly quickly! Trust me, a well-prepared workstation makes all the difference in preventing sticky situations, potential burns, and ensuring you get beautiful, perfectly swirled results for our “Witches Brew Hard Candy Swirls.” It’s all about “mise en place” – having everything in its place before you start.
- Line Your Baking Sheets with Silicone Mats: First things first, grab two large baking sheets. We’ll use these as stable bases for our silicone mats. Lay a large, clean, and completely dry silicone baking mat flat onto each baking sheet. If you only have one very large mat, you might need to pour and work with one color at a time, or use two smaller mats if you have them. Having these non-stick surfaces ready means we won’t be fumbling when the scalding hot candy is ready to be poured and worked. They are your primary workspace for shaping.
- Prepare Your Candy Thermometer: Attach your candy thermometer securely to the side of your heavy-bottomed saucepan. Make sure the tip of the thermometer doesn’t touch the bottom of the pan itself, but is submerged enough to accurately measure the liquid’s temperature as it cooks. This is our non-negotiable guiding light through the entire cooking process, ensuring we hit that critical “hard crack” stage precisely.
- Organize Flavorings and Colorings: Open up the bottles or jars of your chosen candy flavoring oils and gel food colorings. Have them standing by, uncapped or with easily removable lids, right next to your stovetop. You’ll want to add these quickly and without delay once the candy is off the heat. Also, get your edible glitter ready if you’re using it – perhaps open the jar or have a small, clean, food-safe paintbrush at hand for application.
- Set Up Dividing Bowls: Place your two (or three, if you plan on three distinct colors) small, heat-safe bowls or Pyrex measuring cups within easy reach of your stovetop. These will be used to quickly divide the hot sugar syrup for separate coloring and flavoring. Ensure they are clean and dry.
- Gloves, Glorious Gloves!: This is a critically important step for both safety and practical candy working. Have at least one, and ideally two, pairs of heat-resistant gloves ready. I highly recommend wearing thin cotton gloves underneath disposable nitrile gloves. The cotton provides a layer of insulation from the intense heat, and the nitrile prevents the sticky candy from adhering directly to the cotton. You will be touching very hot candy, so this is not an optional step; it’s absolutely essential for preventing severe burns.
- Dusting Station Ready: In a small, shallow bowl, measure out your ¼ cup of powdered sugar or cornstarch. This will be used to dust our finished candies later to prevent them from sticking together. Position it conveniently for the final stage.
- Clear Your Workspace: Before you begin, ensure your countertops are completely clear of any clutter, towels, or anything flammable. You’ll need ample, clean, and cool space to work the candy once it’s poured onto the silicone mats, especially for the intricate swirling and cutting process. A clean, uncluttered, and cool surface is your best friend when making hard candy.
Why This Prep is So Important:
Hard candy making is a sprint, not a marathon! Once the sugar syrup hits the hard crack stage (that critical 300-310°F), it begins to cool and harden rapidly. Any delay in adding flavor, color, pouring, or shaping can lead to a less pliable, harder-to-work-with candy, or even a batch that hardens completely before you can even begin to swirl it. So, a thorough mise en place isn’t just a fancy chef term; it’s the absolute backbone of successful hard candy making, especially for intricate, beautiful creations like our “Witches Brew Hard Candy Swirls.” It allows you to move with confidence and precision when the heat is on!
Phase 2: Crafting the Candy Base – The “Brew” Itself
Now that our magical workstation is sparkling, organized, and ready for action, it’s time to create the foundation of our Witches Brew Hard Candy Swirls. This sugar syrup base is where all the enchanting magic begins, and getting it precisely right is crucial for clear, delicious, and perfectly textured hard candy. Don’t rush this stage; patience and attention to detail here will yield the most enchanting and satisfying results.
- Combine the Liquids and Sugar: In your chosen heavy-bottomed saucepan, carefully pour in the 4 cups of granulated sugar, followed by 1 ½ cups of light corn syrup, and then 1 cup of filtered water. Give this mixture a gentle, thorough stir with a clean, heat-resistant spatula or metal spoon. The primary goal here is to moisten all the sugar granules and ensure they are fully incorporated with the liquids. Don’t worry about dissolving every single granule just yet; the heat will take care of that.
- Gentle Heat to Dissolve Sugar: Place your saucepan over medium heat. Continue stirring gently and consistently. As the mixture warms, you’ll feel the sugar crystals dissolving. Keep stirring until all the sugar crystals have completely disappeared. You’ll be able to tell because the mixture will go from cloudy and grainy to perfectly clear and shimmering, much like liquid glass. This step is extremely important to prevent unwanted crystallization later on. If there are any undissolved sugar crystals clinging to the sides of the pan above the liquid line, they can act as “seed crystals” and cause your entire batch of candy to become grainy, cloudy, and crumbly instead of smooth and clear. If you spot any, use a clean, damp pastry brush to gently wash them down into the syrup.
- Bring to a Boil (and Stop Stirring!): Once the sugar is fully dissolved and the syrup is absolutely clear, you can increase the heat slightly to medium-high. Now, here comes a critical instruction: stop stirring immediately! Seriously, put that spatula down and step away from the pan. From this point forward, we want to avoid introducing any more air or disturbing the sugar molecules, which could strongly encourage premature crystallization. Allow the mixture to come to a rolling, vigorous boil without any further agitation.
- Monitor the Temperature with Precision: Keep a very close eye on your candy thermometer. This is the most crucial part of the cooking phase. We are aiming for the “hard crack” stage, which is precisely 300°F (149°C) to 310°F (154°C). For a really crisp, satisfyingly snappy hard candy, I usually aim for the sweet spot of around 305°F. The temperature will rise slowly at first, but then it will pick up speed, often quite dramatically, as more and more water evaporates from the syrup.
- Observe the Syrup’s Transformation: As the syrup continues to boil and the temperature climbs, you’ll notice several visual changes. The bubbles will become smaller, tighter, and more vigorous. The syrup will visibly thicken, and it will transition from being perfectly clear to a very pale yellow, then gradually to a light, delicate amber color as it approaches the higher temperatures. This subtle color change is a good indicator of its progress. Do not, under any circumstances, leave the pot unattended, especially once the thermometer passes 260°F, as the temperature can shoot up very quickly in the final stages, leading to burnt candy in a matter of seconds.
- The Critical Moment – Reaching Hard Crack: Once your thermometer confidently and steadily reads anywhere between 300°F and 310°F, immediately and carefully remove the saucepan from the heat source. Timing is absolutely everything here. If you remove it too early, your candy will be soft and sticky, more like taffy than hard candy. If you go too high above 310°F, it will scorch, tasting bitter and burnt, and will be difficult to work with. A perfect hard crack stage gives us that delightful, satisfying snap and crystalline texture we’re after for our Witches Brew Hard Candy Swirls.
A Note on Safety When Handling Boiling Sugar:
Working with boiling sugar syrup is akin to working with molten glass. It reaches extremely high temperatures and can cause severe, deep, and painful burns if it comes into contact with your skin. Always exercise extreme caution throughout this entire process. Keep young children and curious pets completely out of the kitchen during candy making. Do not touch the hot syrup with bare hands, ever, nor attempt to taste it directly from the pot or while it’s still hot. We’ll have a safe opportunity to taste-test later with a tiny, cooled drop of the flavored candy.
Phase 3: Infusing the Magic – Flavoring and Coloring
With our perfectly cooked candy base now sitting hot and ready, it’s time to breathe life and enchantment into our Witches Brew Hard Candy Swirls by infusing them with captivating flavors and spellbinding colors. This is where the visual appeal and deliciousness truly come together, transforming clear sugar syrup into a mystical confection. Remember, we’re still working with very hot sugar, so swift and decisive action, coupled with careful movements, is absolutely key.
- Prepare for Syrup Division: As soon as you remove the saucepan of perfectly cooked sugar syrup from the heat, gently, but without hesitation, bring your heat-safe bowls or Pyrex measuring cups closer to the pot. We need to divide the hot syrup efficiently and before it begins to cool and thicken too much.
- Divide the Hot Syrup: Carefully pour approximately half of the hot sugar syrup into one heat-safe bowl, and the remaining half into the second heat-safe bowl. If you’re feeling extra ambitious and going for a third color, divide it into approximate thirds among three bowls. For simplicity and impactful contrast in our swirls, I generally find that two main colors work best, so let’s focus on two for this recipe.
- First Color and Flavor – The Deep Purple Brew:
- To the first bowl containing half of your hot syrup, carefully add 6-8 drops of your deep purple gel food coloring. Start with fewer drops if you prefer a lighter shade, and add more if you want a truly intense, dark, mystical hue. Remember, gel colors are highly concentrated.
- Immediately follow with ½ to 1 teaspoon of your chosen blackcurrant or grape candy flavoring oil. Again, these oils are potent, so starting with the smaller amount is always a good practice.
- Using a clean, heat-resistant spatula or metal spoon dedicated to this color, stir the color and flavor into the syrup. Do this very gently but thoroughly until the color is completely uniform and vibrant. Try to avoid introducing too many air bubbles during stirring, but ensure the color is evenly distributed throughout the syrup. You’ll instantly see the clear syrup transform into a beautiful, alluring, mystical purple, reminiscent of a bubbling brew.
- Second Color and Flavor – The Vibrant Green Elixir:
- To the second bowl, repeat the precise process. Add 6-8 drops of your vibrant green gel food coloring. Adjust the number of drops to achieve your desired intensity – think electric, otherworldly green to perfectly contrast the purple.
- Immediately add ½ to 1 teaspoon of your green apple or lime candy flavoring oil. The fresh, tangy aroma will quickly fill the air!
- Stir gently but thoroughly with a separate, clean heat-resistant spatula or spoon until the green color is completely uniform and brilliantly vibrant. This green should pop beautifully against the deep purple, truly giving us that iconic “witches brew” look.
- Consider Edible Glitter (Optional, but Highly Recommended): If you’re incorporating edible glitter for that extra magical shimmer, this is the perfect moment to add it. While the candy is still liquid and quite hot, sprinkle about ¼ teaspoon of silver or iridescent edible glitter into each colored batch. Gently stir it in. The residual heat of the candy will help the glitter suspend evenly throughout and create a truly magical, shimmering effect that will twinkle in your finished candies. You can also add a tiny pinch of black edible glitter to the purple for a darker, more mysterious twinkle, enhancing the “brew” feel.
- Work Swiftly and Decisively: At this stage, the candy is continuously cooling and beginning to thicken, so you need to work with purpose and without hesitation. Don’t linger too long over stirring or admiring the colors. Once the flavor and color are thoroughly incorporated into each batch, it’s time to move immediately to the next phase – getting the candy onto the mats for shaping.
Why Speed is Your Indispensable Friend at This Stage:
As the candy cools, it thickens rapidly, becoming increasingly viscous and difficult to work with. The longer you take to add flavors and colors, the harder it will be to stir them in evenly without creating streaks or uneven distribution. More importantly, the quicker you get the candy onto the silicone mats, the more precious working time you’ll have for stretching, pulling, shaping, and swirling, which is arguably the most fun and creative part of making our Witches Brew Hard Candy Swirls! Every second counts in maintaining pliability.
Phase 4: The Swirling Spell – Shaping Your Witches Brew Candies
This is where the true artistry and enchanting visual appeal of our Witches Brew Hard Candy Swirls come to life! Working with hot, pliable candy requires a combination of speed, confidence, and, most importantly, those wonderful heat-resistant gloves. Don’t be intimidated by the process; it’s an incredibly satisfying and tactile experience that results in unique, beautiful candies every single time. Remember, the candy will be quite hot to the touch, even through several layers of gloves, so always be mindful of safety and your comfort level.
- Pour onto Silicone Mats: Carefully and deliberately pour each colored candy syrup onto separate sections of your prepared silicone mats. You can pour one color onto one mat and the other color onto another mat, or, if your mat is large enough, strategically pour them side-by-side on a single large mat, leaving a little space between them. The syrup will naturally spread out into a thin pool. Allow it to cool for just a minute or two – this crucial brief cooling period lets it thicken slightly so it’s still very warm and pliable but not so liquid that it runs uncontrollably when you touch it. It should start to firm up noticeably around the edges.
- Don Your Heat-Resistant Gloves: Now is the absolute moment to put on your heat-resistant gloves. Ensure they are secure and comfortable on your hands. As a reminder, the candy will be intensely hot, even through multiple glove layers, so do not even think about skipping this step! Your hands are your most important tools here, so protect them.
- Work the Candy (Initial Pulling and Folding): Using your gloved hands, begin to gently gather and fold one of the colored candy masses in on itself. As you fold, stretch, and pull, you’ll notice the candy becoming more opaque and developing a lovely, silky sheen. This pulling action introduces tiny air bubbles into the candy, which makes it less brittle and can give it a slightly chewier, more desirable hard candy texture. Do this for each color separately for a minute or two, just until each mass is more manageable and less like a liquid blob. It should be firm enough to hold its shape somewhat but still very pliable, much like thick, warm taffy. This process helps equalize the temperature and makes it easier to combine.
- Combine the Colors for the Swirl:
- Take one of your now-pliable colored candy masses (let’s say the deep purple) and stretch it into a long, thick rope or a flat strip, about 1-2 inches wide.
- Do the exact same with your other beautifully colored candy mass (the vibrant green).
- Now, carefully lay the two colored ropes or strips side-by-side, pressing them gently together so they adhere. You can also carefully twist them around each other, or even layer one on top of the other to create different swirl effects. The goal is to get them to merge into a single, multi-colored mass.
- Twist and Swirl the Magic:
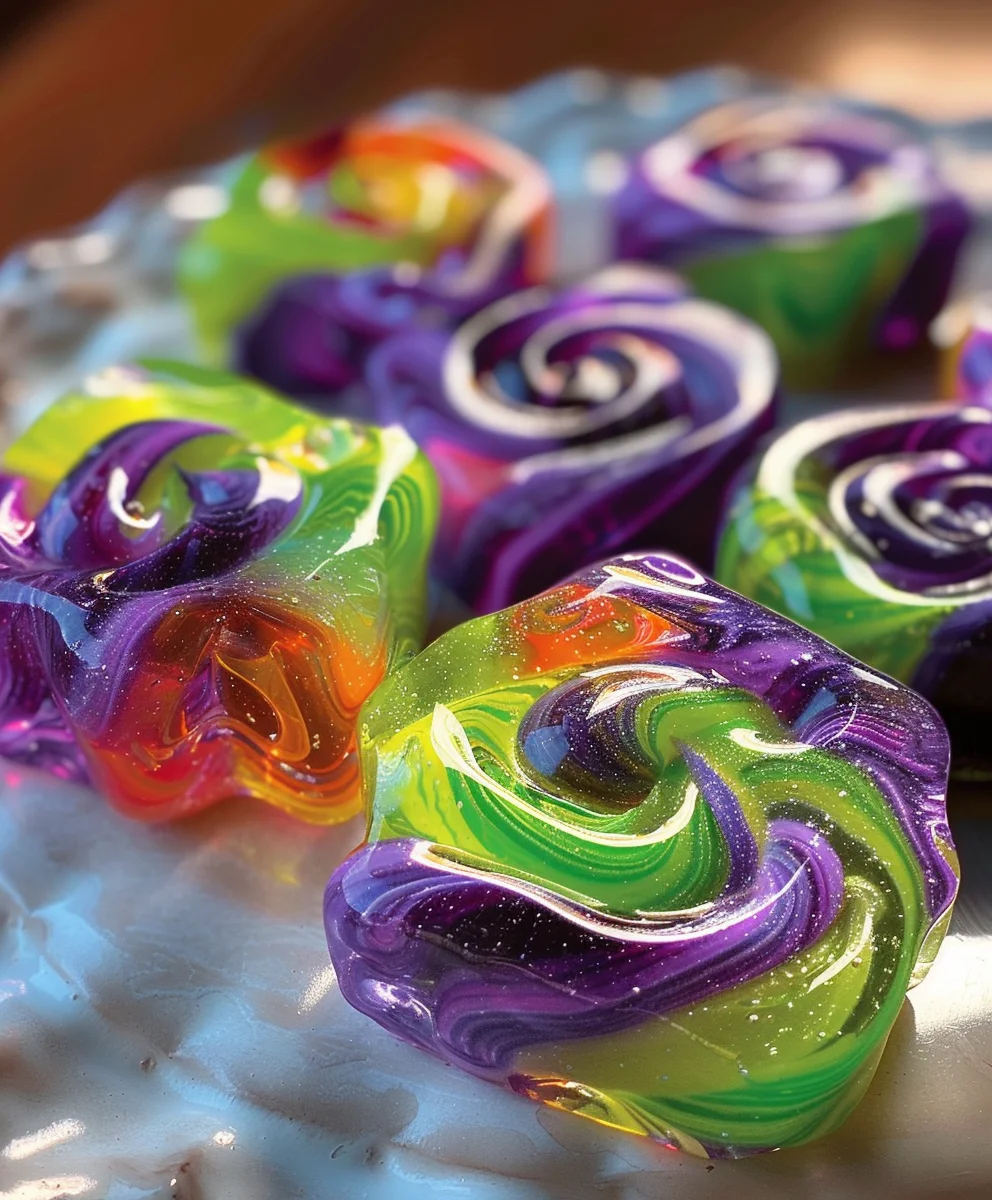
- Once the colors are combined, gently but firmly begin to twist the entire multi-colored candy mass. As you twist and gently stretch, the two distinct colors will begin to marble, intertwine, and swirl together, creating that mesmerizing “Witches Brew” effect. This is your prime chance to be truly creative! Think about how you want the colors to intertwine – tight spirals, broad strokes, or subtle marbling. For dramatic, large swirls, don’t overmix; just a few good, deliberate twists will achieve that bold look.
- If you desire smaller, more intricate, and numerous swirls, continue to stretch the combined candy, fold it back on itself, and twist it multiple times. Each fold and twist will create more layers of color and increase the complexity of the pattern.
- If, at any point, a section of the candy becomes too stiff or hard to work with, you can carefully place it back on the silicone mat for a few seconds to absorb some residual warmth from the mat. Alternatively, if your oven has been used for other cooking and is still barely warm (turned off, with the door ajar), you can briefly hold the candy near the opening to regain a little pliability – but be extremely careful not to melt it too much, or it will lose its structure.
- Roll into Ropes: Once you’re completely satisfied with your swirls and the candy is well-mixed but still warm and pliable, begin to roll the entire candy mass into long, even ropes. Aim for a thickness of about ½ to ¾ inch. Try your best to maintain a consistent thickness along the entire length so that all your individual candies are roughly the same size and cool at a similar rate. If you want thinner, more delicate swirls, you can make the ropes thinner, but remember they will cool and harden faster.
- Add Final Glitter Touches (Optional): If you desire an extra sparkly outer layer that wasn’t incorporated earlier, now is an excellent time. Lightly sprinkle some additional edible glitter (silver, iridescent, or black) along the entire length of your candy ropes before cutting. Gently roll the ropes to ensure the glitter adheres beautifully to the surface, adding an extra layer of magic.
- Cut into Individual Candies: While the candy ropes are still wonderfully warm and pliable (but no longer hot enough to stick badly to everything), use your buttered kitchen scissors or a buttered knife to cut the ropes into individual, bite-sized pieces, about ¾ inch to 1 inch long. You’ll feel a slight, satisfying resistance as you cut, but they should separate cleanly. Work quickly and efficiently, as the candy continues to cool and harden with every passing second. Place the cut pieces directly onto a clean silicone mat or parchment paper.
Tips for Success in this Dynamic Phase:
Speed and Confidence are Your Allies: This is the most hands-on, interactive part of the process, and you need to be quick and decisive. The candy is cooling all the time, losing pliability. Don’t be afraid to handle it, but always, always with your protective gloves on.
Maintain Pliability: If a section of candy gets too cool and hard to work with, it’s genuinely difficult to reheat it uniformly without scorching or losing its pristine clarity. Try to work consistently and methodically to keep the entire mass pliable throughout the shaping stage.
Practice Makes Perfect: Your first few pieces of Witches Brew Hard Candy Swirls might not be absolutely perfect, and that’s entirely normal and perfectly fine! Candy making, especially hard candy, is a skill that improves with practice. The more you make it, the more intuitive the feel for the right consistency and working temperature becomes. Remember, every single “Witches Brew Hard Candy Swirls” will have its own unique, enchanting pattern, making each one special.
Phase 5: The Grand Finale – Cooling and Finishing Touches
Congratulations, you’ve performed the swirling spell and meticulously crafted a batch of truly mesmerizing Witches Brew Hard Candy Swirls! Now, all that’s left is to let them cool completely and apply those essential finishing touches to ensure they are perfectly preserved and presented for enjoying, sharing, or even gifting. This final stage is less about active manipulation and more about patience, proper cooling, and careful presentation.
- Allow Complete Cooling: Once all your individual candy pieces are cut and laid out, spread them out in a single layer on a fresh, clean silicone mat or a large piece of parchment paper. Ensure they are not touching each other too much, as they are still slightly warm and could potentially stick. Let them cool completely at room temperature for at least 30-60 minutes, or even longer depending on the ambient temperature and humidity levels in your kitchen. Resist the overwhelming urge to touch or handle them too much while they’re cooling, as they will be quite fragile and prone to stickiness. The candies should be completely hard, firm, and make a clear, satisfying “clink” sound when gently tapped against each other, indicating they are fully set.
- Dust to Prevent Sticking: Once the candies are fully cooled and hardened to perfection, it’s time for the crucial step of preventing them from sticking together. This is where your powdered sugar or cornstarch comes in. In a clean, dry bowl with a lid (or a large resealable plastic bag), add your ¼ cup of powdered sugar or cornstarch.
- The “Shake and Coat” Method: Gently add a handful or two of your completely cooled Witches Brew Hard Candy Swirls to the bowl with the powdered sugar/cornstarch. Put the lid securely on the bowl (or seal the bag tightly) and gently, but vigorously, shake it. Toss the candies around to coat them thoroughly and evenly with the fine powder. This process creates a thin, protective barrier around each candy, which is absolutely essential for preventing them from fusing together during storage, especially in humid conditions.
- Shake Off Excess Powder: After coating, you can gently shake off any excess powder. This can be done by briefly placing the candies in a small-mesh sieve or colander and giving it a gentle shake, or simply by gently tapping them against the side of the bowl. You want a light, even dusting that is barely visible, not a thick, cakey layer that detracts from their beauty.
- Inspect Your Masterpieces: Take a well-deserved moment to admire your beautifully crafted, shimmering Witches Brew Hard Candy Swirls! Each one will be delightfully unique, a testament to your newfound candy-making prowess. Take pride in those vibrant colors and mystical swirls – they truly are enchanting.
- Storage for Longevity: To maintain their crisp texture and prevent stickiness, always store your finished hard candies in an airtight container at room temperature. It’s incredibly important to keep them away from direct sunlight and any sources of humidity, as both can cause the candy to become tacky, sticky, or even melt over time. When stored properly in a cool, dry place, these magical candies can last for several weeks, if not months, allowing you to enjoy their enchantment over an extended period. For extra protection against sticking, especially if your kitchen is prone to humidity, you can even layer them between sheets of wax paper or parchment paper inside the container.
Enjoying Your Witches Brew Hard Candy Swirls:
These incredibly unique and visually stunning hard candies are absolutely perfect for Halloween parties, as delightful spooky treats, or simply to enjoy whenever you crave a little bit of magic and a sweet, fruity burst. The tantalizing combination of vibrant fruity flavors with the enchanting visual swirls makes them a delight for both the eyes and the taste buds. Share them with your friends and family to spread the enchantment, or keep them all to yourself – you’ve certainly earned it after crafting such a spectacular batch of “Witches Brew Hard Candy Swirls”!
Conclusion:
As we wrap up our sweet journey, I sincerely hope you’re feeling inspired and excited to dive into the enchanting world of homemade hard candy. This isn’t just any treat; it’s an experience, a delightful fusion of culinary art and whimsical charm that truly stands out. What makes this particular creation, the Witches Brew Hard Candy Swirls, an absolute must-try isn’t just its eye-catching appearance, though those vibrant, mesmerizing swirls are certainly a huge part of its allure. It’s the unique blend of flavors you can experiment with, creating a truly personalized taste sensation that will surprise and delight anyone who tries it. From the moment you begin to mix the ingredients to the final, satisfying snap of a perfectly cooled piece, you’ll feel a sense of accomplishment and creative joy that few other recipes can provide. It’s a fantastic project for a cozy afternoon, a delightful way to explore your inner candymaker, and an even better way to produce something truly magical for your friends and family.
The beauty of this recipe also lies in its incredible versatility. While these candies are utterly fantastic simply enjoyed on their own, dissolving slowly on the tongue to release their mysterious flavors, their potential extends far beyond the candy dish. Imagine crushing a few of these iridescent shards and sprinkling them over a scoop of vanilla bean ice cream, adding both a burst of color and a delightful crunch. They make extraordinary toppers for cupcakes, transforming a simple baked good into a miniature masterpiece. Consider using them as edible garnishes for festive cocktails or mocktails, their swirling patterns adding a touch of sophisticated whimsy to any drink. For a truly thoughtful gift, arrange a handful of these beautiful candies in small cellophane bags, tie them with a ribbon, and you have a handmade present that speaks volumes about your care and creativity. Don’t be afraid to experiment with your own twists! Perhaps a different combination of food colorings to achieve an even more eerie or ethereal effect, or a dash of edible glitter mixed in just before pouring for an extra sparkle. You could even play with different flavor extracts – imagine a spicy cinnamon swirl meeting a tart green apple, or a mystical elderflower mingling with a hint of dark cherry. The possibilities are as limitless as your imagination, allowing you to personalize every batch to suit any occasion or preference.
I genuinely encourage you, with all my heart, to set aside some time and embark on the adventure of making this Witches Brew Hard Candy Swirls Recipe. It’s more than just following steps; it’s about embracing the process, enjoying the aroma of sugar transforming, and witnessing the captivating magic as the colors intertwine to form those spectacular swirls. Don’t worry if your first attempt isn’t absolutely perfect; candy making is a skill that develops with practice, and every batch, no matter how “imperfect,” will still be wonderfully delicious and uniquely yours. The true reward is in the experience, the pride of creating something so beautiful and tasty from scratch, right in your own kitchen. Once you’ve successfully brewed up your own batch of these enchanting confections, I would absolutely love to hear about your journey! Please don’t hesitate to share your experiences, your creative variations, and especially your stunning photos. Tag us on social media (if you’re sharing there!) or simply drop a comment below. Your stories and images not only bring a smile to my face but also inspire countless other aspiring candymakers in our community to try their hand at this delightfully spooky and undeniably delicious treat. So go forth, embrace the magic, and let your inner sorcerer of sweets shine!
Witches Brew Hard Candy Swirls: Spooky & Sweet Treat Recipe
Craft mesmerizing, vibrant Witches Brew Hard Candy Swirls, perfect for adding a spellbinding touch to autumn gatherings or simply indulging your inner witch or wizard. This recipe guides you through creating these unique, visually stunning hard candies, embodying the whimsy and wonder of the season in every glossy, colorful piece.
Ingredients
-
2 cups granulated sugar
-
2/3 cup light corn syrup
-
1/2 cup water
-
1/4 tsp cream of tartar
-
Food coloring (green, purple, or your choice)
-
1 tsp non-alcohol candy flavoring oil (optional)
-
Edible glitter (silver, iridescent, or black, optional for shimmer)
-
1/4 cup powdered sugar or cornstarch (for dusting)
Instructions
-
Step 1
Line 2-3 baking sheets with silicone mats. Secure a candy thermometer to a heavy-bottomed saucepan. Gather flavoring oils, gel food colorings, small heat-safe bowls, and heat-resistant gloves. Prepare 1/4 cup of powdered sugar/cornstarch for dusting. -
Step 2
Combine granulated sugar, light corn syrup, water, and cream of tartar in the saucepan. Stir over medium heat until sugar dissolves and mixture is clear. Stop stirring, increase heat to medium-high, and boil until mixture reaches the hard crack stage (300-310°F or 149-154°C). Immediately remove from heat. -
Step 3
Swiftly divide the hot syrup into 2-3 heat-safe bowls. To each bowl, add desired gel food coloring and non-alcohol candy flavoring oil. Stir gently until colors are uniform. Optionally, stir in edible glitter for extra shimmer. Work quickly as candy cools and thickens. -
Step 4
Carefully pour each colored syrup onto separate sections of silicone mats. Once slightly cooled but still pliable, don heat-resistant gloves. Gather and pull each candy mass until opaque and silky. Combine the colored masses, then twist and stretch to create desired swirl patterns. Roll the candy into long ropes (½-¾ inch thick). Optionally, sprinkle with more edible glitter for an outer sparkle. Cut ropes into ¾-1 inch individual pieces using buttered kitchen scissors or a buttered knife. -
Step 5
Spread cut candies on a clean silicone mat or parchment paper to cool completely at room temperature until fully hardened (30-60 minutes). Once hard, transfer candies to a bowl with powdered sugar/cornstarch. Shake gently to coat, then shake off excess powder. Store in an airtight container at room temperature, away from humidity, for up to several weeks.
Important Information
Nutrition Facts (Per Serving)
It is important to consider this information as approximate and not to use it as definitive health advice.
Allergy Information
Please check ingredients for potential allergens and consult a health professional if in doubt.